22
C
HAPTER
2: I
NSTALLING
T
HE
S
WITCH
8800
■
AUX cable
■
Power cord and chassis ground wire
■
Interface cables for the selected interface modules
■
Equipment
■
The switch
■
Ethernet 100BASE-T Hub or LAN switch
■
Channel service unit/data service unit (CSU/DSU) or other data
communications equipment (DCE) equipment (such as a modem)
■
Configuration terminal, such as a PC
■
Additional equipment for the selected interface modules
Installing the Chassis
You can install the Switch 8800 in a standard, 19-inch rack or on a workbench.
Installing in a Standard
Rack
When you are ready to install the Switch 8800 in the rack:
1
Carry the switch to the front of the rack. At least two people are required to move
the switch.
2
Put the switch on the tray or the guides and push it into the rack.
3
Fix the switch in the rack with the combination screw and floating nuts that are
shipped with the switch.
Installing on a
Workbench
To install the switch on a workbench, take the following precautions:
■
Ensure that the workbench is smooth and stable.
■
Leave a heat-dissipation clearance in the front and back of the switch of more
than 1 m (3 ft) and at least 0.8 meters (2.5 ft) away from the walls on the sides.
■
Do not put heavy objects on the switch.
Installing the Cabling
Rack
To install the cabling rack:
1
Attach the rack brace to the left side of the chassis (opposite the fan frame).
2
Insert the wiring channel into the brace and fasten the screws.
Installing a Module
To install a module:
1
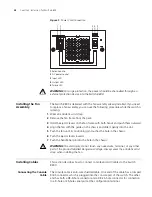
Wear an antistatic wrist strap.
2
Remove the blank plate from the chassis slot and save it for future use.
3
Hold the ejector levers of the module with both hands and push them outward.
4
Align the module with the guides in the chassis and slide it gently into the slot.
5
Push the module until the captive thumb screw on its handle bar touches the hole
in the chassis.
Содержание 8800 SERIES
Страница 28: ...28 CHAPTER 2 INSTALLING THE SWITCH 8800 ...
Страница 34: ...34 CHAPTER 3 CONFIGURING THE SWITCH 8800 ...
Страница 50: ...50 CHAPTER 5 MAINTAINING HARDWARE ...
Страница 54: ...54 CHAPTER 6 TROUBLESHOOTING ...
Страница 58: ...58 APPENDIX A SWITCH 8800 CABLES ...
Страница 62: ...62 APPENDIX B OBTAINING SUPPORT FOR YOUR SWITCH 8800 ...


