


B
Installing the DynamicAccess LAN Agent
58
Installing the Dynamic
Access
LAN Agent
To install the Dynamic
Access
LAN agent:
1
Make sure that the NIC and the network driver are installed on your PC.
See “Verifying Successful Installation” on page 22 to confirm that the NIC is properly
installed in the PC.
2
Start Windows.
3
Insert the
EtherCD
in the CD-ROM drive.
The
EtherCD
Welcome screen appears.
If the
EtherCD
Welcome screen does not appear, enter the following command from
the Run option of the Windows Start menu:
d:\installs\setup.exe
where d:\ represents the letter name of the CD-ROM drive.
4
Click
NIC Software
.
5
Click
DynamicAccess Technologies
.
6
Click
DynamicAccess LAN Agent
.
7
Click
Install DynamicAccess LAN Agent Now.
8
Exit the
EtherCD
, and then exit Windows.
9
Restart the PC.
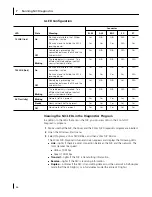
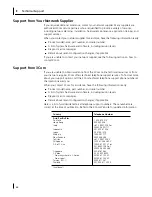
Verifying Successful Installation
After the Dynamic
Access
LAN agent is installed, the following changes are visible in the
Windows Network control panel:
■
For each physical NIC installed in the PC, a virtual NIC entry appears in the list of
network adapters.
All protocols are re-bound to the virtual NIC. The bindings to the physical NIC are
still intact.
■
A 3Com Dynamic
Access
LAN agent entry appears as a protocol.
■
A 3Com Dynamic
Access
LAN agent icon is installed in the Windows Control Panel.
NOTE:
You must restart the PC to complete the installation.