


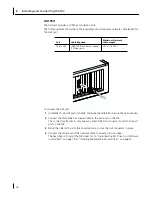


Connecting the Remote Wake-Up Cable
13
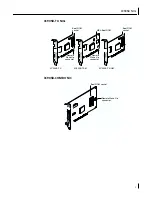
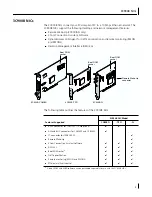
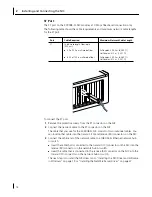
To connect the Remote Wake-Up cable:
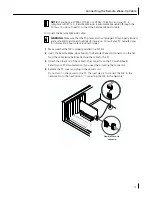
1
Make sure that the NIC is properly installed in a PCI slot.
2
Insert the Remote Wake-Up cable into the Remote Wake-Up connector on the NIC.
Twist the cable twice before attaching the cable to the PC.
3
Attach the other end of the cable to the connector on the PC motherboard.
Refer to your PC documentation if you need help locating the connector.
4
Replace the PC cover and plug in the power cord.
Do not turn on the power to the PC. The next step is to connect the NIC to the
network. Go to the next section, “Connecting the NIC to the Network.”
NOTE:
If you have a 3C905CX-TX-M or 3C905C-TX-M NIC and your PC is
compliant with PCI 2.2, Remote Wake-Up is automatically enabled through the
PCI bus. You do not need to connect the Remote Wake-Up cable.
WARNING:
Make sure that the PC power cord is unplugged. Only properly trained
and authorized personnel should perform service. Consult your PC manufacturer
for information about safe service techniques.
Remote Wake-Up
connector