background image

4

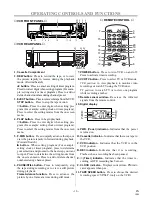
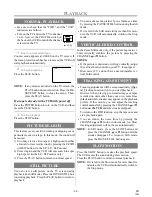
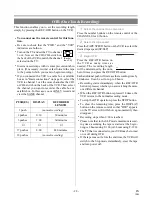
Set the timer

To go back one step, press the REW/

s

 button.

5

Finish setting the program

Press the F.FWD/

B

 button after setting the tape speed.

Program 1 is now completed.

To set another program, repeat steps [2] to [5].

Press the RESET/EXIT button to return to original
mode.

6

Set the timer

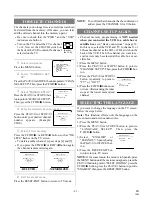
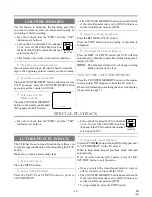
Press the POWER button to turn off. The "

w

" indicator

on the display comes on.

Please see "HINTS FOR TIMER RECORDING" for
more information.

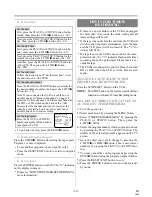
HINTS FOR TIMER

RECORDING

If there is a power failure or the VCR is unplugged
for more than 30 seconds, the clock setting and all
timer settings will be lost.

If the tape runs out before the end time, the VCR will
switch to the Stop mode immediately, eject the tape
and the VCR power will be turned off. The "

w

" in-

dicator will flash.

If a tape is not in the VCR or does not have the erase-
protection tab, the "

w

" indicator flashes and timer

recording cannot be performed. Please insert a re-
cordable tape.

The TV that is connected to your VCR may be turned
ON or OFF when the VCR is in the timer-record
mode.

TO STOP AN AUTOMATIC TIMER 
PROGRAM ALREADY STARTED

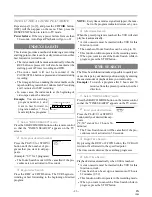
Press the STOP/EJECT button on the VCR.

NOTE:  The STOP button on the remote control will not

function in Automatic Timer Recording mode.

TO CHECK, CORRECT, OR CANCEL AN
AUTOMATIC TIMER PROGRAM

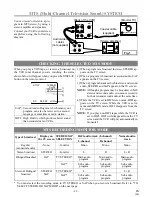
1) Turn the power on.

2) Select main menu by pressing the MENU button.

3) Select "TIMER PROGRAMMING" by pressing the

PLAY/

 or STOP/

 button. Then, press the

F.FWD/

B

 button.

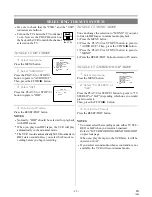
4) Select the program number which you want to check

by pressing the PLAY/

 or STOP/

 button. The

details of the selected program appears on the TV
screen.

Go to the digit you want to change by pressing the
F.FWD/

B

 or REW/

s

 button. Then, enter correct

numbers by pressing the PLAY/

 or STOP/

 but-

ton.

You may cancel the entire program by pressing the
REW/

s

 button during the program number flashes.

5) Press the RESET/EXIT button to exit.

6) Press the POWER button to return to timer stand-

by mode.

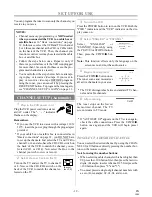
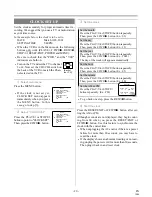
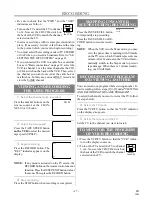
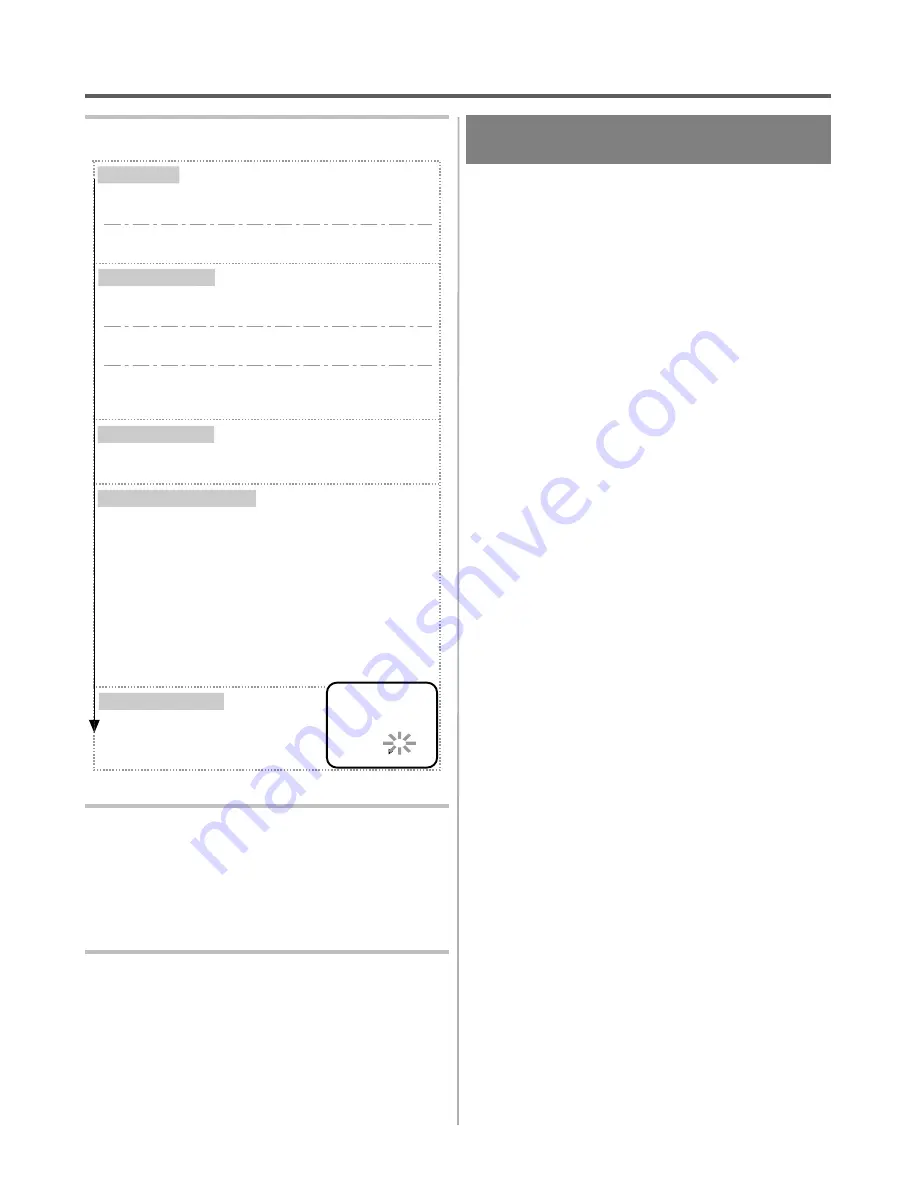
ONE  TIME  PROGRAM

PROGRAM  NUMBER  1
DATE                       05/03  THU
START  TIME          07:30    PM
END      TIME          08:30    PM
CHANNEL               16
REC  SPEED           SP
                                 SP    
                                 SLP

Set the date
First, press the PLAY/

 or STOP/

 button for the 

month, then, press the F.FWD/

B

 button. (Ex.: 05) 

Next, press the PLAY/

 or STOP/

 button for the 

day, then, press the F.FWD/

B

 button. (Ex.: 03) 

Set the start time

First, press the PLAY/

 or STOP/

 button for the 

hour, then, press the F.FWD/

B

 button. (Ex.: 07) 

Next, press the PLAY/

 or STOP/

 button for the 

minute, then, press the F.FWD/

B

 button. (Ex.: 30)

And then, press the PLAY/

 or STOP/

 button for 

AM or PM. Then, press the F.FWD/

B

 button. 

(Ex.: PM) 

Set the end time

Follow the instructions of "Set the start time" to set 
the end time. (Ex.: 08:30 PM)

Set the channel number
Press the PLAY/

 or STOP/

 button repeatedly for 

the desired channel number, then, press the F.FWD/

B


button. (Ex.: 16)
Note: If you connected the VCR to a cable box or 
satellite box as in "Basic connections" on page 18, 
select the VCR to channel 3 or 4 the same channel as 
the CH3 or CH4 switch on the back of the VCR. 
Then, select the channel you want to record at the 
cable box or satellite box. Leave the cable box or 
satellite box on for timer recording.

Set the tape speed

Press the PLAY/

 or STOP/


button repeatedly for the desired 
tape speed. (Ex: SP)

1B14

H7942

- 30 -

EN

Содержание DTK5400HF

Страница 1: ...M A N U A L D E I N S T R U C C I O N E S VIDEOCASSETTE Hi Fi 4 CABEZALES DTK 5400HF...

Страница 2: ...Disponga de cualquiera ellos seg n las normas de reciclaje de su localidad Las pilas nunca deber n tirarse ni incine rarse sino que deber n tratarse seg n las normas locales relacionadas con desperdic...

Страница 3: ...cci ny proseguir con el siguientepasoque desee introducir P lselo para determinar los modos de ajuste del men en pantalla P lselo para a adir o borrar n meros de canales du rante el preajuste de canal...

Страница 4: ...Consulte la figura Conexiones b sicas antenna interior de la p gina 18 UTILIZACI N DE LAS TOMAS DE SALIDA AU DIO VIDEO OPCIONALES Si su televisor tiene tomas de entrada A V usted podr conectar las to...

Страница 5: ...ccionado en el televisor 1 Pulse el bot n MENU Si el reloj no ha sido ajustado todav a el men AJUSTE DE RE LOJ aparecer inmediatamente cuando pulse el bot n MENU En este caso vaya al paso 3 2 Pulse el...

Страница 6: ...EREO de saparecer de la pantalla del televisor y la videograbadora repro ducir en mono MODO DE GRABACI N MONITOREO DE MTS Tipo de emisi n Visualizaci n en pantalla Selecci n TV ESTEREO SAP Pista de au...

Страница 7: ...n de seguimiento digital pare una vez la cinta e inicie de nuevo la reproducci n Usted tambi n puede reducir las l neas de ruido pulsando el bot n CHANNEL o en el modo de c mara lenta El ajuste de se...

Страница 8: ...Ejemplo Para ver un programa ubicado a 2 horas y 50 minutos de la posici n actual en ambos sentidos 1 Pulse repetidamente el bot n SEARCH MODE del control remoto hasta que aparezca BUSCA HACIA HORA en...

Страница 9: ...la operaci n OTR pulse el bot n STOP Para mostrar el tiempo restante pulse el bot n DISPLAY del man do a distancia para que OTR aparezca en la pantalla del televisor Se mostrar moment neamente y luego...

Страница 10: ...esta vi deograbadora conecte la toma de salida de audio de la videogra badora mono otra fuente a la toma AUDIO IN L de esta videograbadora La se al de audio se grabar igualmente en los canales derech...

Страница 11: ...ras minutos y segundos El tiempo visualizado no cambiar durante las partes en blanco de la cinta La indicaci n aparecer cuando la cinta se rebobine m s all de 0 00 00 en el contador de cinta REBOBINAD...

Страница 12: ...RA LOCALIZACI N Y SOLUCI N DE PROBLEMAS Si ha seguido las instrucciones de este manual y tiene dificultades al utilizar su videograbadora localice el PROBLEMA en la columna de la izquierda de la tabla...

Страница 13: ...ion may occur inside the unit when it is moved from a cold place to a warm place or after heating a cold room or under conditions of high humid ity Do not use the VCR at least for 2 hours until its in...

Страница 14: ...22 SELECTING THE MTS SYSTEM 23 PLAYBACK 24 NORMAL PLAYBACK 24 PICTURE SEARCH 24 STILL PICTURE 24 VERTICAL HOLD CONTROL 24 TRACKING ADJUSTMENT 24 SLOW MOTION 24 COUNTER MEMORY 25 SPECIAL PLAYBACK 25 A...

Страница 15: ...the maximum recording play back time using T60 T120 or T160 tapes in each mode Tape Speed Recording Playback Time Type of tape T60 T120 T160 SP mode 1 hour 2 hours 2 2 3 hours SLP mode 3 hours 6 hour...

Страница 16: ...l picture during playback Frame Advance function Press to advance the picture by one frame at a time during still mode 7 POWER button Press to turn VCR on and off Press to activate timer recording 8 V...

Страница 17: ...ion playback only on the remote control 18 COUNTER MEMORY button Press to set counter memory on and off only on the remote control 19 COUNTER RESET button Press to reset counter to 0 00 00 only on the...

Страница 18: ...connect the external source to input jacks on the back of the VCR select L1 position for re cording by pressing the 0 0 1 on the remote control or CHANNEL Up Down button 2 When you connect the externa...

Страница 19: ...r scanning The tuner stops on the lowest memorized channel The TV screen returns to TV mode If AUTO SET UP appears on the TV screen again check the cable connections Press the F FWD B button once agai...

Страница 20: ...ET EXIT or F FWD B button Use this feature to synchronize the clock with the correct time When unplugging the AC cord or if there is a power failure for more than 30 seconds you may have to reset the...

Страница 21: ...se select the VCR and TV to channel 3 or 4 the same channel as the CH3 or CH4 switch on the back of the VCR Then the channel you want to re cord or view may be selected at the cable box or sat ellite...

Страница 22: ...the VCR is set in HIFI stereo mode HIFI ap pears on the TV screen While the VCR is set in monaural MONO mode HIFI disappears from the TV screen NOTE If you play non HIFI tapes while the VCR is set in...

Страница 23: ...layback 1 Press the MENU button 2 Press the PLAY or STOP button to point to AUDIO OUT Then press the F FWD B button 3 Press the PLAY or STOP button to point to MONO 4 Press the RESET EXIT button to re...

Страница 24: ...pressing the PAUSE STILL button during the still mode If it is left in the Still mode for more than five min utes the VCR will automatically switch to the Stop mode VERTICAL HOLD CONTROL In the Pause...

Страница 25: ...eturned to approxi mately 0 00 00 NOTE The displayed time will not change during blank portions on the tape TO EXIT THE COUNTER MEMORY Press the COUNTER MEMORY button on the remote control so that M d...

Страница 26: ...ndex signal is skipped the num ber in the program indicator decreases by one 4 After Index Search When the preset program is reached the VCR will start playback automatically A video cassette must be...

Страница 27: ...creen the RECORD button on the remote control does not function PresstheRESET EXITbuttontoclear the menu Then press the RECORD button 4 Stop recording Press the STOP button when recording is completed...

Страница 28: ...number buttons on the remote control or the CHANNEL or button 2 Select the tape speed Press the TAPE SPEED button on the VCR to select the desired tape speed SP SLP 3 Begin OTR Press the REC OTR butto...

Страница 29: ...STOP button to point to TIMER PROGRAMMING Then press the F FWD B button NOTE If you have not yet set the clock CLOCK SET ap pears If so follow the steps 3 and 4 on page 20 Then set the timer recording...

Страница 30: ...pressing the PLAY or STOP button The details of the selected program appears on the TV screen Go to the digit you want to change by pressing the F FWD B or REW s button Then enter correct numbers by p...

Страница 31: ...tion Always use video quality shielded cables with RCA type connectors Standard audio cables are not rec ommended You can use a video disc player satellite receiver or other audio video component with...

Страница 32: ...cord is connected to an AC outlet Check batteries in remote control Video or color fades in and out when making a copy of a video tape You cannot copy a copyrighted video tape You are experiencing cop...

Страница 33: ...F type connector x 1 Video input output RCA connector x 3 Audio input output RCA connector x 6 Video output level 1Vp p Video output impedance 75 Audio output level 6dBv 1KHz Video input level 0 5 2...

Страница 34: ...MEMO 1B14 34 EN...

Страница 35: ...MEMO 1B14 35 EN...

Страница 36: ...Printed in China 0VMN02688 H7942ZD...

Отзывы: