Create a movie DVD with
a digital video camera
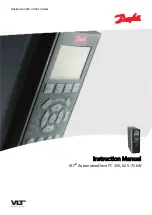
1
Click “Capture Video”.
Make further adjustments
to the contents of your DVD.
Or
Click here to
proceed.
2
3
4
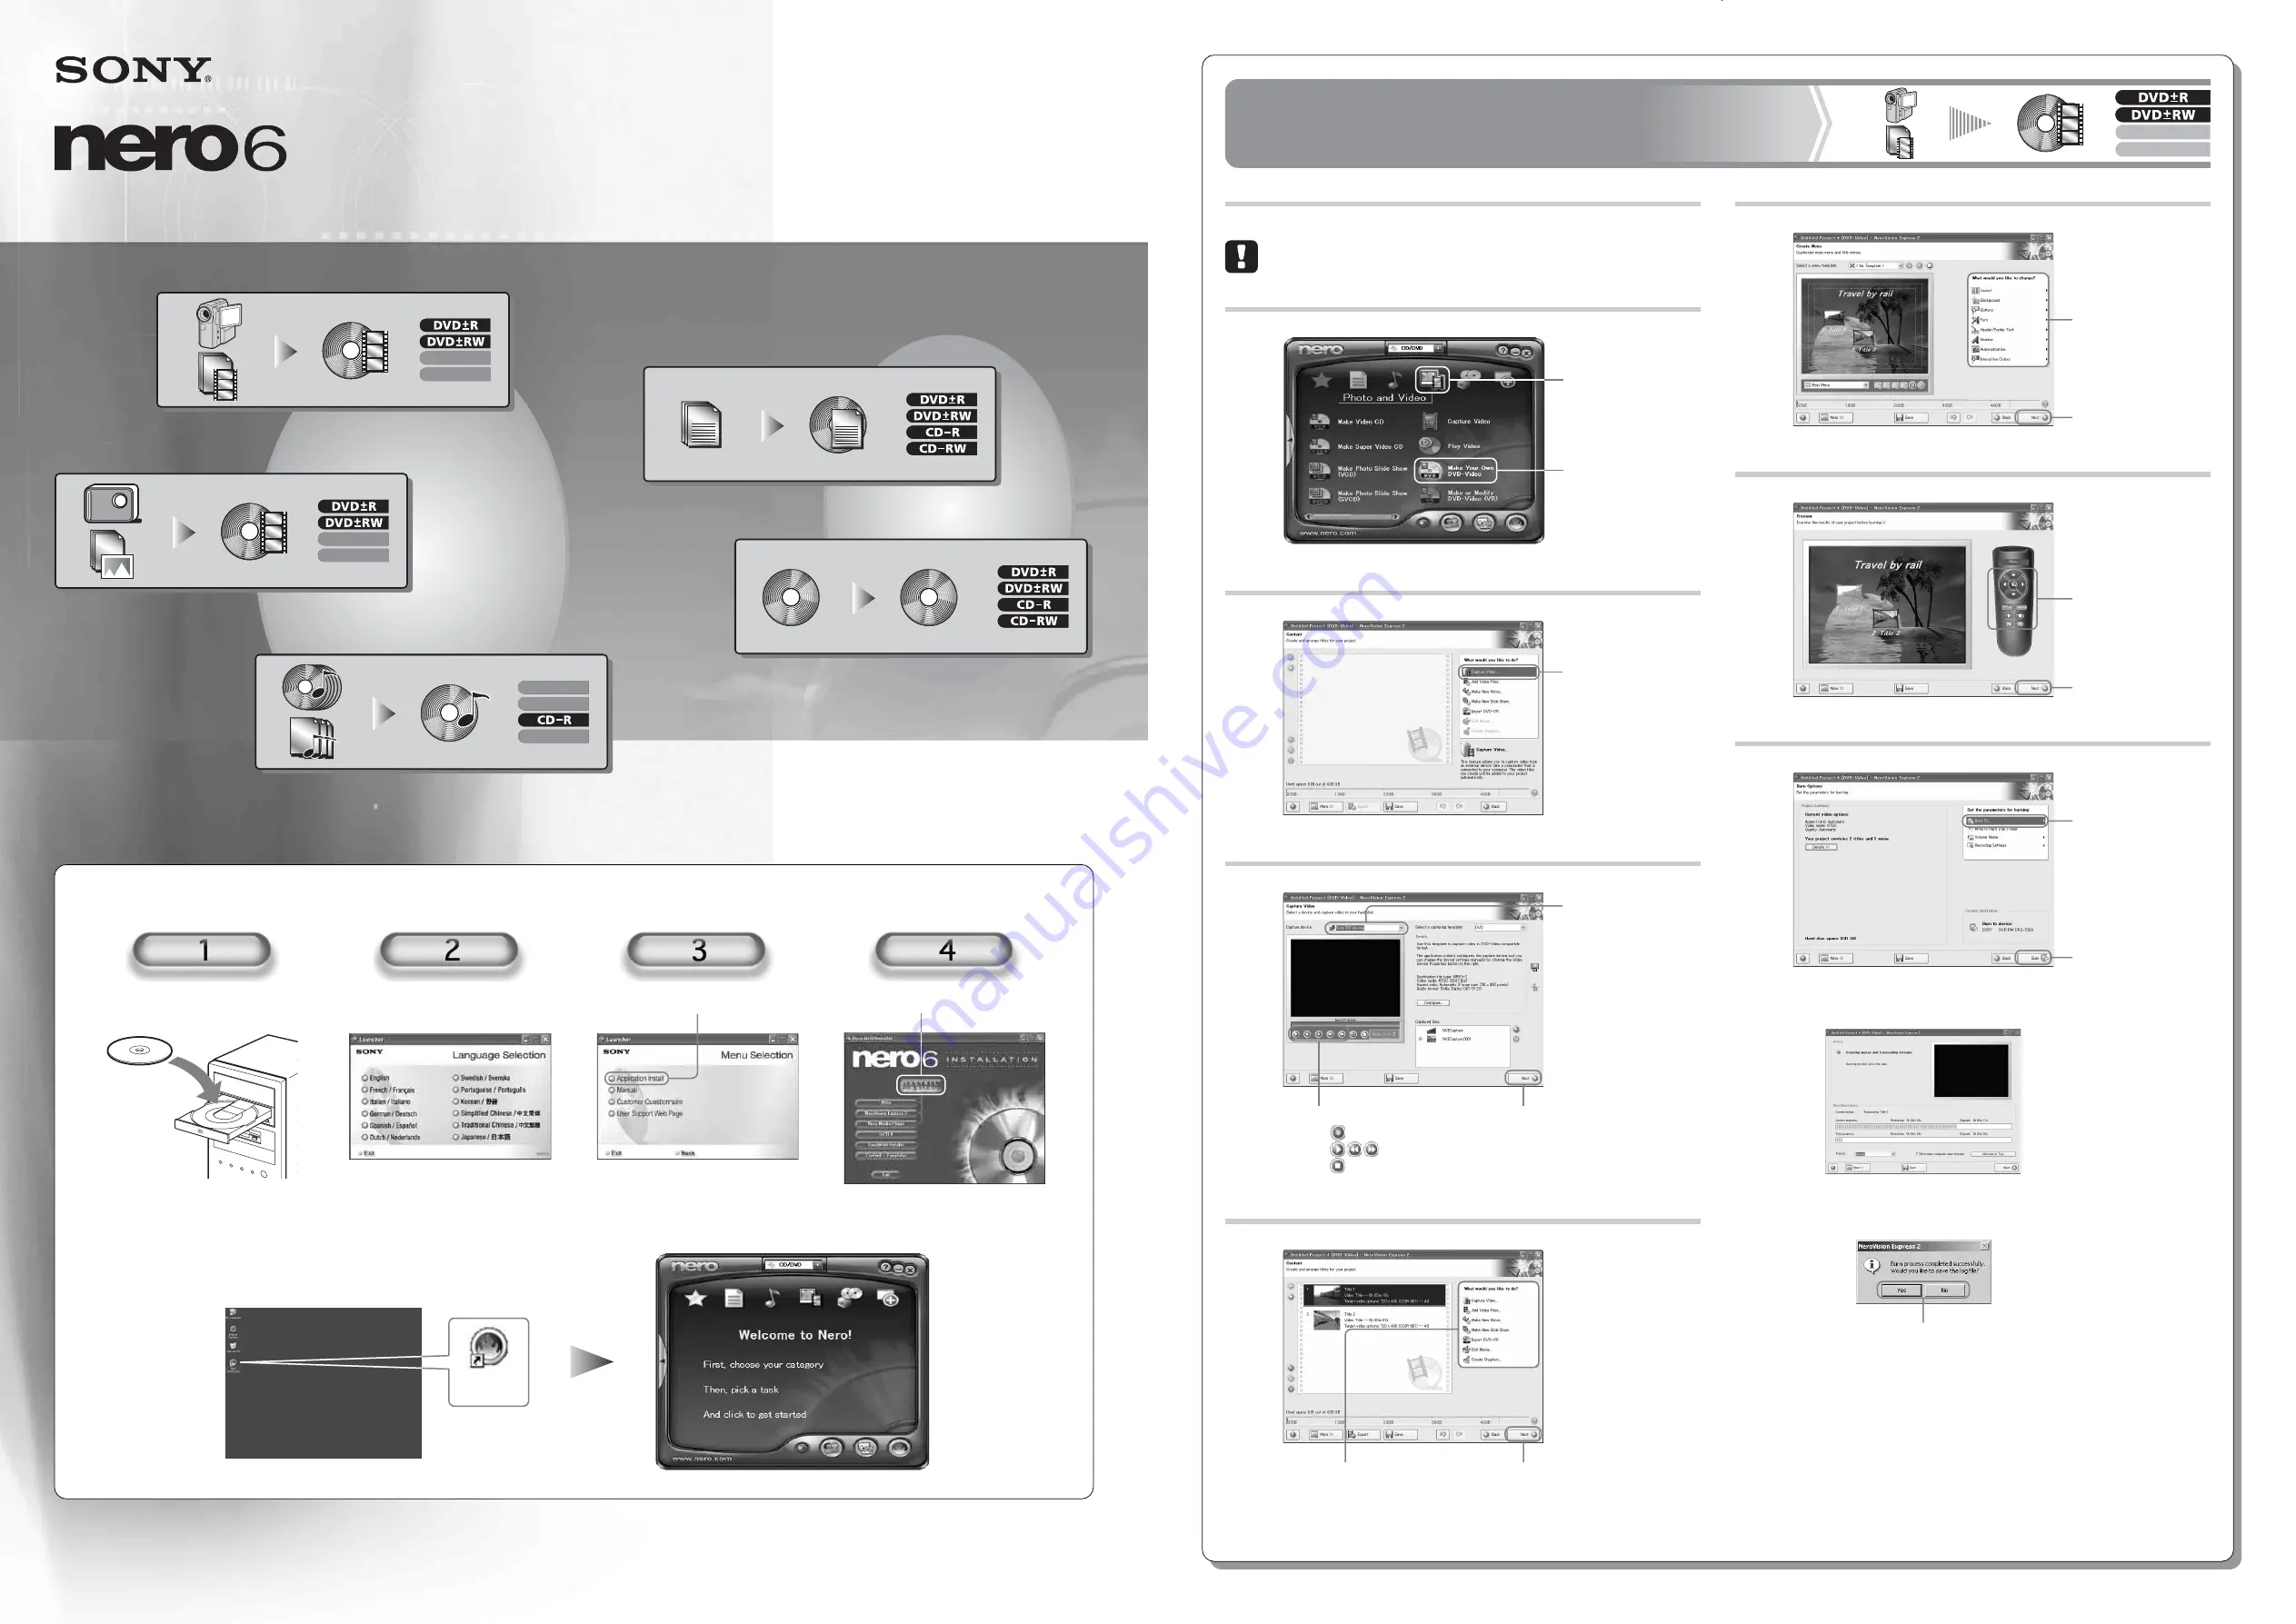
1
Select a DV
device here.
2
Click
to capture video.
to play/search video.
to stop playback.
3
Click here to proceed.
Create a menu for
your DVD.
Or
Click here to proceed.
Preview your DVD.
Or
Click here to proceed.
1
Click “Burn To...”
and select a drive
for burning.
2
Click here to burn.
Click an option to finish.
1
Point here.
2
Click here.
5
6
7
v
v
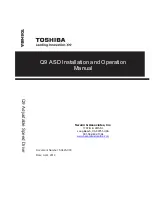
First, connect a digital video camera to your computer with an
i.LINK cable.
Installing the software
Insert the software disc.
Select a language.
Click here.
Click here to install the software.
Quick Start Guide
Nero
StartSmart
Note: Images depicted in this guide may differ slightly from what appears on your screen.
2-514-546-11(1)
7819900951
Double-click the “Nero StartSmart” icon.
Start up the software
©2004 Sony Corporation
Printed in China
Steps 2 and 3 may not appear for some users.
Create a data disc
Create a data disc
Copy a disc
Copy a disc
Create a data disc
Copy a disc
Create a movie DVD with a digital video camera
Create a movie DVD with a digital video camera
Create a slide-show DVD from digital photos
Create a slide-show DVD from digital photos
Create a music CD
Create a music CD
Create a movie DVD with a digital video camera
Create a slide-show DVD from digital photos
Create a music CD