VSG1432 User Setup Guide
17
1
Make sure that your Device is turned on and your notebook is within the cover range of the wireless
signal.
2
Make sure that you have installed the wireless client driver and utility in your notebook.
3
In the wireless client utility, go to the WPS setting page. Enable WPS and press the WPS button
(
Start
or
WPS
button).
4
Push and hold the
WPS
button located on the Device’s front panel for more than 5 seconds.
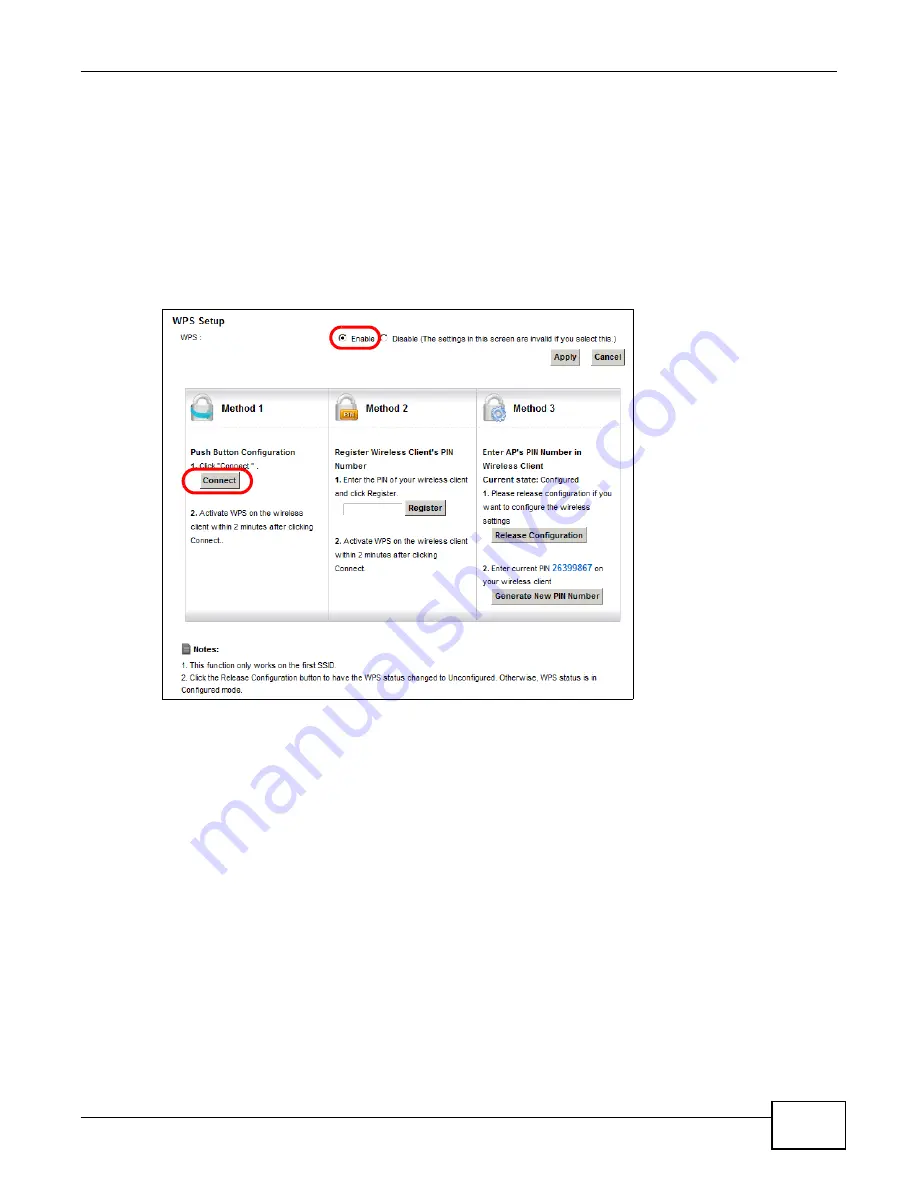
Alternatively, you may log into Device’s web configurator and go to the
Network Settings >
Wireless >
WPS
screen. Enable the WPS function and click
Apply
. Then click the
Connect
button.
Note: Your Device has a WPS button located on its front panel as well as a WPS button in
its configuration utility. Both buttons have exactly the same function: you can use
one or the other.
Note: It doesn’t matter if the WPS button on the wireless client or AP is pressed first. You
must press the button on the second device within two minutes of pressing the
button on the first device.
The Device sends the proper configuration settings to the wireless client. This may take up to two
minutes. The wireless client is then able to communicate with the Device securely.
Summary of Contents for VSG1432
Page 2: ......
Page 4: ...Contents Overview VSG1432 User Setup Guide 4 ...
Page 12: ...VSG1432 User Setup Guide 12 ...
Page 15: ...VSG1432 User Setup Guide 15 1 Click Wireless to open the Basic Wireless Setup screen ...
Page 48: ...VSG1432 User Setup Guide 48 ...
Page 54: ...VSG1432 User Setup Guide 54 ...
Page 56: ...Technical Specifications VSG1432 User Setup Guide 56 ...


