Chapter 2 Hardware
V500 Series User’s Guide
36
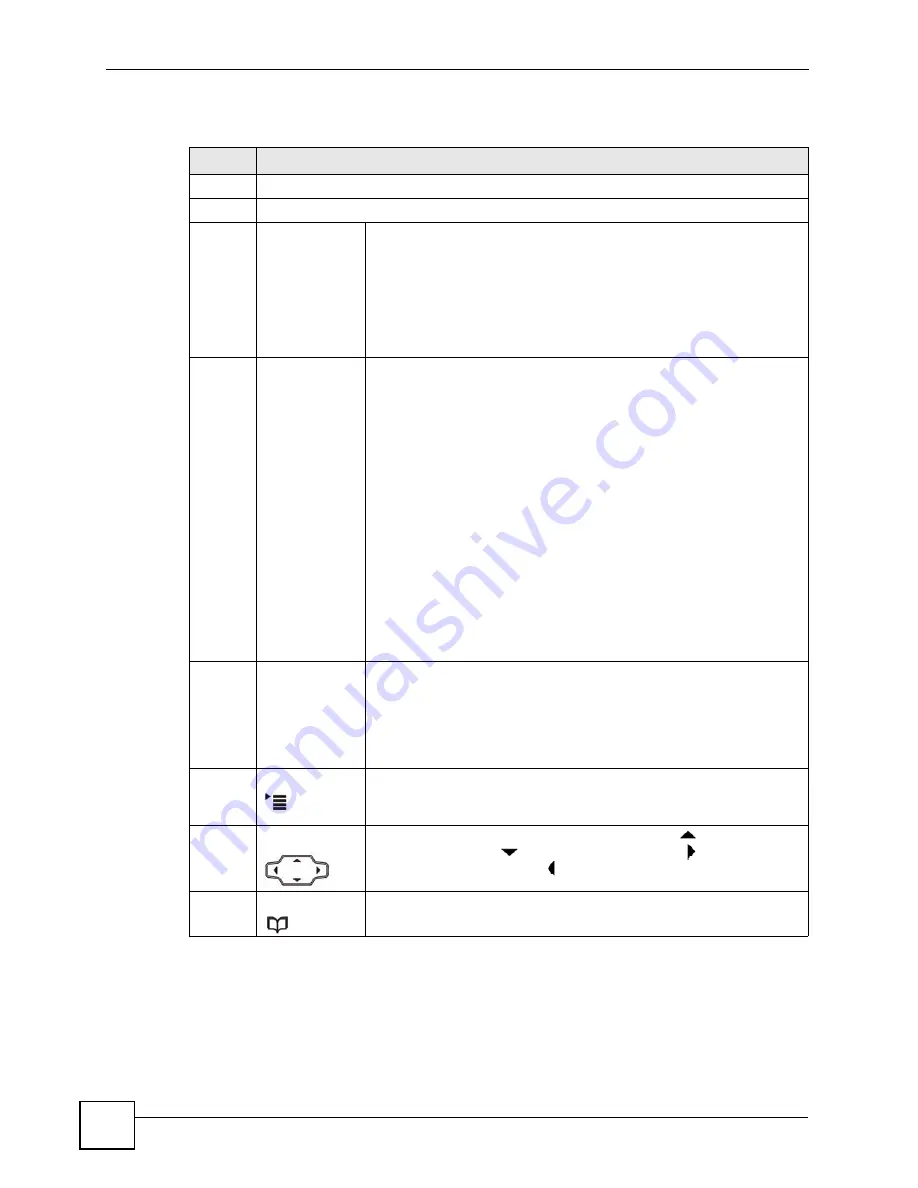
The following table describes the front panel hardware.
Table 2
Front Panel Hardware
LABEL
DESCRIPTION
1
Handset.
2
LCD (Liquid Crystal Display) screen.
3
Account keys
Use these to select the SIP account you want to use. You can configure
up to four SIP accounts on the V500. The account keys are independent
of the line keys - you can use any SIP account with any line.
Note: You can select an account only when it has been
configured (use the
Advanced Setting
>
SIP
Configuration
LCD menus to configure an account).
4
Softkeys
These keys’ functions depend on the screen currently displayed on the
LCD. A word or symbol displayed on the LCD above a softkey shows its
current function.
•
If “
Select
” displays above a softkey, press the key to choose an entry
on the screen.
•
If “
Add
” displays above a softkey, press the key to add a new entry to
the screen.
•
If “
Edit
” displays above a softkey, press the key to change an
existing entry on the screen.
•
If “
Del
” displays above a softkey, press the key to delete an entry
from the screen.
•
If “
Back
” displays above a softkey, press the key to return to the
previous screen.
•
If “
Cancel
” displays above a softkey when you are editing a field,
press the key to return to the previous screen without saving any
changes.
•
If “
<-
” displays above a softkey when you are editing a field, press
the key to delete the character to the left of the cursor.
•
If “
.
” displays above a softkey when you are editing a field, press the
key to enter a period.
5
Line keys
Press these to select the phone line you want to use. The V500 has four
phone lines.
•
If a line key’s LED is off, the line is not active.
•
If a line key’s LED is on, the line is active.
•
If a line key’s LED is blinking slowly, a call is on hold on that line.
•
If a line key’s LED is blinking quickly, a call is incoming on that line.
6
Menu
Press this to display the V500’s configuration menu. When the menu
displays, you can press this key again to exit the menu. The menu is not
accessible when a call is in progress.
7
Navigator
Use this to move around the V500’s screens. Press
to go up one line
in a menu, and press
to go down one line. Press
to move one
space to the right, and press to move one space to the left.
8
Phonebook
Use this to display the list of contacts stored in the V500. You can add,
edit and delete phonebook entries from this screen.
Summary of Contents for V500-T1
Page 2: ......
Page 7: ...Safety Warnings V500 Series User s Guide 7...
Page 8: ...Safety Warnings V500 Series User s Guide 8...
Page 10: ...Contents Overview V500 Series User s Guide 10...
Page 17: ...Table of Contents V500 Series User s Guide 17 Index 289...
Page 18: ...Table of Contents V500 Series User s Guide 18...
Page 24: ...List of Figures V500 Series User s Guide 24 Figure 211 Subnetting Example After Subnetting 275...
Page 29: ...29 PART I Introduction Introduction 31 Hardware 35 Tutorials 45...
Page 30: ...30...
Page 44: ...Chapter 2 Hardware V500 Series User s Guide 44...
Page 60: ...60...
Page 68: ...Chapter 4 Using the LCD Screen V500 Series User s Guide 68...
Page 76: ...Chapter 5 The Phonebook V500 Series User s Guide 76...
Page 102: ...Chapter 6 LCD Menus Basic Settings V500 Series User s Guide 102...
Page 158: ...Chapter 7 LCD Menus Advanced V500 Series User s Guide 158...
Page 160: ...160...
Page 166: ...Chapter 8 Introducing the Web Configurator V500 Series User s Guide 166...
Page 200: ...Chapter 12 Phone Setup V500 Series User s Guide 200...
Page 210: ...Chapter 13 The Phone Book V500 Series User s Guide 210...
Page 211: ...211 PART IV Maintenance and Troubleshooting System 213 Logs 219 Tools 221 Troubleshooting 227...
Page 212: ...212...
Page 234: ...234...
Page 264: ...Appendix B Setting Up Your Computer s IP Address User s Guide 264...
Page 282: ...Appendix E Legal Information V500 Series User s Guide 282...
Page 288: ...Appendix F Customer Support V500 Series User s Guide 288...
Page 294: ...Index V500 Series User s Guide 294...


