1
15
Controlling your Rapture Drone
Camera
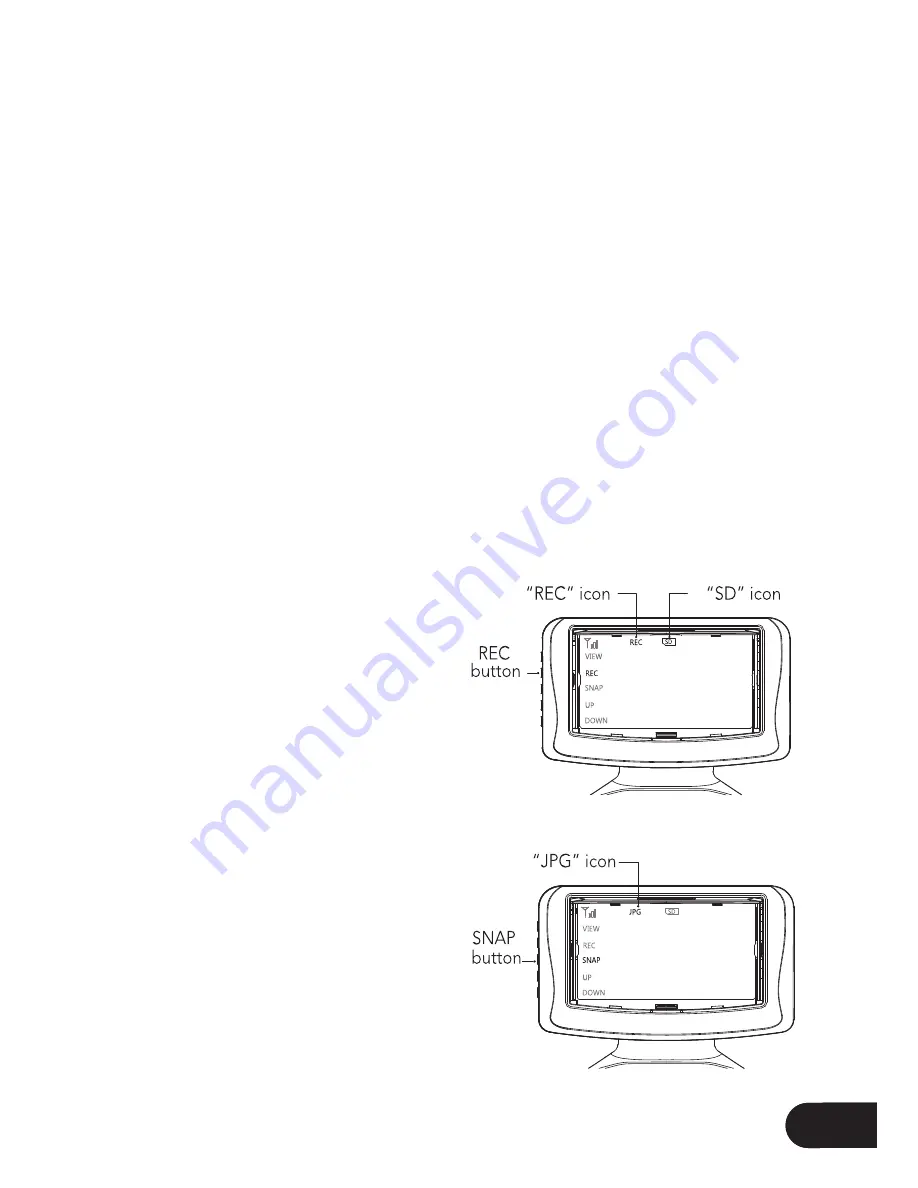
The camera on the Rapture drone is controlled via the Record and Snap buttons on
the left hand side on the FPV screen.
When you are intending to use the camera, please ensure that you have inserted
a Micro SD Card (not included) into the Micro SD Card slot in the camera on the
underside of the Rapture drone.
The camera will not record to a SD Micro card
that is inserted into the FPV screen.
The Left SD icon on the FPV screen will display green when a Micro SD Card is
detected, and it is ready to record video or take still photos.
If the SD icon does not display green, or shows “ERR”, try re inserting the Micro SD
Card into the Rapture drones’ Camera and restart the Rapture drone. If this issue
persists please ensure you are using a compatible Micro SD card.
Shooting Video:
The Rapture drone will capture 60 second clips, once it has inished recording
a clip it will begin a new clip and continue recording 60 second clips until you
stop recording.
To start recording video, push the
Record button (8) on the left side of the
FPV Screen. The FPV screen will lash the
word “REC” in red at the top of the screen
and a counter will show timing the clip
length indicating that recording is in
progress. To stop recording push the
Record Button again. Ensure you have
stopped recording before removing the
Micro SD Card, or turning the power off
on your Rapture drone.
Shooting Photos:
To shoot a photo with your Rapture
drone press the Snap button (9) on
the left side of the FPV screen. “JPG”
will be displayed at the top of the FPV
screen in red indicating that a photo has
been taken.
Summary of Contents for Rapture ZXRAP
Page 1: ...USER MANUAL PRODUCT CODE ZXRAP www zero x com au www zero x co nz RAPTURE DRONE ...
Page 2: ......
Page 23: ......


