Zero 88 Series
Usk House, Lakeside, Llantarnam Park,
Cwmbran, NP44 3HD. UK
Tel: +44 (0)1633 838088 Fax: +44 (0)1633 867880
Email: [email protected] Web: www.zero88.com
Lighting Controls
–
FLX lighting console
Zero 88 FLX Quick Start Guide v1.2
– Stock Code: 9850-000492-00 – Page 8 of 20
Controlling intensities
On FLX, all intensities can be controlled in exactly the
same way
– no matter if the fixture is a basic dimmer, an
LED, a moving light or any other type of fixture. There are
three possible ways to control an intensity:
-
using the Multi-Function Faders,
-
using one of the encoder wheels,
-
entering commands directly via the numeric keypad.
Multi-Functional Faders
First, ensure that the MFFs are in channel mode by
pressing the Fader Funct. button.
Channels can now be adjusted by moving the appropriate
fader. The Page Up and Page Down buttons can switch
through all the channels patched on the console, and grey
boxes in the Output Window show which set of 24
channels are currently being controlled on the MFFs.
If a channel already has a level, for example set through
commands, then you
must ‘grab’ the level by moving the
fader up to the present value. Once that value is grabbed,
the fader gains control.
Encoder wheels
To change the intensity of a fixture via an encoder wheel,
first select the fixture(s) required. This can be done using
the buttons under the faders (MFFs must be in “channel”
mode) or by using similar commands described to the right
(just press Enter after the selection, in place of @
…).
… 1 Thru 6 And 9 Enter …
When the channel is selected, the LED in the button under
the fader will turn on, and an orange box will be drawn
around the channel number in the Output Window. You
can select multiple channels on the faders at the same
time by pressing and holding the first button, and then
tapping the last button.
Once selected, press the Z key and then use the encoder
wheel marked on the internal monitor as
“intensity” to
adjust the level. The output value is shown above the
corresponding encoder wheel and in the Output Window.
Commands
To control the intensity of a fixture(s) via the numeric
keypad, commands must be typed like this:
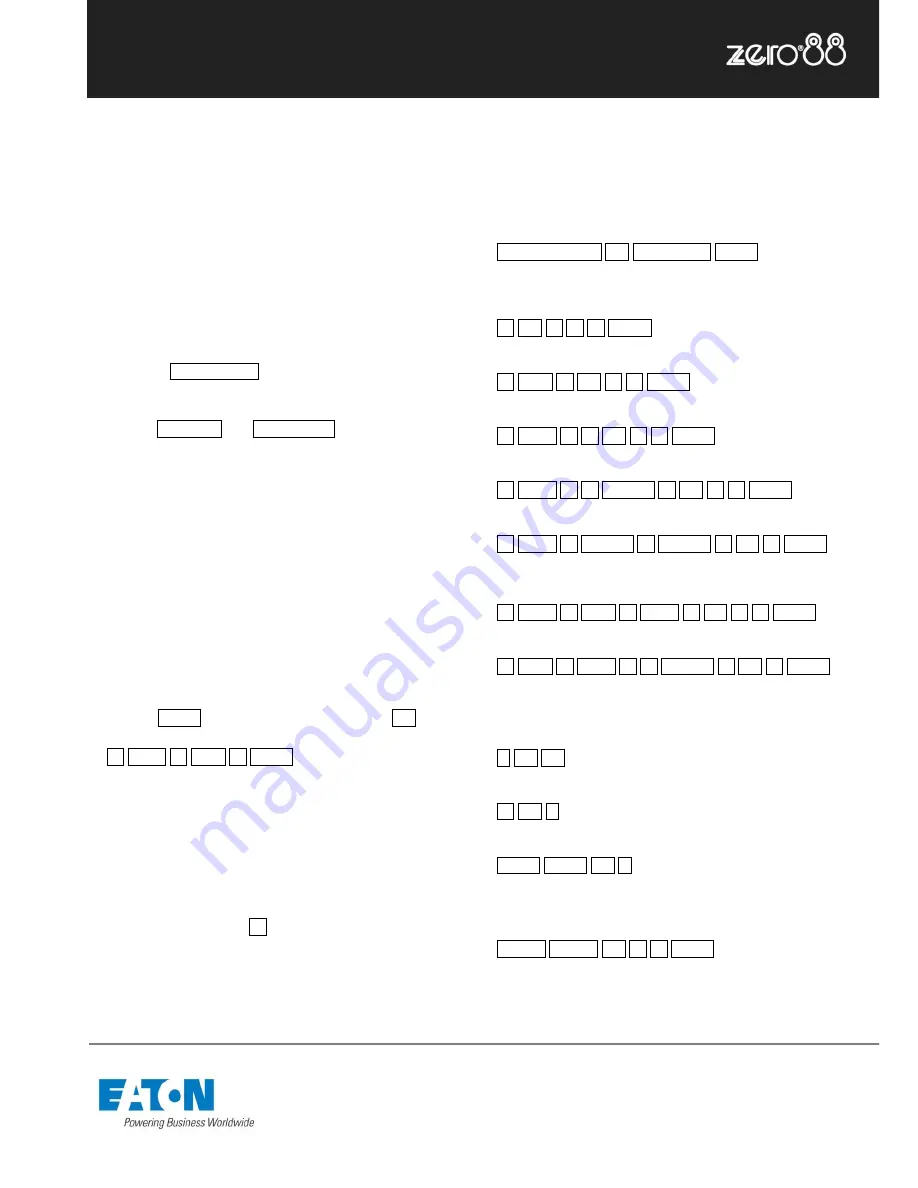
… Channel No(s). @ Intensity % Enter
…
Examples of valid commands are below:
… 1 @ 1 0 0 Enter
…
This sets the intensity of channel 1 to 100%.
… 2 And 3 @ 7 5 Enter
…
This sets the intensity of channels 2 and 3 to 75%.
… 5 Thru 1 0 @ 5 0 Enter …
This sets the intensity of channels 5 through to 10 to 50%.
… 5 Thru 1 0 Except 7 @ 6 5 Enter …
This sets the intensity of channels 5, 6, 8, 9 and 10 to 65%
… 3 Thru 9 Except 5 Except 6 @ 0 Enter …
This sets the intensity of channels 3, 4, 7, 8 and 9 to 0%. Note how
Except is used twice to exclude two different channels from the range.
… 1 Thru 3 And 7 Thru 9 @ 2 5 Enter …
This sets the intensity of channels 1, 2, 3, 7, 8, and 9 to 25%.
… 1 And 7 Thru 1 2 Except 9 @ 5 Enter …
This sets the intensity of channels 1, 7, 8, 10, 11 and 12 to 5%.
There are also some shortcuts available:
… 1 @ @ …
@@ is a shortcut which quickly sets the intensity to 100%.
… 1 @ . …
@. (at dot) is a shortcut which quickly sets the intensity to 0%.
… Enter Enter @ . …
Enter Enter is a shortcut which quickly selects all the channels that are
currently on (above 0%). In this example, it then takes them to 0% using
the @. shortcut (resulting in a blackout).
… Group Group @ 1 0 Enter …
Group Group is a shortcut which quickly selects all channels, no matter
what intensity they are. In this example, it then takes them all to 10%
(useful for a rig check).


