3
2
1
4
3 ACQUIRING A FIRST MICROSCOPE IMAGE
18
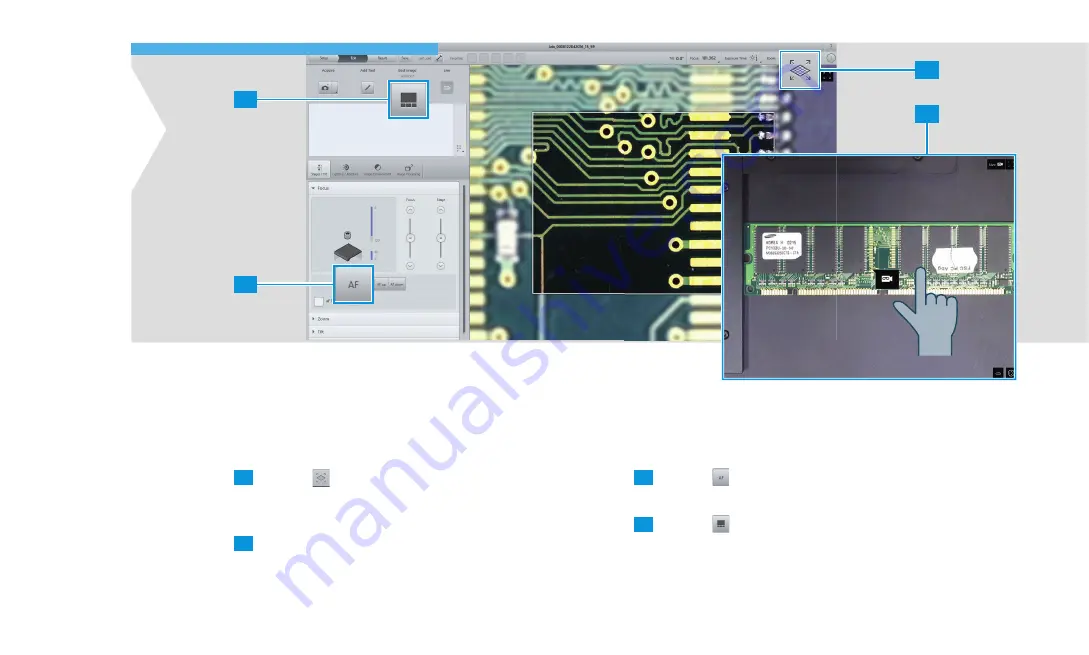
3.3 Acquiring a Microscope Image
After acquiring the overview image, you can now create the
actual microscope image:
1
Tap the
icon to open the overview image.
The camera symbol indicates the live-position of the
microscope image.
2
Double tap the overview image at the position you wish
to inspect.
The stage moves to the desired position and the micro-
scope image is displayed on top of the overview image.
3
Tap the
icon to perform an initial autofocus.
The microscope image gets focused.
4
Tap the
icon to optimize imaging.
•
A number of different imaging modes are displayed.
•
Choose the imaging mode that creates the best image.
Summary of Contents for Smartzoom 5
Page 1: ...Quick Start Guide Smartzoom 5 Digital Microscope ...
Page 2: ......
Page 4: ......
Page 5: ...1 WELCOME 03 1 WELCOME ...
Page 9: ...1 WELCOME 07 1 5 7 2 3 4 6 ...
Page 11: ...2 ASSEMBLING AND STARTING SMARTZOOM 5 09 2 ASSEMBLING AND STARTING SMARTZOOM 5 ...
Page 13: ...2 1 3 2 1 2 0 3 0 3 2 1 6 7 2 3 4 2 ASSEMBLING AND STARTING SMARTZOOM 5 11 ...
Page 16: ...14 2 ASSEMBLING AND STARTING SMARTZOOM 5 ...
Page 29: ...1 3 4 5 7 6 8 9 2 Routine Free 3 ACQUIRING A FIRST MICROSCOPE IMAGE 27 ...
Page 30: ...3 ACQUIRING A FIRST MICROSCOPE IMAGE 28 ...
Page 31: ...4 RUNNING A JOB 29 4 RUNNING A JOB ...
Page 40: ...4 RUNNING A JOB 38 ...


