DOC-USR-0068-02
_______________________________________________________________________________________
Z3 Technology, LLC
♦
100 N. 8th St. STE 250
♦
Lincoln, NE 68508-1369 USA
♦
+1.402.323.0702
12
6.4
Open the Z3-MVE-40 Web GUI
(6)
Take the IP address from step (5) and enter it into a web browser running on a Linux or Windows PC
connected to the Z3-MVE-40. You should see the Z3-MVE-40 Web GUI System Setup Page (shown in
Figure 8).
*Note:
To be able to communicate with the Z3-MVE-40, the PC that you are communicating from needs
to have at least the same first two parts of the IP address as the Z3-MVE-40. For example, if the Z3-
MVE-40 has an IP address of 192.168.81.68, your PC would need to have an address of 192.168.x.y,
where x.y is anything but 81.68 (and not conflicting with any other equipment on your current
network). Note that the first two parts being the same are based on a value of netmask of 255.255.0.0.
If netmask were 255.255.255.0, for example, then the first three parts of the IP address would have to
be the same.
6.5
Open the Z3-MVE-40 Web GUI using ZFinder (Optional)
(7)
Another option is to access the Z3-MVE-40 Web GUI using the included utility “ZFinder.” This requires
a Windows PC. To do this, first connect the Windows PC to the same network the Z3-MVE-40 is
connected to.
(8)
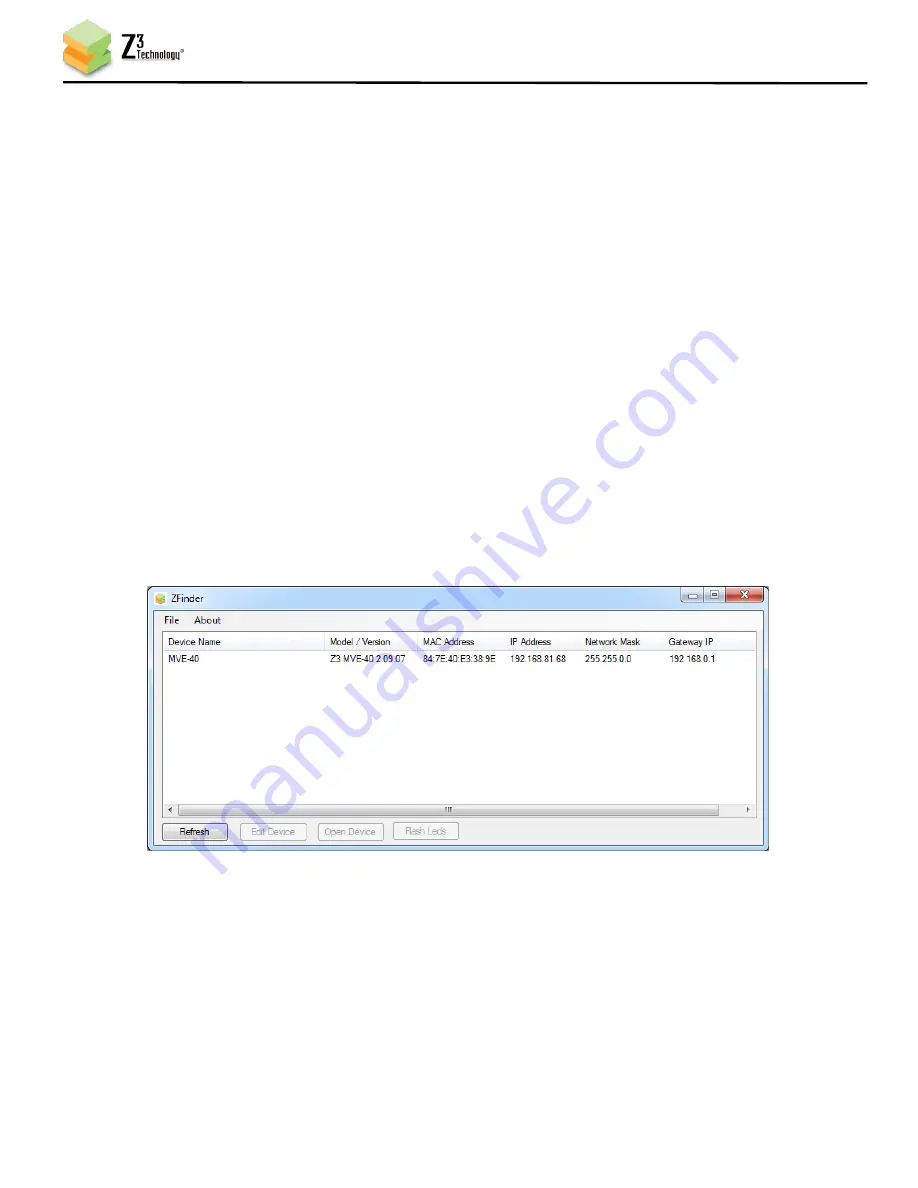
Run the “ZFinder” PC Utility on this Windows PC. The ZFinder window appears. ZFinder does a scan
of the network and lists the location of all Z3 systems connected to the network. In this case, the Z3-
MVE-40 appears:
(9)
Click on the Z3-MVE-40 entry in the window to select it. This will cause the “Edit Device,” “Open
Device,” and “Flash LEDs” boxes to activate.
Figure 7 ZFinder with Z3-MVE-40 Listed


