Z Corporation
Z406 System User Manual
40
Z Corporation Service (781)852-5050/(887)88-ZCORP
9. Look up the numbers that are next to
the best-aligned pattern as described
above.
10.
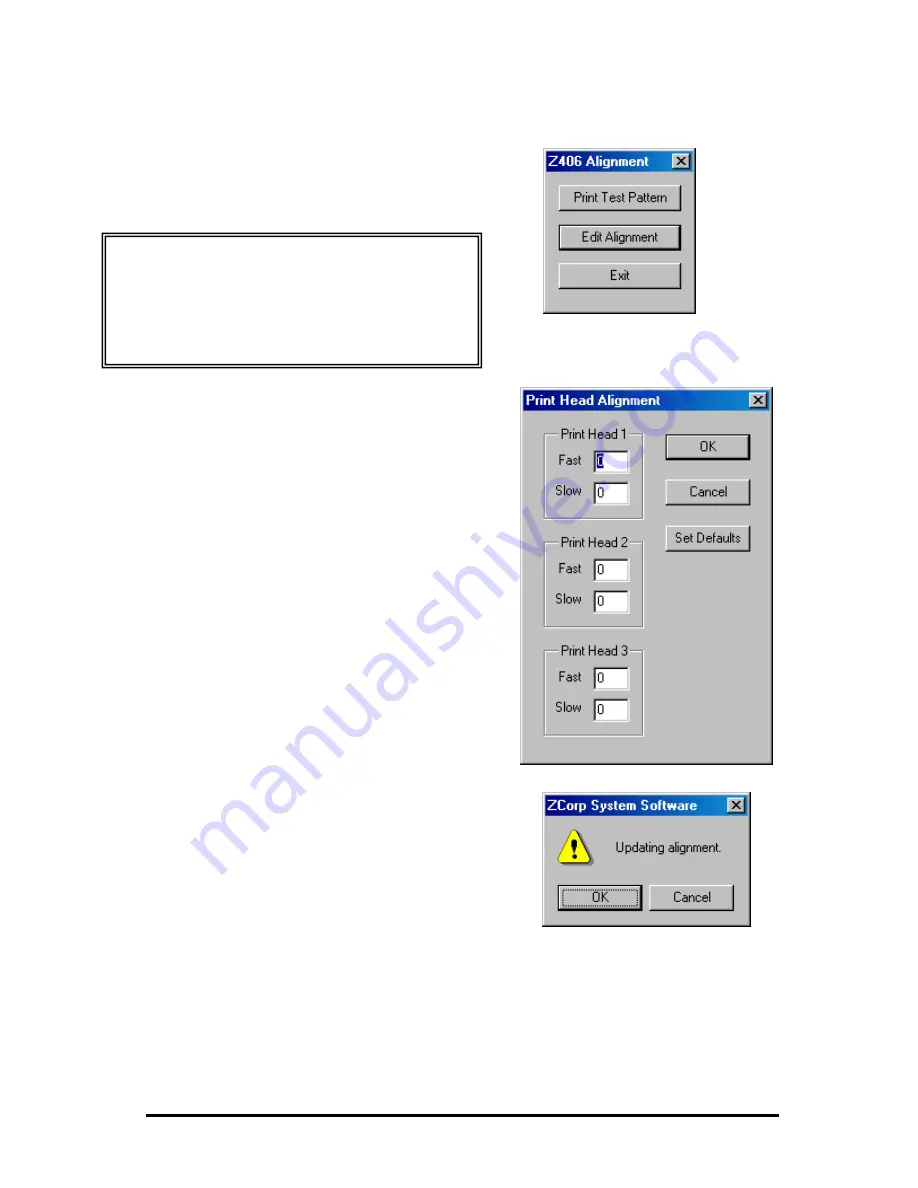
Choose ‘Edit Alignment’ in the
alignment dialog box.
11. Enter numbers for each row into the
corresponding (fast and slow axis)
boxes:
F1 – Head 1, Fast
S1 – Head 1, Slow
F2 – Head 2, Fast
S2 – Head 2, Slow
F3 – Head 3, Fast
S3 – Head 3, Slow
12. Click ‘OK’. The software will ask you to
update the INI file. Click ‘OK’ to update
the Printer’s configurations.
13. Repeat steps 2-11 on a clean sheet of
alignment paper until all alignment
reticles line up at 0.
14. Look at target drawings to confirm alignment of print heads.
Technical Tips –
If you have printed problem reticules, and are not
able to choose the best aligned pattern, choose ‘Set
Defaults’ under the Edit Alignment option and
continue alignment procedure.


