


<7. Operation>
7-1
IM 01C25F01-01E
7. Operation
7.1 Preparation for Starting
Operation
This section describes the operation procedure for
the EJ
530
as shown in figure 7.1.
NOTE
Check that the process pressure tap valves,
drain valves, and stop valves are closed.
(a) Follow the procedures below to introduce
process pressure into the impulse piping and
transmitter.
1) Open the tap valve (main valve) to fill the
impulse piping with process fluid.
2) Gradually open the stop valve to introduce
process fluid into the transmitter pressure-
detector section.
3) Confirm that there is no pressure leak in
the impulse piping, transmitter, or other
components.
(b) Turn ON power and connect the communicator.
Open the terminal box cover, and connect
the communicator to the and
– terminals.
(c) Using the communicator, confirm that the
transmitter is operating properly. Check
parameter values or change the setpoints as
necessary.
See IM 01C25T03-01E (BRAIN
communication) or IM 01C25T01-06EN (HART
communication) for communicator operation.
If the transmitter is equipped with an integral
indicator, its indication can be used to confirm
that the transmitter is operating properly.
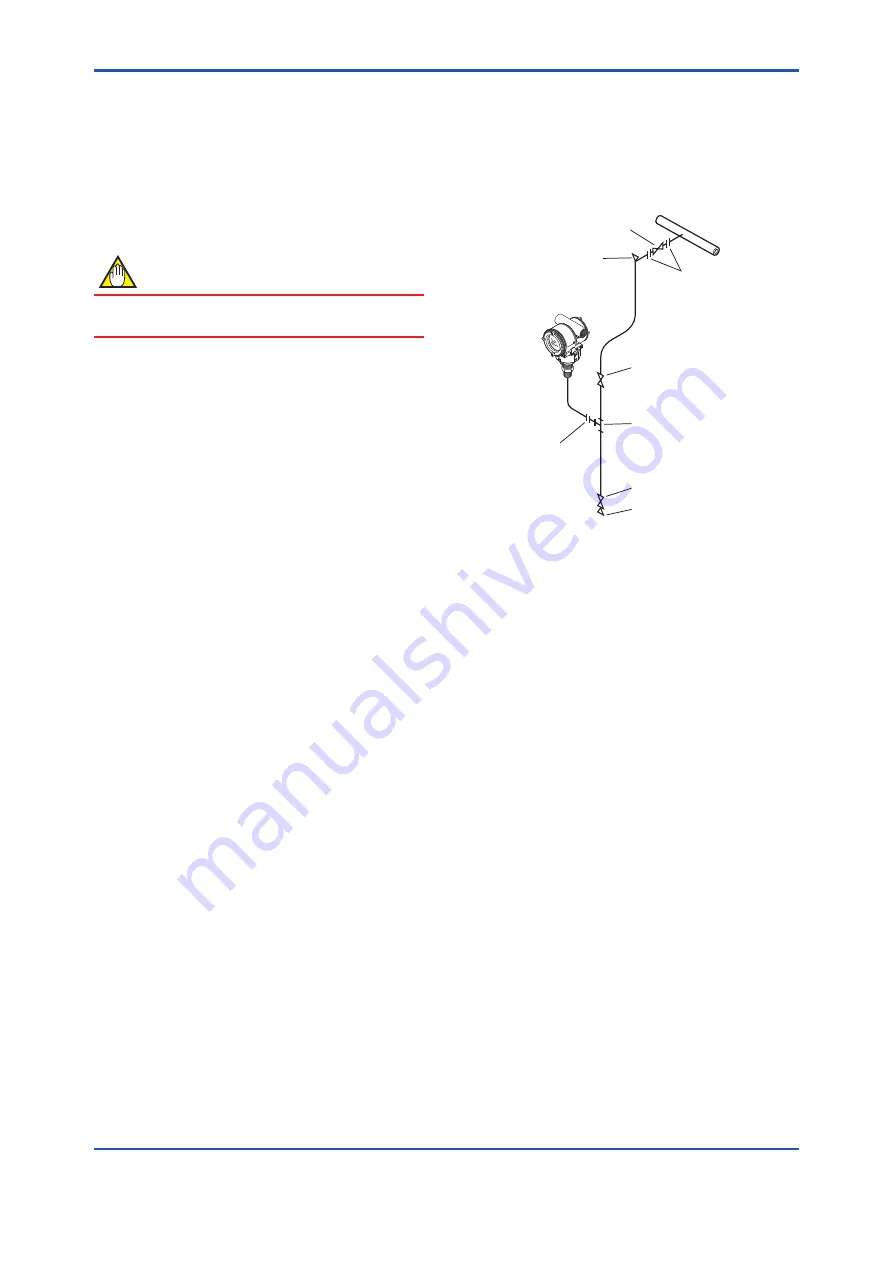
F0701.ai
Tee
Vent plug (Fill plug)
Union or flange
Drain valve
Drain plug
Stop valve
Union or flange
Tap valve
Figure 7.1
Liquid Flow Measurement
(Gauge Pressure Transmitters)


