


LUBRICATION
Repair
12/05
BY Service Manual
8-9
© 2009 Yanmar Marine International
Change Engine Oil and Replace
Engine Oil Filter Element
The engine oil on a new engine becomes
contaminated from the initial break-in of internal
parts. It is very important that the initial oil
replacement is performed as scheduled.
It is easiest and most effective to drain the engine
oil after operation while the engine is still warm.
WARNING! Burn Hazard. ALWAYS stay clear of
the hot engine oil to avoid being burned.
1. Turn engine off.
2. Remove engine cover.
3. NOTICE: NEVER use an adjustable wrench or
other open-end tool as there is a risk of
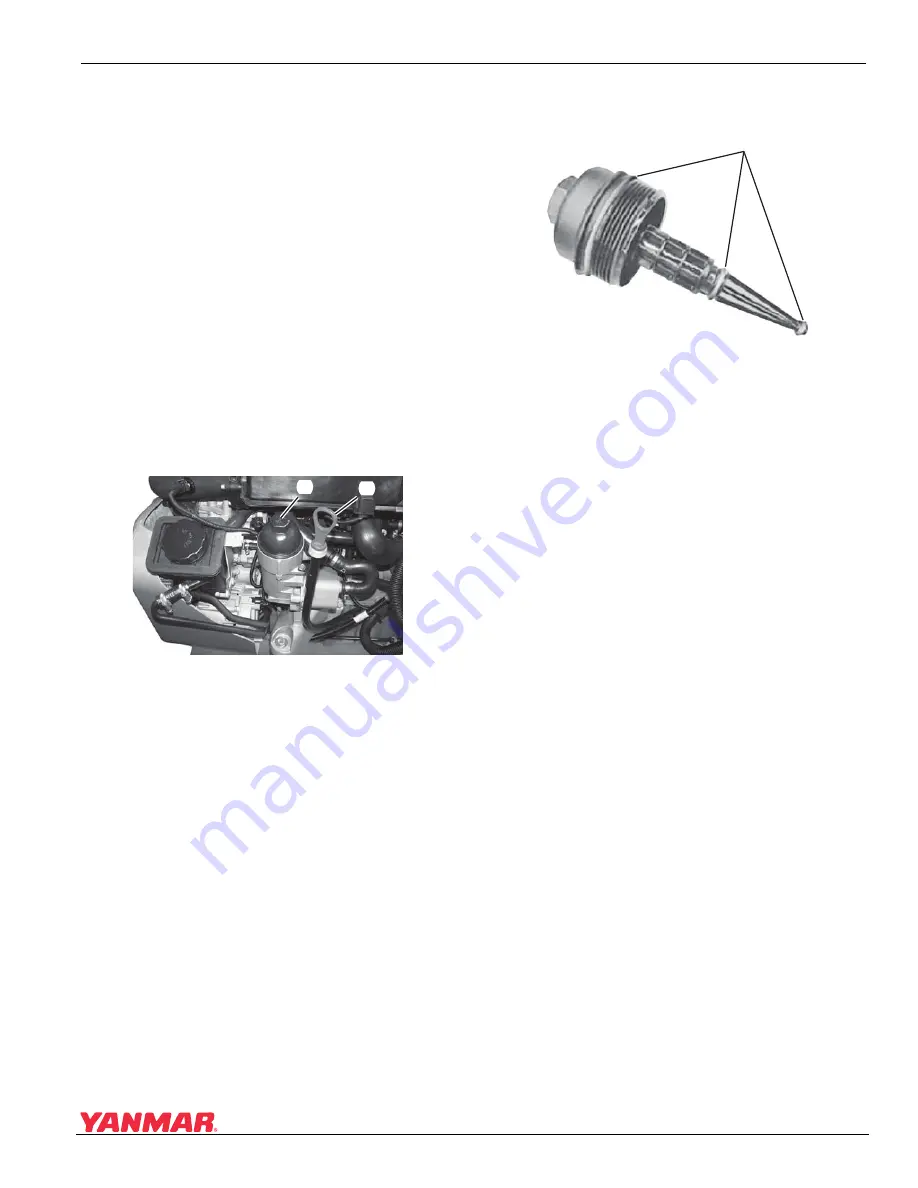
damaging the filter cover. Loosen the engine oil
filter cap (Figure 8-6, (2)) 1 - 2 turns with a
socket wrench.
Figure 8-6
Figure 8-6
4. Remove the engine oil dipstick
(Figure 8-6, (1)). Attach an oil drain pump and
pump out the oil. Dispose of waste properly.
5. Remove the engine oil filter cap (Figure
8-6, (2))and filter assembly.
6. Remove the filter element from stem.
7. Replace the three O-rings (Figure 8-7, (1)) on
the stem.
Figure 8-7
Figure 8-7
8. Install a new filter element. Ensure the filter fits
snugly in the filter cap.
9. Install the cap and filter assembly. Tighten cap
by hand until the seal touches the housing.
10. Tighten to 25 N·m (225 in.-lb).
11. Fill with new engine oil. See Engine Oil
Specifications on page 3-14. NOTICE: NEVER
overfill the engine with oil.
12. Perform a trial run and check for oil leaks.
13. Approximately 10 minutes after stopping the
engine, remove the oil dipstick and check the oil
level. Add oil if the level is too low.
Remove and Install Oil Cooler
1. NOTICE: When working on the oil, coolant or
fuel systems you must protect the alternator
from contamination. Cover alternator with
suitable materials.
Drain engine coolant. See Drain and Fill Closed
Cooling System on page 7-10.
2. Remove oil filter element. See Change Engine
Oil and Replace Engine Oil Filter Element on
page 8-9.
000
3
65
3
(1)
(2)
000
3
652
(1)