- 8 -
TF series
Quick Guide
Connect your inputs and outputs
Connect your inputs and outputs
Connect the instruments and mics.
Connect output devices such as powered speakers.
Input and output settings are ready to go when the
console is shipped, so you can start mixing as soon as
you make your connections (page 12).
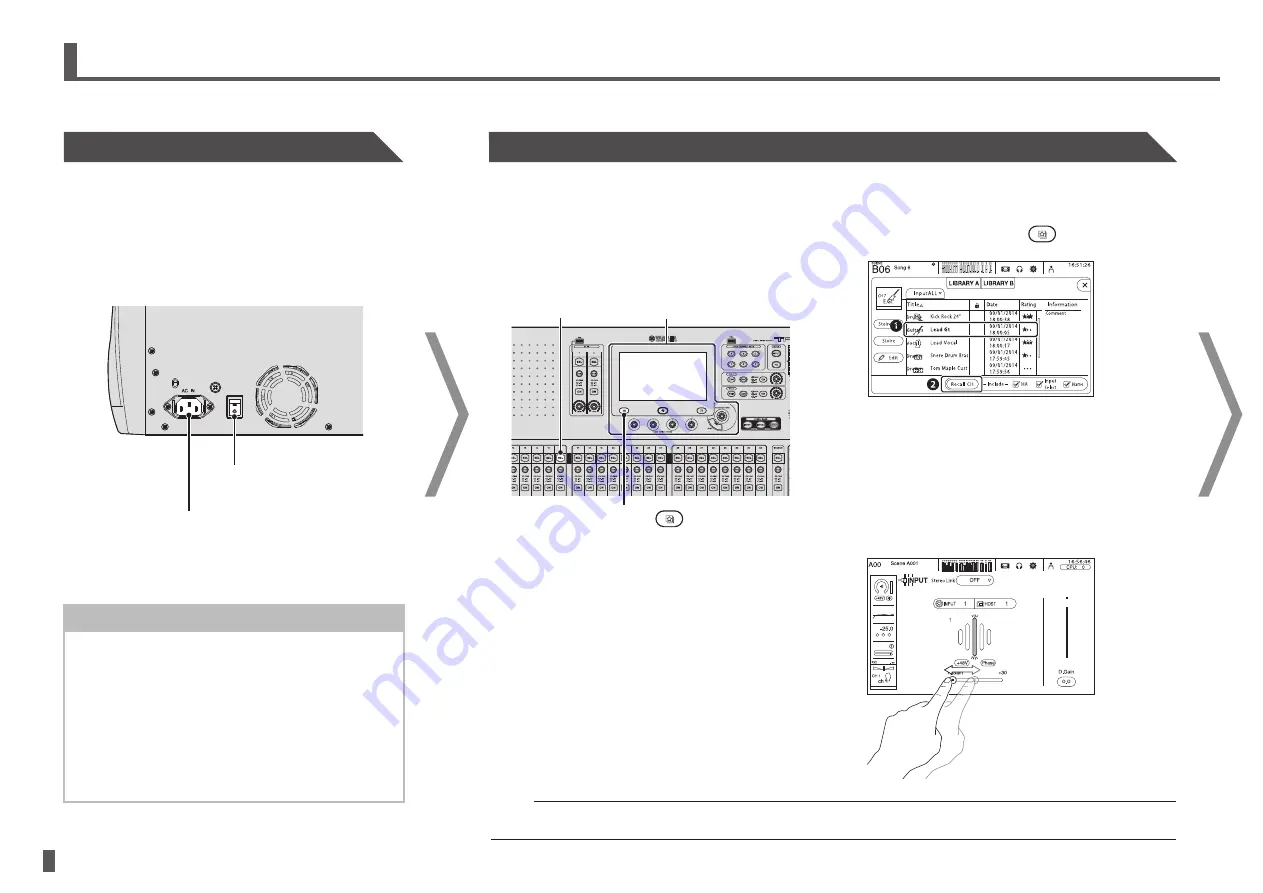
When your connections are finished, turn on the power.
NOTICE
•
Rapidly turning the unit on and off in succession
can cause it to malfunction. After turning the unit
off, wait for at least 6 seconds before turning it
on again.
•
This product regularly saves the state of its
workspace so that it can return to the previous
state when the product is turned on. To ensure
that the state is saved properly, wait at least
10 seconds after performing the last operation
before turning the product off.
Set up each channel
> Step 1
Select a channel by pressing its [SEL] key
in the Channel Strip section.
The channel's [SEL] key lights, indicating that you
can control the channel using the Display section.
> Step 2
Press the Library key (
) to access the
Library and recall a Preset.
Adjust the overall balance of the mix
After adjusting each channel, adjust the overall balance
of the mix while doing a sound check. While listening to
the main speakers, pay attention to the overall sound
quality, the balance of each instrument, the volume of
each performer's monitor, and the amount of effects
applied to each instrument.
• Adjusting SENDS ON FADER for the level sent to
AUX for each channel (page 16)
• Muting all input channels or effects (page 15)
• Turning effects on and off, adjusting the overall level
of effects (page 15)
Save your settings
You can save your entire mix setup as a Scene.
(SCENE window
g
page 18)
If several bands are performing on the same stage, or
if a single performer’s mix or audio sources vary greatly
from song to song, you can save a complete mix setup
for each band or each song as a Scene, and easily
switch between Scenes.
You can also save individual channel setups by
overwriting existing Presets or by saving them as new
Presets in the Library screen.
After fine-tuning the sound of each channel to suit each
instrument or mic, you can save them as Presets and
recreate that configuration anytime, easily.
HINT
Using USER DEFINED KEYS
When the console is in the default state, USER DEFINED KEYS
(page 15) are configured as "Direct Scene Recall" keys. You
can save a Scene by pressing and holding down one of the
USER DEFINED KEYS, and recall a Scene by pressing one of
the USER DEFINED KEYS.
> Step 3
Adjust the channel’s parameters.
Adjust the input gain, EQ, compressor, and gate
from the OVERVIEW screen and the individual
configuration screens (page 18).
Adjust the input gain on the INPUT screen so that
the loudest sound that is input causes the center
graph to light.
> Repeat steps 1 to 3 and set up each
channel.
NOTE
You can set up channels without using Presets. For details about the available features and parameters, refer to the Reference
Manual.
3. Workflow Overview
Here's a brief overview of how to start mixing using a Presets.
Power switch
AC IN connector
Connect the included
power cord.
Connect
Use Presets to Set Up Each Channel
Adjusting the input gain
Display section
[SEL] key
Library key (
)


