23
C
O
NFI
G
URA
T
IONS
English
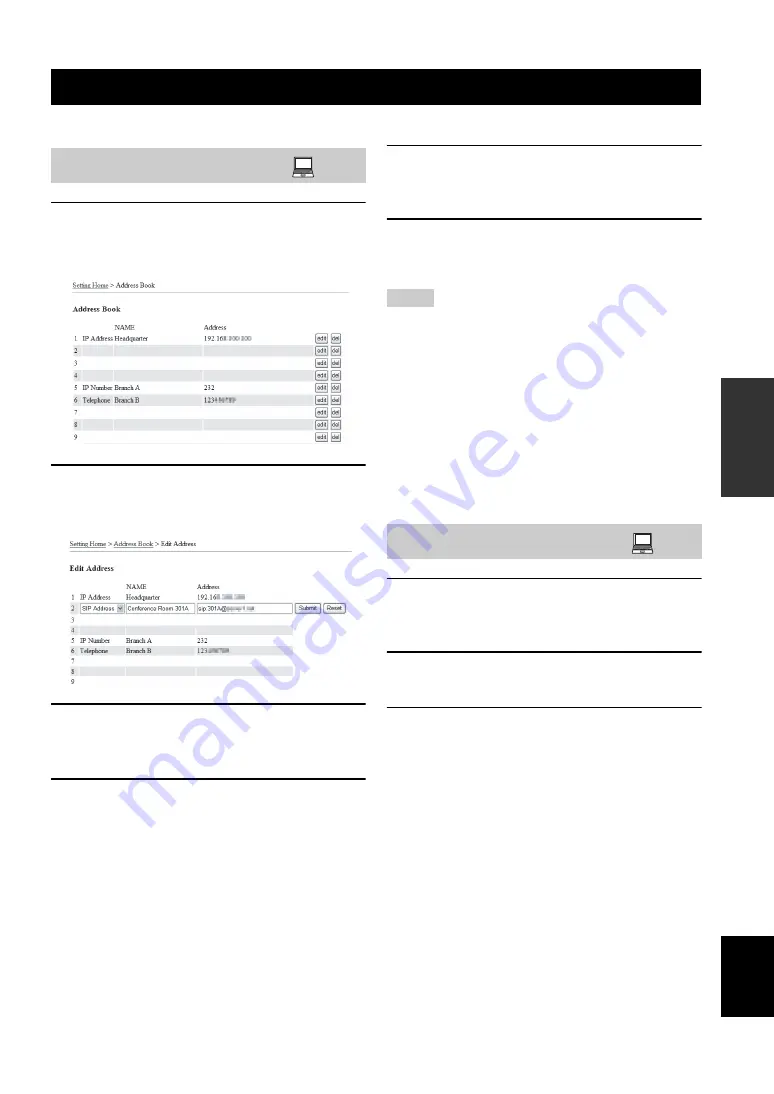
Frequently used addresses can be registered in the Address Book of each system.
1
In the Web menu, click “View/Edit Address
Book”.
The “Address Book” window appears.
2
Click “edit” for the address you want to
register.
The “Edit Address” window appears.
3
Enter the name of the destination to be
registered in the “NAME” using up to 29
alphanumeric characters.
4
Select the type of the communication
destination information to be registered.
•
SIP Address
: Select for registering SIP addresses.
•
Telephone
: Select for registering public switched
telephone numbers.
•
IP Number
: Select for registering IP extension
•
IP Address
: Select for registering IP addresses.
5
Enter the address or phone number of the
destination to be registered.
Enter the address of the type selected in step 3.
6
Click “Submit”.
The new address is registered in the address book,
and the “Address Book” window reappears.
• Do not include the prefix to the IP address, telephone numbers,
etc. you want to enter.
• The Address Book can register up to 50 addresses of
communication destinations. The 50 addresses can include up
to 16 IP addresses and up to 16 SIP addresses.
• If the destination ProjectPhone unit obtains the IP address from
a DHCP server, its IP address may change from the last call.
If your call cannot reach the destination unit registered in the
address book, check the latest IP address configured at the
destination unit.
■
To abort the registration
Click “Reset” in step 4.
1
In the Web menu, click “View/Edit Address
Book”.
The “Address Book” window appears.
2
Click “edit” for the address you want to edit.
The “Edit Address” window appears.
3
Edit the information of the selected address,
and then click “Submit”.
The updated address is registered in the address book,
and the “Address Book” window reappears.
■
To delete the information a registered
communication destination
Click “del” in step 2.
Editing the Address Book
Registering a new address
Notes
Editing an existing address


