Troubleshooting
Owner’s Manual
107
Appendix
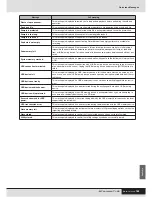
Perform the following if multiple sounds are produced by
the struck pad (i.e., if double triggers are being produced).
●
If your external pads and triggers feature output or sensitivity
controllers, reduce the output or sensitivity to a more appropri-
ate level.
●
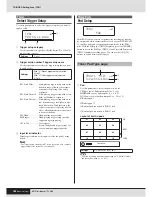
Open the Input Gain page for the pad’s trigger ([SHIFT] + [UTIL-
ITY]
→
TRG2
→
TRG2-1
→
TRG2-1-1) and ensure that the
Gain parameter is not set too high. (See page 101.)
●
Ensure that you are using only the recommended Yamaha drum
triggers or trigger sensors. Products from other manufacturers
can output excessively large signals, which in turn can result in
double triggering.
●
Ensure that the heads are not vibrating in an irregular manner,
muting them if so required.
●
Ensure that drum triggers are attached in the vicinity of the rim
and not near the center of the head.
●
Ensure that no other objects are coming into contact with the
drum trigger.
●
Open the Double Trigger Prevention page for the pad(s) in ques-
tion ([SHIFT] + [UTILITY]
→
TRG2
→
TRG2-1
→
TRG2-1-5)
and increase the setting for the RejectTime parameter. Avoid
setting too large a reject time, as this can make it impossible to
accurately detect flams, rolls, and the like. (See page 102.)
Perform the following if sounds are also produced by pads
other than the one that was struck (i.e., if crosstalk is
occurring).
●
Carry out the steps described in the section Typical Example of
Crosstalk-Prevention Setup on page 103.
●
Open the Global Crosstalk Level and Individual Crosstalk Level
pages ([SHIFT] + [UTILITY]
→
TRG2
→
TRG2-2
→
TRG2-2-1,
TRG2-2-2) and ensure that the Level parameters are set appro-
priately. (See pages 102, 103.)
●
If using a separately-sold pad featuring a level adjuster, ensure
that it is set appropriately.
●
Open the Input Level Range page for the pad(s) in question
([SHIFT] + [UTILITY]
→
TRG2
→
TRG2-1
→
TRG2-1-3) and
ensure that the lower setting for the Level parameter is set to an
appropriate value. (See page 101.)
●
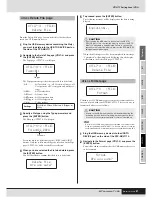
If playing by hand, open the Select Trigger Setup page ([SHIFT]
+ [UTILITY]
→
TRG1) and ensure that a suitable trigger setup is
selected for the drum kit. (See page 100.)
●
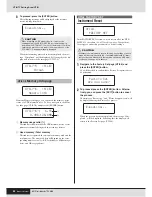
If playing with sticks, open the Pad Type page for the pad(s) in
question ([SHIFT] + [UTILITY]
→
TRG2
→
TRG2-1) and ensure
that the Type parameter is not set for playing by hand. (See
page 100.)
Perform the following if only one voice is produced even
though two pads are struck simultaneously.
●
Open the Input Gain page for the pad not producing a sound
([SHIFT] + [UTILITY]
→
TRG2
→
TRG2-1
→
TRG2-1-1) and
increase the setting for the Gain parameter. (See page 101.)
●
Open the Input Level Range page for the pad not producing a
sound ([SHIFT] + [UTILITY]
→
TRG2
→
TRG2-1
→
TRG2-1-3)
and reduce the lower setting for the Level parameter. (See page
101.)
●
Open the Alternate Group page for each of the pads ([VOICE]
→
VCE5
→
VCE5-2) and ensure that they are not assigned to
the same alternate group. (See page 60.)
●
Open the Trigger Alternate Group page for each of the pads
([MIDI]
→
MIDI1
→
MIDI1-9) and ensure that TrgAltGrp is set to
“off” for both. (See page 65.)
Perform the following checks if consistent, reliable trigger
signals cannot be produced using an acoustic drum.
●
Ensure that a high-quality drum trigger, such as the DT20, is
secured firmly in place using adhesive tape. (Remember to
remove any old tape.)
●
Carry out the checks listed above in the above section No sound
is produced by striking pads or the volume is lower than
expected.
●
Ensure that the signal cable is securely plugged into the jack on
the DT20 or other drum trigger.
Check the following if closed hi-hat sounds cannot be
played.
●
Open the Pad Type page ([SHIFT] + [UTILITY]
→
TRG2
→
TRG2-1) and ensure that a suitable type has been selected. If
you are using a Yamaha RHH130 or RHH135 hi-hat controller,
the pad type must be set to either “RHH130” or “RHH135”. (See
page 100.)
Check the following if edge and cup sounds cannot be
played or the choking technique does not work when
using a cymbal pad.
●
Open the Pad Type page for the connected cymbal pad ([SHIFT]
+ [UTILITY]
→
TRG2
→
TRG2-1) and ensure that a suitable
cymbal-pad type has been selected. (See page 100.)
Perform the following checks if hi-hat splash sounds can-
not be played.
●
Ensure that the foot controller is connected via the HI-HAT
CONTROL jack.
●
Open the Splash Sensitivity page ([UTILITY]
→
UTIL5
→
UTIL5-2) and ensure that the SplashSens parameter is set to a
suitable level. Note that hi-hat splash sounds will not be pro-
duced if “off” has been set here. (See page 89.)
Check the following if a foot switch connected via the
FOOT SW jack is not working properly.
●
You may have connected the foot switch with the DTX-MULTI 12
already turned on. Ensure that you always connect foot
switches before turning on the instrument.
●
Ensure that the Panel Lock is turned off. (See page 8.)
●
Ensure that the Cubase Remote function is turned off. (See
page 15.)
●
Ensure that the USB memory device has been correctly format-
ted. (See page 97.)
●
Ensure that the USB memory device has not been write-pro-
tected. (See page 12.)
●
Ensure that there is sufficient free space on the USB memory
device to save the data in question. To confirm how much mem-
ory is available for saving data, open the Memory Info page
([UTILITY]
→
UTIL7
→
UTIL7-6). (See page 98.)
●
If you are using USB cables, ensure that they are connected
correctly. (See page 13.)
●
Open the MIDI In/Out page ([UTILITY]
→
UTIL6
→
UTIL6-9)
and check the current setting. If you want to exchange MIDI
data with a computer via USB, ensure that the MIDI IN/OUT
parameter is set to “USB”. Alternatively, if you want to exchange
MIDI data with external devices via MIDI cables, ensure that this
parameter is set to “MIDI”. (See page 91.)
Multiple sounds are produced when a single pad is
struck.
Optional add-on products do not operate as expected.
Perform the following if nothing happens when but-
tons on the front panel are pressed.
Carry out the following checks if data cannot be
saved on a USB memory device.
Check the following if MIDI data cannot be exchanged
with a computer or external MIDI device.
Summary of Contents for DTX-MULTI
Page 1: ...Owner s Manual EN ...
Page 114: ...114 Owner s Manual MEMO ...

