Version 1.0
PartPro120 xP Operation Manual
5.
Click “Generate” after setting up all marks.
6. Adjust the contact area of the branches if necessary.
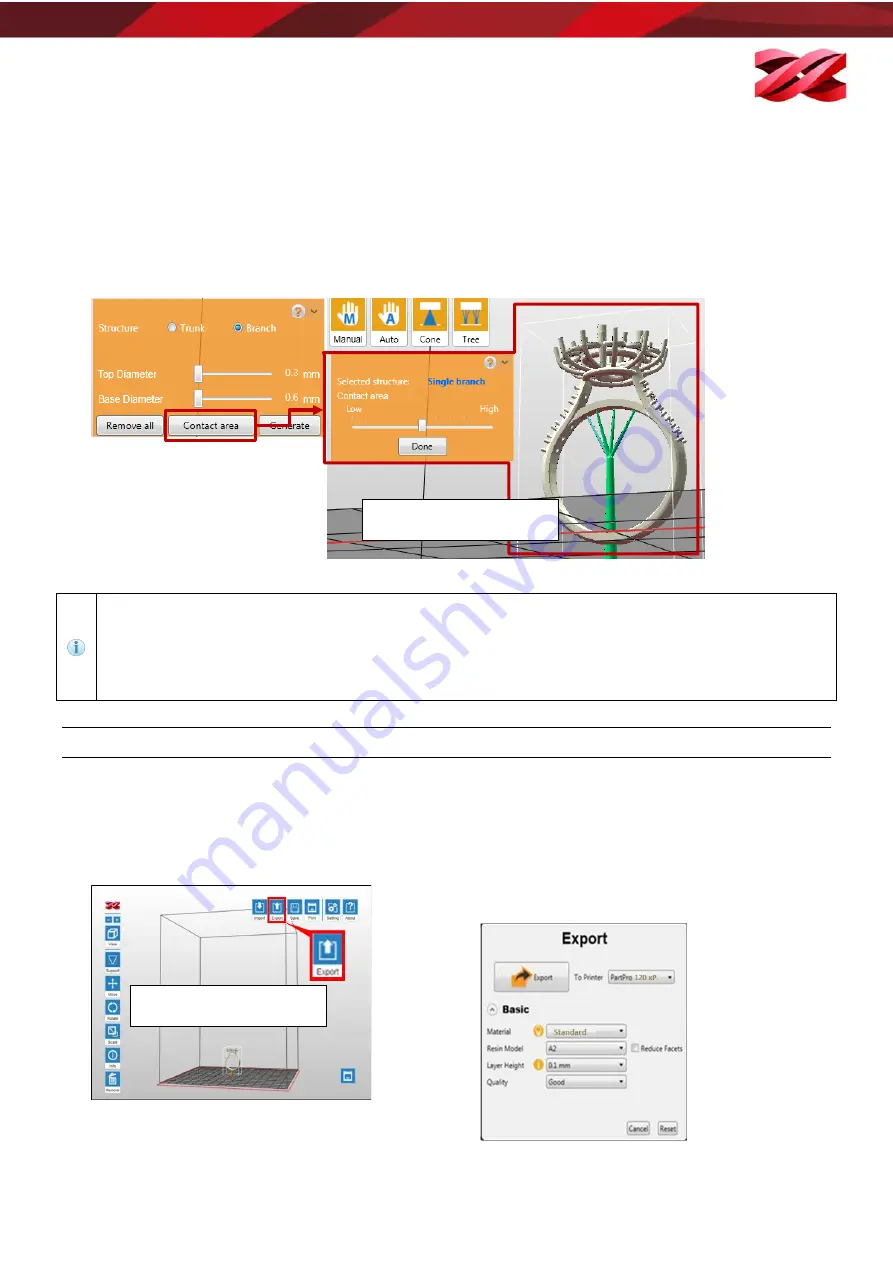
To adjust the contact area of the branches, go back to the function menu “Support” > “Tree”, and select the
button “Contact Area”.
Click on the targeted branch (selected branch will change to blue) and drag the slider to adjust the contact
area.
Click “Done” once you have adjusted the contact area of all cones.
When no trunk is selected, the branches will be shown as yellow marks. Simply click on a trunk, the
branch marks will be connected to the selected trunk.
Branch mark should be higher than the top of the selected trunk.
Branch setting is disabled when no trunk is added. Please set up trunks before adding branches.
Branches over 45 degree slope will be shown in red, as they may be displaced in the printing process.
CONVERTING TO THE PRODUCTION FILES
Exporting the files
When finishing editing the files and the supports, click on [Export] to save the model to a sliced .3wn file. Once
the file is sliced, you may skip repeating settings in the future.
To export the file:
1.
Click [Export] icon.
2.
Setup below settings based on the printing quality
required and the resin material will be used, and click
[Export] to slice the file.
Layout Will Be Changed
Function Remain The Same
Layout Will Be Changed
Function Remain The Same
37


