Multi 3410
Operation
90
ba75863y18
01/2015
Continuing with three-
point calibration
Repeat the steps 11 to 15 with the third standard solution. The new cal-
ibration values are displayed after the last calibration step was com-
pleted.
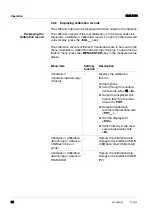
4.10.5 Calibration data
Displays the calibration
data
The calibration record of the last calibration is to be found under the
menu item,
<MENU/ENTER>
/
Calibration
/ /
Calibration record
. To
open it, press the
<CAL
_
>
key in the measured value display.
The calibration records of the last 10 calibrations are to be found in the
menu,
Calibration
/
Calibration data storage
/
Display
. To open the
Cal-
ibration
menu, press the
<MENU/ENTER>
key in the measured value
display.
12
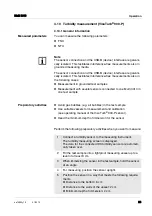
Immerse the turbidity sensor in the test sample at an angle.
13
Position the turbidity sensor in the measuring vessel (see sec-
tion 4.10.1).
14
Use
<
> <
>
and
<
><
>
to set the concentration of the
standard solution for each digit and confirm with
<MENU/
ENTER>
.
The standard solution is measured.
The measured value is checked for stability (AutoRead).
15
Wait for the end of the AutoRead measurement.
The calibration display for the next standard solution appears.
16
If necessary, terminate the calibration as a two-point calibration
with
<M>
.
The new calibration values are displayed.
or
Continue with three-point calibration.
15.09.2014 08:00
1010.0 FNU
Standard
3
Cal
Summary of Contents for wtw Multi 3410
Page 1: ...OPERATING MANUAL ba75863e18 01 2015 Multi 3410 DIGITAL METER FOR DIGITAL IDS SENSORS...
Page 6: ...Multi 3410 6 ba75863y18 01 2015...
Page 14: ...Multi 3410 Overview 14 ba75863y18 01 2015...
Page 18: ...Multi 3410 Safety 18 ba75863y18 01 2015...
Page 106: ...Multi 3410 Operation 106 ba75863y18 01 2015...
Page 116: ...Multi 3410 What to do if 116 ba75863y18 01 2015...
Page 125: ......


