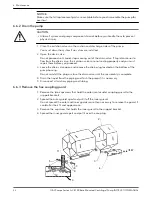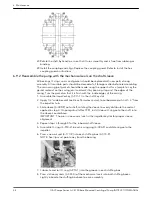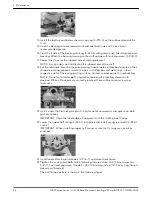
7. Remove the snap ring (3–915–4) (or locknut and lockwasher on pumps built after 1991)
from the outboard end of the shaft and, using a puller, remove the bearing (3–026–4)
from the shaft. Remove the drive end bearing in the same manner.
Snap ring is not used on drive end bearings.
IMPORTANT: Do not reuse the ball bearings.
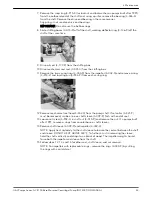
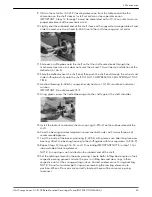
8. Slide stuffing boxes (3–073–9) off of the shaft, working deflector ring (3–136–9) off the
shaft at the same time.
9. Drive oil seal (3–177–9) from the stuffing box.
10.Drive mechanical seal seat (3–401–0) from the stuffing box.
11.Remove the two casing rings (3–003–9) from the impeller (4–002–0) and remove o-ring
(3–914–2) and locating pin (3–943–9) from each casing ring.
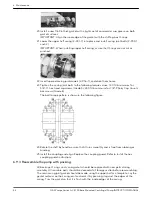
12.Remove mechanical seal head 3–402–0) from the pump shaft. If set collar (3–421–9)
must be removed, scribe a line on shaft sleeve (3–009–9) flush with end of seal.
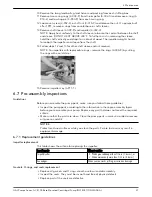
13.Loosen set screw (3–902–3) in shaft nut (3–015–9) and remove the nut. On pumps built
after 1991, remove o-rings from counterbore in shaft sleeves.
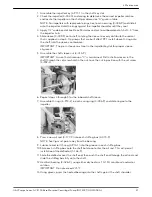
14.Remove shaft sleeve (3–009–9) and impeller (4–002–0).
NOTE: Apply heat uniformly to the shaft sleeve to loosen the sealant between the shaft
and sleeve. DO NOT HEAT ABOVE 300°F. To further assist in removing the sleeve,
hold the shaft vertically and drop it on a block of wood. The impeller weight should
force both the impeller and sleeve from the shaft.
15.Follow steps 12, 13, and 14 for other seal, shaft sleeve, and nut removal.
NOTE: For impellers with replaceable rings — remove the rings (4–004–9) by cutting
the rings with a cold chisel.
6 Maintenance
G&L Pumps Series A-C 8100 Base Mounted Centrifugal Pump INSTRUCTION MANUAL
35

