


5
2.3 Remote Controller
Chapter 3 XHRDVR Connection
3.1 HDD Installation
(1) Make sure your XHRDVR is not powered, now you can remove the screws on both sides of the
XHRDVR and the rear panel. Slide the cover away from the front panel and lift off.
(2) Within the XHRDVR original box you will have the SATA cables for data and a Molex cable for
power, connect these to the main board. Install the HDD(s) and screw it down using the provided
screws. Once secure please connect the cables to the back of the HDD.
(3) You can now place the cover back on, please take care to put all screws back into the holes
they came from.
3.2 Camera and Monitor Connection
The XHRDVR video output signals are transmitted to VGA monitor or HDMI monitor by VGA
or HDMI cable.
3.3 Power Supply Connection
Please use only the supplied power adapter to connect to the XHRDVR. Please refer to table
showing rear connections above.
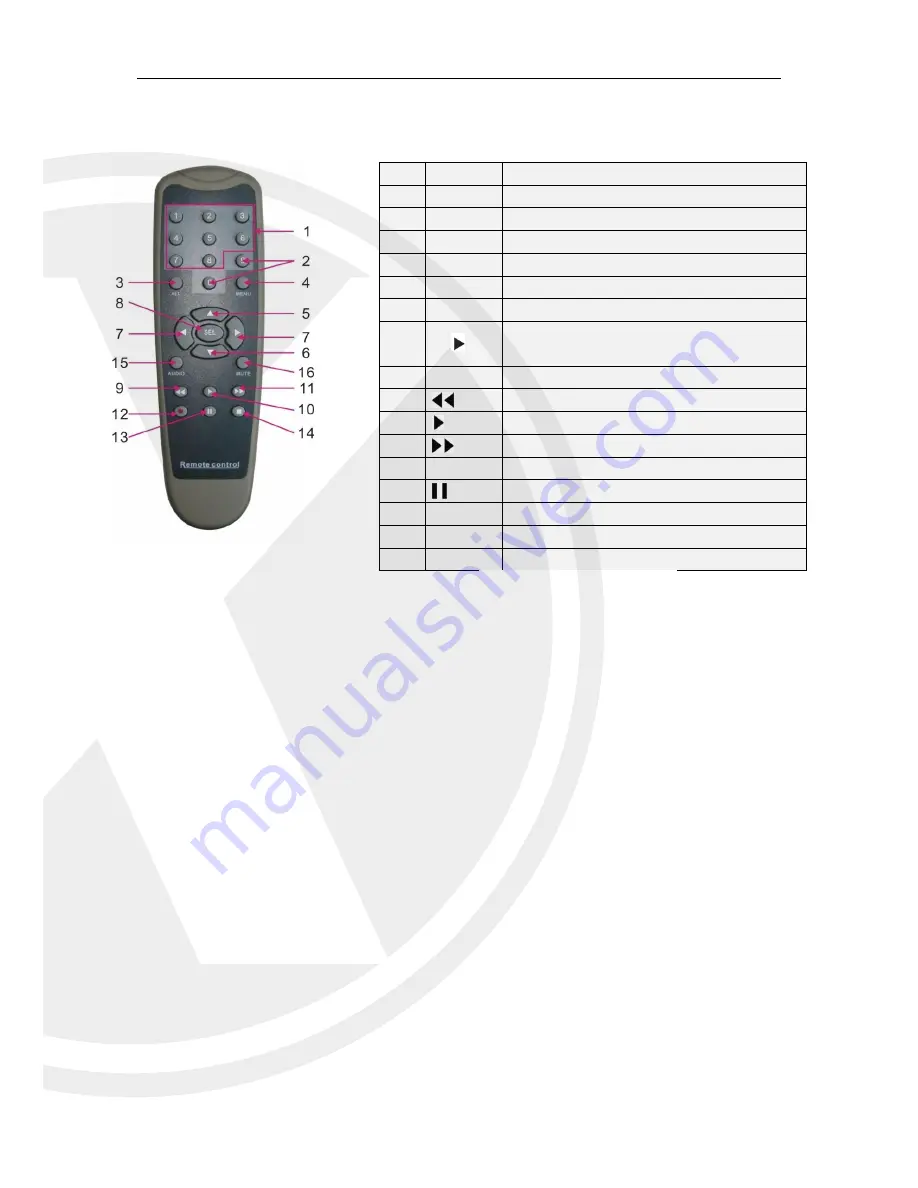
SN
Buttons
Functions
1
1-8
Channel1-8; Numerical key
2
9
、
0
Numerical key
3
ALL
Multi-channel display
4
Menu
Enter into main menu/Return
5
▲
Move up; Volume adjustment
6
▼
Move down; Volume adjustment
7
◄/
Move left/right; Decrease/increase
parameter value on the control bar
8
SEL
Select/Edit; Confirm the selection
9
Fast backward
10
Enter into Record Search menu; Play
11
Fast forward
12
●
Record key
13
Pause/Sequence key
14
■
Stop manual recording; Stop playing
15
Audio
Testing
16
Mute
Mute on/off


