holes. Replace the two screws and tighten all four screws. Check for freedom
of movement.
Initial Setting:
Rear anti-squat: 3° rear anti-squat (holes 3 and 1)
R
Re
ea
arr R
Ro
ollll C
Ce
en
ntte
err
You can alter the car’s rear roll center by moving the rear lower suspension
holders to both upper positions (upper holes 3 and 4 = 0° anti-squat).
WHEELBASE
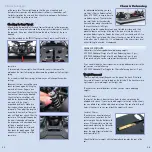
The wheelbase can be adjusted in a 9mm range. This feature enables you
to adjust the car for all conditions: asphalt or carpet, fast or technical. The
wheelbase is very easy to adjust using removable adjustment clips on the
rear lower pivot pins.
•• SShhoorrtteerr w
whheeeellbbaassee:: More aggressive, better turning. Rear traction is
increased by placing more weight behind the rear arms. Shorter
wheelbases are better on carpet tracks.
•• LLoonnggeerr w
whheeeellbbaassee:: More stable, but rear traction is reduced. Longer
wheelbases are better on smooth, fast tracks especially asphalt tracks
with long corners.
The initial setup of the T1R uses non-removable shims to adjust the
wheelbase to 258mm, which is optimum for most track conditions.
If you want to adjust the wheelbase, remove the original shims on the rear
lower pivot pins, and replace them with replaceable adjustment clips.
To remove the original shims, remove the rear lower hinge pins, remove the
shims, then reinstall the rear lower hinge pins. After the rear lower arms are
again in place, snap the adjustment clips onto the pivot pins. Make sure you
put the proper clips in front of and behind the rear lower arm. We
recommend using only the 2, 3, and 4mm clips. You can also use the 1mm
clips, but keep in mind that the sum of all clips used must always total 9mm.
••
LLeessss ssppaacceerrss iinn ffrroonntt ooff rreeaarr aarrm
m:: Shorter wheelbase.
••
M
Moorree ssppaacceerrss iinn ffrroonntt ooff tthhee rreeaarr aarrm
m:: Longer wheelbase.
Hint: Use the Hudy Caster Clip Remover (#10 7610) for easy adjustments.
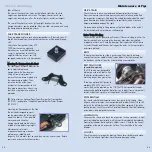
No clips = 3° rear toe-in
1mm clip = 2° rear toe-in
2mm clip = 1° rear toe-in
If you want to change the rear
toe-in by 0.5°, use a 0.5mm shim.
Never use more than 3.0° or less than 1.0° (except maybe when using foam
tires on carpet).
REAR ANTI-SQUAT
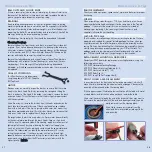
Rear anti-squat refers to the angle at
which the rear suspension is
mounted in relation to horizontal
when looked at from the side of the
car.
There are two possibilities for rear
anti-squat:
•• 00°° aannttii--ssqquuaatt ((lloow
weerr hhoolleess 22 aanndd 11))::
Improves acceleration in bumpy conditions, and gives more lateral grip
(side bite) on-power and while braking. The car will be easier to drive in
low-grip conditions, and the rear end will slide more easily.
•• 33°° aannttii--ssqquuaatt ((hhoolleess 33 aanndd 11)):: Provides good rear traction, makes the rear
end more sensitive to throttle input. The car will have more steering while
braking, and slightly more steering when powering out of corners.
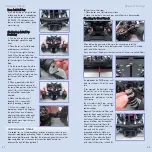
Rear anti-squat is very easy to adjust. Loosen the four screws that mount the
rear lower suspension pin holders to the rear bulkheads. Then remove the
two screws that hold the FRONT pair of lower suspension holders, and pivot
the front of the lower arms up or down to align with the upper or lower front
28
27
INSERT
CLIP
WHEELBASE
Chassis Setup
3° ANTI SQUAT
0° ANTI SQUAT
Chassis Setup
1
2
3
4
1mm
2mm
3mm
4mm
Summary of Contents for T1R Raycer
Page 1: ......


