


F
Frro
on
ntt D
Do
ow
wn
nsstto
op
pss
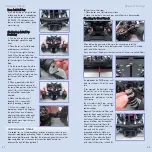
Using the #10 7712 measuring
gauge, measure the distance from
the reference surface to the bottom
screws of the C-hub block (which
pivots the steering blocks). Positive
numbers indicate the distance (in
mm) ABOVE the level of the support
blocks (or, above the bottom of the
chassis). Negative numbers indicate
the distance (in mm) BELOW the
level of the support blocks (or, below
the bottom of the chassis).
Adjust the front downstop screws so
the bottom screws of the C-hub block
(which pivots the steering blocks) are
at the recommended setting on the
gauge.
Initial Setting:
3mm on gauge. (Actual
measurement = 3mm above
the level of support blocks).
Downstop settings depend on track
condition. The above setting was for
smaller tires (approx. 63 mm) and a
smooth track.
R
Re
ea
arr D
Do
ow
wn
nsstto
op
pss
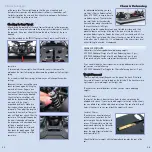
Using the #10 7712 measuring
gauge, measure the distance from
the reference surface to the bottoms
of the rear uprights. Positive
numbers indicate the distance (in
mm) ABOVE the level of the support
blocks (or, above the bottom of the
chassis). Negative numbers indicate
the distance (in mm) BELOW the
level of the support blocks (or,
below the bottom of the chassis).
Adjust the rear downstop screws so
the bottoms of the rear uprights are
at the recommended setting on the
gauge.
Initial Setting:
3mm on gauge. (Actual
measurement = 3mm above
the level of support blocks).
There are numerous ways to adjust a rear wing to achieve different
handling characteristics and downforce. For example, you can mount a
wing higher or further back on the body to create more rear downforce.
Some wings even allow you to change their angle, or use different canards
(side plates). Most bodies typically come with a rear wing, and some
aftermarket wings are available which allow even more adjustments.
Experiment with bodies that have different frontal areas and different wing
shapes to find the one that works best for you. Like most other tuning
parameters, body style is also a compromise. Experiment to find out what
bodies work best at your track.
TRACK-WIDTH
Front track-width affects the car's understeer and steering response.
The T1R has a fixed track-width of 189mm that is optimal
for all racing conditions.
DOWNSTOPS
Downstops limit how far the suspension arms travel downward, which
determines how far upwards the chassis rises. The amount of downward
suspension travel affects the car's handling, as it directly impacts the weight
transfer of the chassis. Restricting upward chassis travel (more downstop)
reduces the weight transfer of the chassis, making the car more stable.
Allowing more upward chassis travel (less downstop) increases the weight
transfer of the chassis, making the car more responsive but less stable; it is
also better on a bumpy track. The effect may change with the type of track
and/or amount of grip available. It is very important to adjust the
downstops so the left and right sides are equal. Downstops are checked
with the chassis elevated above a reference surface.
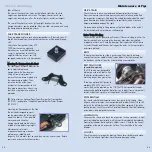
Hint: Use Hudy Set-up Board and Droop Gauge Tool.
Perform these initial steps:
1. Remove the wheels from the car. Disconnect anti-roll bars if mounted.
2. Place the #10 7702 support blocks on the reference surface, then place
the chassis on the elevating blocks.
Final Adjustments
Chassis Setup
17
Chassis Setup
18
Summary of Contents for T1R Raycer
Page 1: ......


