6
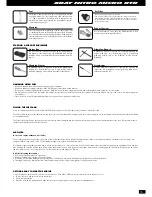
Air Filter
Fuel Inlet
Main Needle Valve
Idle Speed Screw
Flywheel
Clutch Bell
Crankshaft
Crankcase
Low-speed Needle
Throttle
Head (Cylinder Head)
Glowplug
Air Intake
This section illustrates the parts of the NT18 engine, and also describes fuel, glowplug, and air filter that you will use in the operation of this nitro-powered engine.
MICRO NITRO TRUCK QUICK START CHECKLIST
1.
Read & understand all manuals & precautions
page 2
2.
Charge the battery packs
page 6
3.
Install the antenna
page 7
4.
Decorate the body with decals
page 7
5.
Fill shock absorbers with oil and install
page 8
6.
Install the transmitter batteries
page 9
7.
Check radio system & truck operation
page 10
8.
Check the radio range
page 13
9.
Install the starterbox battery
page 13
10. Check starterbox operation
page 13
11. Fill the fuel tank
page 15
12. Start the engine
page 16
13. Break in the engine
page 17
14. Adjust the engine
page 17
15. Break in the ball differentials
page 19
15. Drive your truck!
page 20
16. Make
adjustments
page
20
17. Maintaining the micro nitro truck
page 23
18. Tune up and personalize your truck
page 24
19. Troubleshooting
page
25
CHARGING BATTERIES
Before operating your micro nitro truck for the fi rst time, you need to properly charge the receiver battery pack and the starterbox battery pack.
USE THE PROPER BATTERY CHARGER
We strongly recommend using a high-quality peak-detection charger with automatic shut-off. The charger should be specifi cally designed for charging NiMH batteries used
in the receiver pack and starterbox battery pack. Charge each pack at its recommended rate, and do not overcharge or damage or injury may result. Carefully follow the
manufacturer’s instructions that accompany the battery charger.
INITIAL CHARGING & CYCLING THE BATTERY PACKS
The receiver battery pack and starterbox battery pack must be cycled before fi rst-time use. When cycling the receiver battery pack for the fi rst time, carefully follow these instructions:
1. Set the charge current to 110 mA (0.11A).
2. Charge each battery pack for 14-16 hours. During charging it may happen that the charger will stop charging while the battery pack is not fully charged. In such case you
can continue charging until the battery pack is fully charged. This may happen one or more times during charging and this issue is related to the type of charger or type of
charging used.
3. After 14-16 hours disconnect the battery pack, even if the charger is still charging it.
4. Let the battery pack rest for 1 day.
5. After 1 day discharge the battery pack. Set the discharger to a 1.1A discharge rate, and set the discharge cut-off voltage to 4.5V for the pack (0.9V per cell).
6. Let the battery pack rest for 6 hours.
Your battery packs have now been cycled and you can use them safely.
RAPID CHARGING
After you have initially charged and run the receiver and starterbox battery packs, you can rapid charge the packs afterwards.
Using a peak-detection charger, set each battery pack to charge at the proper rate (1.0A for receiver pack, X.XA for starterbox battery pack). Do not use higher charge currents;
rapid charging is done at a higher current, so the battery pack may generate too much heat and explode or vent. Never leave the battery pack unattended while it is charging. If
the battery pack becomes too hot (113°F or higher), stop charging immediately.
DISCHARGING AND STORAGE
After use, we DO NOT RECOMMEND discharging the packs completely, as this will damage the packs. You can safely recharge the packs immediately after use without any
performance degradation. If you will be storing the packs for longer than a month, partially discharge the pack down to approximately 40% capacity.
Summary of Contents for Nitro Micro NT18MT
Page 1: ...M I C R O...


