E-mail Procedure
Xerox WorkCentre 3550
User Guide
77
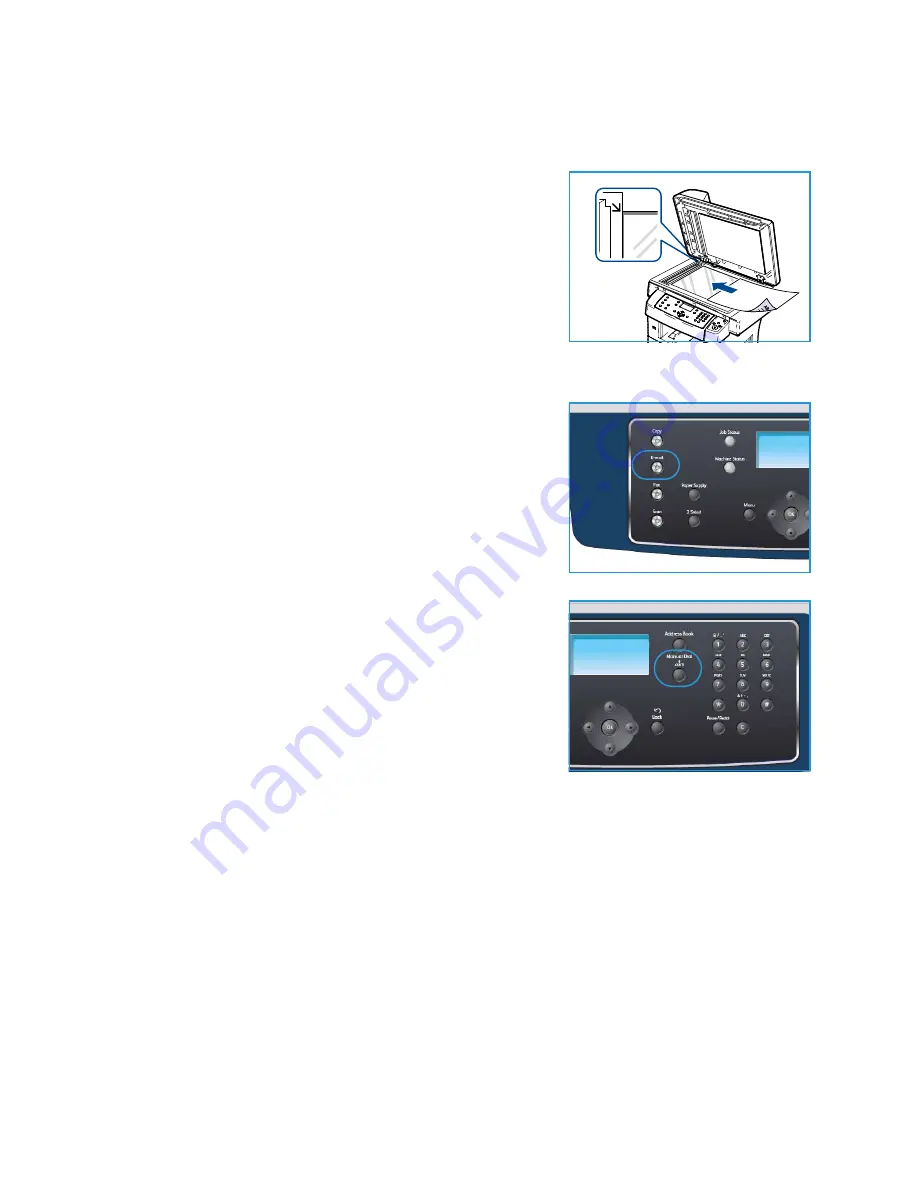
Document Glass:
The following steps explain how to load documents using the
document glass
:
1.
Raise the
document feeder
.
2.
Place the document face down on the
document glass
,
aligned with the tip of the registration arrow near the top left
of the
document glass
.
The default document size is 8.5 x 11” or A4. For other sized
documents change the
Original Size
option. Refer to
Options
on page 80 for further information.
3.
Lower the
document feeder
.
Enter the E-mail Address
1.
Press the
button on the control panel.
If Authentication is enabled, enter your
Login ID
and
Password
(if required).
2.
When
Enter From Address:
appears, enter the sender’s e-
mail address and press
OK
.
If
Send to Myself?
appears, press the left/right arrows to
highlight
Yes
or
No
and press
OK
.
3.
When
Enter Destination Addresses:
appears, enter the
recipient’s e-mail address and press
OK
.
•
Use the
.com
button to add commonly used address
text to the e-mail address, for example
.com
or
@yourdomainname.com
. Press the
.com
key repeatedly
until the text required is displayed and press
OK
. The
text is added to address. The
Smart Key
text can be
customized using CentreWare Internet Services, refer to
Smart Key Addresses
on page 84 for instructions.
•
E-mail addresses can also be added using the
Address
Book
, refer to
Address Book
on page 82 for instructions.
•
Press the down arrow and enter additional e-mail addresses if required and press
OK
.
4.
If
File Format
appears, highlight the file format required and press
OK
.
5.
Enter an e-mail subject and press
OK
.
6.
When
Ready to E-mail
appears you can add or edit the recipient list, press
Menu
to select
additional features or press
Start
to scan your originals.
•
To add additional recipients, highlight
Add Another Address
and enter the address required.
•
To edit or delete recipients, use the up/down arrows to highlight the address requiring editing
or deleting and press
OK
. Use the left arrow key to delete characters and then edit the
address. To delete the address, press the down arrow key to highlight
Delete
and select
OK
.
Summary of Contents for WorkCentre 3550
Page 1: ...V1 0 April 2010 Xerox WorkCentre 3550 User Guide ...
Page 6: ...Xerox WorkCentre 3550 User Guide 6 ...
Page 36: ...Media Output Locations Xerox WorkCentre 3550 User Guide 36 ...
Page 58: ...Receiving Faxes Xerox WorkCentre 3550 User Guide 58 ...
Page 116: ...Support Xerox WorkCentre 3550 User Guide 116 ...
Page 126: ...Media Specifications Xerox WorkCentre 3550 User Guide 126 ...
Page 198: ...Feature Specifications Xerox WorkCentre 3550 User Guide 198 ...


