


SAFEStor User Guide
Page 25
2.
Using the check boxes, select the Volume Set that you wish to modify then click
Submit. The attributes for the selected Volume Set are displayed.
3.
This screen has the following attributes that can be modified:
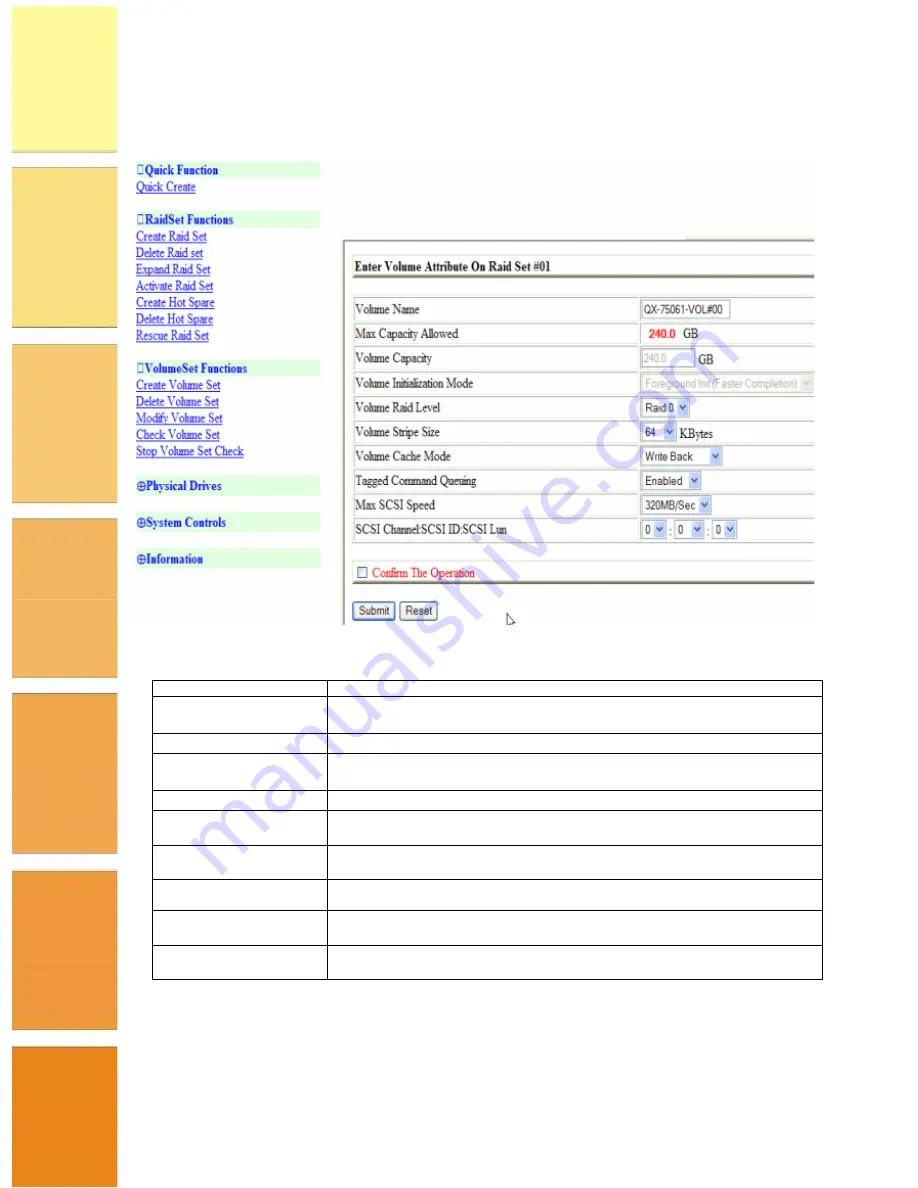
Volume Name
Enter a name for the Volume Set
Max Capacity
Allowed
The maximum capacity allowed for the Volume Set. This value will vary
depending on the number of disks available and the RAID Set selected.
Volume Capacity
Enter the Volume in Gigabytes that you wish to assign to the Volume Set.
Volume Initialization
Mode
Select the Initialization Mode to be applied to the Volume Set. You can
choose between Foreground (fastest) and Background (slowest).
Volume RAID Level
Select the RAID Level to apply to the Volume Set from the drop down list.
Volume Stripe Size
Select the Stripe Size to be applied to the Volume Set from the drop
down list.
Volume Cache Mode
Select the Cache Mode to be applied to the Volume Set from the drop
down box
Tagged Command
Queuing
Select whether you want Tagged Command Queuing enabled or disabled.
Max SCSI Speed
Select the maximum SCSI speed that is to apply to the Volume Set from
the drop down list.
SCSI Channel:SCSI
ID:SCSI Lun
Using the drop down lists, select the SCSI Channel, SCSI ID and SCSI
Lun to be assigned to the Volume Set.
4.
When you have made the modifications to the Volume Set attributes, check the
Confirm The Operation check box and then click Submit. The changes are applied to the
Volume Set.
Check Volume Set


