background image

Specialty Printing

Phaser® 6200 Color Laser Printer

18

Envelopes

Guidelines for envelope printing

Envelopes can only be printed from the Multi-Purpose Tray.

Use only paper envelopes.

Do not print on the back of the envelope.

Keep unused envelopes in their packaging to avoid the effects of moisture and dryness, 
which can affect print quality and cause wrinkling. Excessive moisture causes the envelopes 
to seal before or during printing.

Many applications include a tool for creating an envelope document. For example, Microsoft 
Word includes an 

Envelopes and Labels

 feature in the 

Tools

 menu. Be sure to:

Select 

facedown

.

Select the feed method with the image centered.

Clear 

Clockwise Rotation

.

Load a maximum of 10 envelopes at a time. This printer is not designed to handle 
high-capacity production envelope printing.

Envelopes may wrinkle depending on the weight and stiffness of the envelope. Envelopes 
with short flaps work best; longer flaps are more likely to wrinkle.

Caution

Never use envelopes with windows or metal clasps; they can damage the printer. Damage 
caused by using unsupported envelopes is not covered by your printer’s warranty.
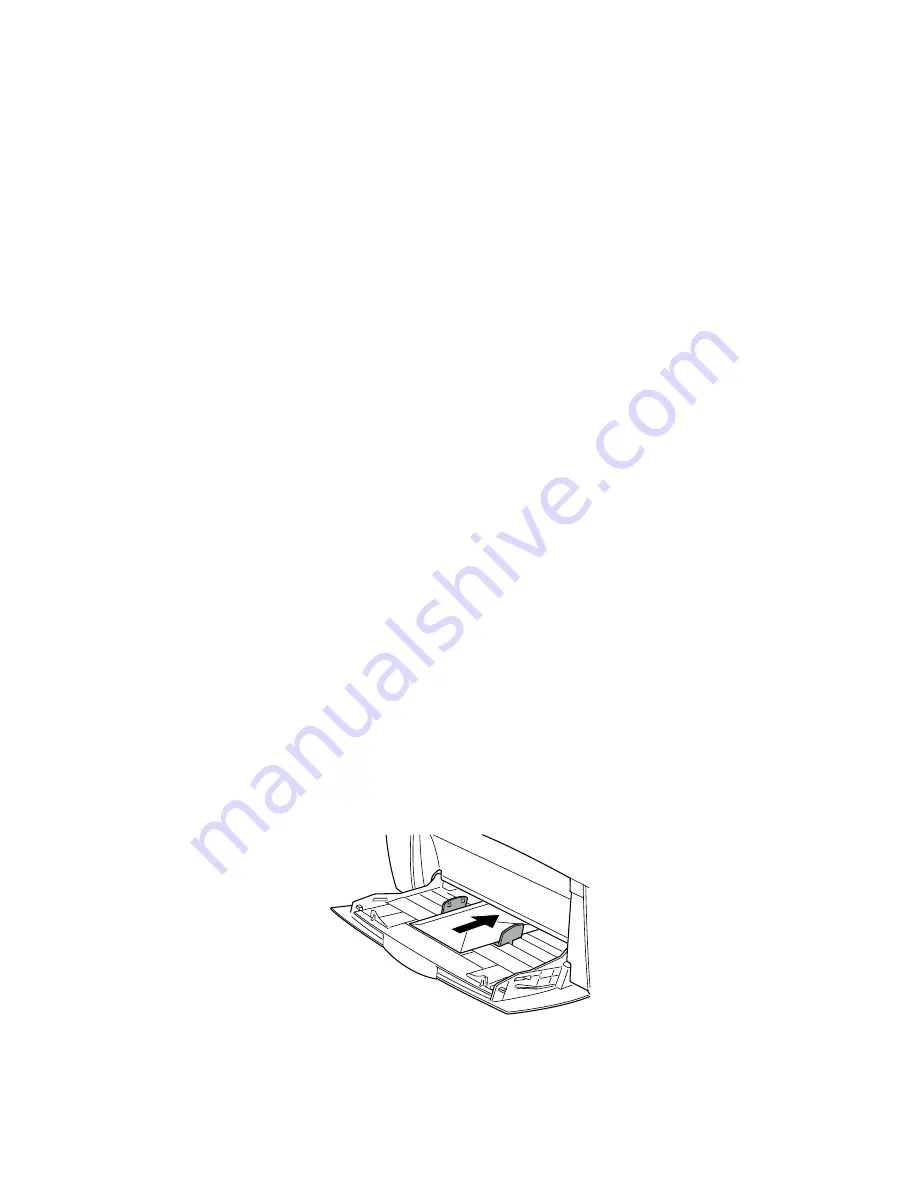
Printing envelopes

1. 

Insert the envelopes short-edge feed into the Multi-Purpose Tray. For more information, refer to 
the 

Trays

 section of the 

Trays and Paper Guide

 on the 

Interactive Documentation CD-ROM

.

Place envelopes with the 

flap side up

 and 

top

 of the envelope towards the right of the printer. 

(For A7 envelopes, place the 

flap side up

 but have the 

top

 of the envelope enter the printer 

first

.)

Maximum capacity is 10


envelopes.

6200-10

Summary of Contents for Phaser 6200N

Page 1: ...rinter will NOT do automatic 2 sided printing on paper loaded in the Multi Purpose Tray Any supported paper size that is supported in the tray can be duplexed Any supported paper type Plain Paper Heav...

Page 2: ...wn with the top of the page at the back of the tray If using paper with pre punched holes place the holes toward the right side of the tray 2 In the printer driver Select the tray containing the paper...

Page 3: ...vy toner coverage on side 1 of a manual 2 sided print Increase the top margin on side 1 to at least 12 mm 0 48 in Print quality may be degraded on the second side of manual 2 sided prints Setting the...

Page 4: ...the page at the front of the tray 2 In the printer driver select the tray containing the paper 3 Send the job to the printer so that the odd numbered pages side 1 are printed Printing side 2 1 Insert...

Page 5: ...of the page entering the printer first 2 In the printer driver select the Multi Purpose Tray as the paper source 3 Send the job to the printer so that the odd numbered pages side 1 are printed Printi...

Page 6: ...an 7 x 10exp11 ohm square Any overhead transparency materials used with this printer must be compatible with the heat and pressure of the oil less fusing process The materials must not discolor melt o...

Page 7: ...gether 2 Insert the transparencies into the tray For more information refer to the Trays section of the Trays and Paper Guide on the Interactive Documentation CD ROM 3 Do not load transparencies above...

Page 8: ...ction of the Trays and Paper Guide on the Interactive Documentation CD ROM 3 When the front panel prompts you to confirm or change the selected paper type and size a Press the Down Arrow key to scroll...

Page 9: ...Load a maximum of 10 envelopes at a time This printer is not designed to handle high capacity production envelope printing Envelopes may wrinkle depending on the weight and stiffness of the envelope E...

Page 10: ...n only be printed from the Multi Purpose Tray The number of sheets that can be loaded depends on the item Refer to the Supplies section of the Support Guide on the Interactive Documentation CD ROM for...

Page 11: ...de to be printed facedown with the top of the sheet entering the printer first For more information refer to the Trays section of the Trays and Paper Guide on the Interactive Documentation CD ROM 3 Wh...

Reviews: