background image

Specialty Printing

Phaser® 6200 Color Laser Printer

16

Note

Xerox and Xerox Phaser transparency films developed for other Xerox printers and copiers 
are not meant to be used with this printer. Using non-Phaser 6200 transparencies may 
damage the fuser and might not be covered under the warranty.

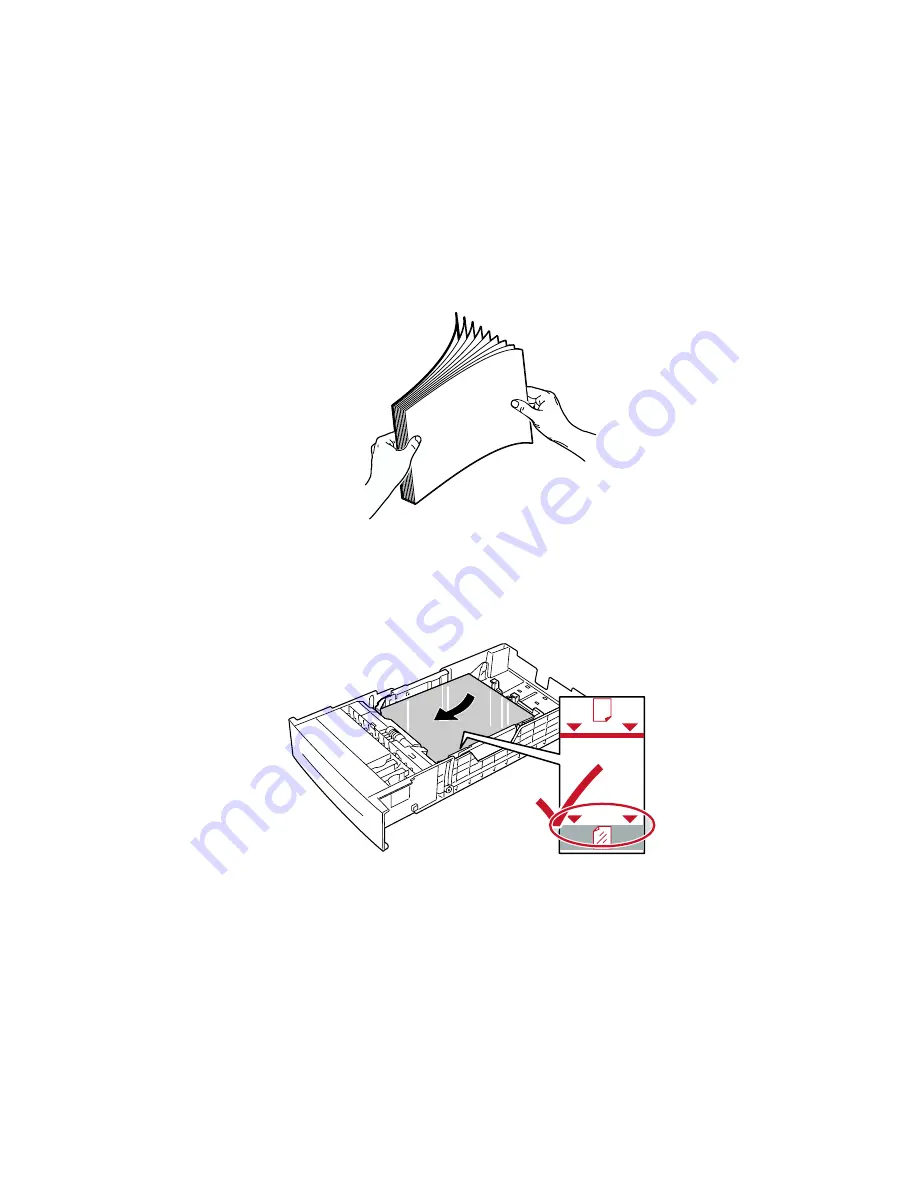
Printing transparencies from Tray 1

1. 

Fan the transparencies to release sheets that are stuck together.  

2. 

Insert the transparencies into the tray. For more information, refer to the 

Trays

 section of the 

Trays and Paper Guide

 on the 

Interactive Documentation CD-ROM

.

3. 

Do not load transparencies above the transparency fill line, because it may cause a jam.

4. 

When the front panel prompts you to confirm or change the selected paper type:

a. 

Press the 

Down Arrow

 key to scroll to 

Change

, then press the 

OK

 key.

b. 

Scroll to 

Transparency

 and press the 

OK

 key to save your selection.

5. 

In the printer driver, select either 

Tray 1

 as the paper source or 

Transparencies

 as the paper type.


MAX

6200-59

MAX

Summary of Contents for Phaser 6200N

Page 1: ...rinter will NOT do automatic 2 sided printing on paper loaded in the Multi Purpose Tray Any supported paper size that is supported in the tray can be duplexed Any supported paper type Plain Paper Heav...

Page 2: ...wn with the top of the page at the back of the tray If using paper with pre punched holes place the holes toward the right side of the tray 2 In the printer driver Select the tray containing the paper...

Page 3: ...vy toner coverage on side 1 of a manual 2 sided print Increase the top margin on side 1 to at least 12 mm 0 48 in Print quality may be degraded on the second side of manual 2 sided prints Setting the...

Page 4: ...the page at the front of the tray 2 In the printer driver select the tray containing the paper 3 Send the job to the printer so that the odd numbered pages side 1 are printed Printing side 2 1 Insert...

Page 5: ...of the page entering the printer first 2 In the printer driver select the Multi Purpose Tray as the paper source 3 Send the job to the printer so that the odd numbered pages side 1 are printed Printi...

Page 6: ...an 7 x 10exp11 ohm square Any overhead transparency materials used with this printer must be compatible with the heat and pressure of the oil less fusing process The materials must not discolor melt o...

Page 7: ...gether 2 Insert the transparencies into the tray For more information refer to the Trays section of the Trays and Paper Guide on the Interactive Documentation CD ROM 3 Do not load transparencies above...

Page 8: ...ction of the Trays and Paper Guide on the Interactive Documentation CD ROM 3 When the front panel prompts you to confirm or change the selected paper type and size a Press the Down Arrow key to scroll...

Page 9: ...Load a maximum of 10 envelopes at a time This printer is not designed to handle high capacity production envelope printing Envelopes may wrinkle depending on the weight and stiffness of the envelope E...

Page 10: ...n only be printed from the Multi Purpose Tray The number of sheets that can be loaded depends on the item Refer to the Supplies section of the Support Guide on the Interactive Documentation CD ROM for...

Page 11: ...de to be printed facedown with the top of the sheet entering the printer first For more information refer to the Trays section of the Trays and Paper Guide on the Interactive Documentation CD ROM 3 Wh...

Reviews: