Xerox Versant 4100 Press, Quick Start Manual
The Xerox Versant 4100 Press is a high-quality digital printing machine designed for businesses. For a quick set-up and usage guidance, download the free Quick Start Manual from manualshive.com. This comprehensive manual will help you maximize the potential of this powerful press for all your printing needs.
Share
Download


Reviews:
No comments
Related manuals for Versant 4100 Press

Figure 4 Standalone
Brand: 3D Systems Pages: 2

ZINK PANPRINT01
Brand: Pandigital Pages: 2

mg6400 series
Brand: Canon Pages: 4

CLX-6260ND
Brand: Samsung Pages: 368

MS Soho
Brand: oliser Pages: 20

DocuPrint 205
Brand: Xerox Pages: 34

4250 - WorkCentre - Copier
Brand: Xerox Pages: 4

6110MFP/XN
Brand: Xerox Pages: 233

HD40.1
Brand: Delta OHM Pages: 28

bizhub C350
Brand: Konica Minolta Pages: 12

C710n
Brand: Oki Pages: 72

Star TSP 143
Brand: POS Tablet Pages: 4
5700i - EPL B/W Laser Printer
Brand: Epson Pages: 33
2180 - LQ B/W Dot-matrix Printer
Brand: Epson Pages: 2

2190 - FX B/W Dot-matrix Printer
Brand: Epson Pages: 2

2200 - Stylus Photo Color Inkjet Printer
Brand: Epson Pages: 62
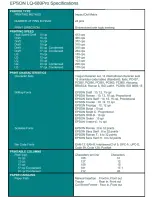
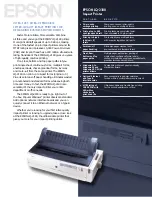
24-PIN DOT MATRIX PRINTER LQ-680PRO
Brand: Epson Pages: 3

221
Brand: Epson Pages: 2


