AccXES Account Management Tool Administrator’s Guide
16
Ÿ
You must select this toolbar button after the new User names
have been added, in order to place the User ID into the AMT Users
Database.
Ÿ
Press the
Close
button.
5. Add Printers on the Printers Tab.
Ÿ
Select the
Printers Tab
.
Ÿ
Select this toolbar button. The "Add Printers" dialog window will
appear.
Ÿ
Type the printer name into the
Printer Name
text field. This Printer
Name information will show on the Printers Tab. However, it is best to
type in the Machine Name that you see on the Web PMT’s Accounting
page. The reason is that then the Printers Name on the Printers Tab
will match the Printer Name which will show on the Printer Job
Accounting Tab after you retrieve data from the printer controllers. The
printer name is limited to a maximum of 20 alphanumeric characters
(A-Z, 0-9). The dash (-) and period (.) symbols are allowed. Duplicate
printer names are not allowed.
Ÿ
Add your
Printer Description
into the 80-character text field. The field
may be left blank. Duplicate descriptions are allowed.
Ÿ
Add your
IP Address
, such as "13 142 199 3".
Ÿ
Press this toolbar button. The information will be cleared from
the Printer Name, Printer Description, and IP Address fields; the
defined printer will be moved to the bottom window as the AMT
connects to the printer. You can continue to add printers in the same
manner.
Ÿ
If you change your mind about adding a printer, highlight the
printer name from the list and select this toolbar button to delete it.
Ÿ
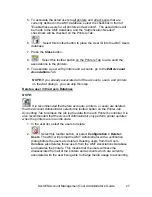
To associate the listed printers with all of the accounts and all of the
users that are currently defined in the AMT database, select the
checkbox in front of "Enable all accounts and users on these printers".
The associations will be made to the AMT database, and the
“Authorization Needed” checkmark will be checked.
NOTE:
Press this button to edit the Printer Name, Printer
Description, or IP Address.


