6
Camera modes
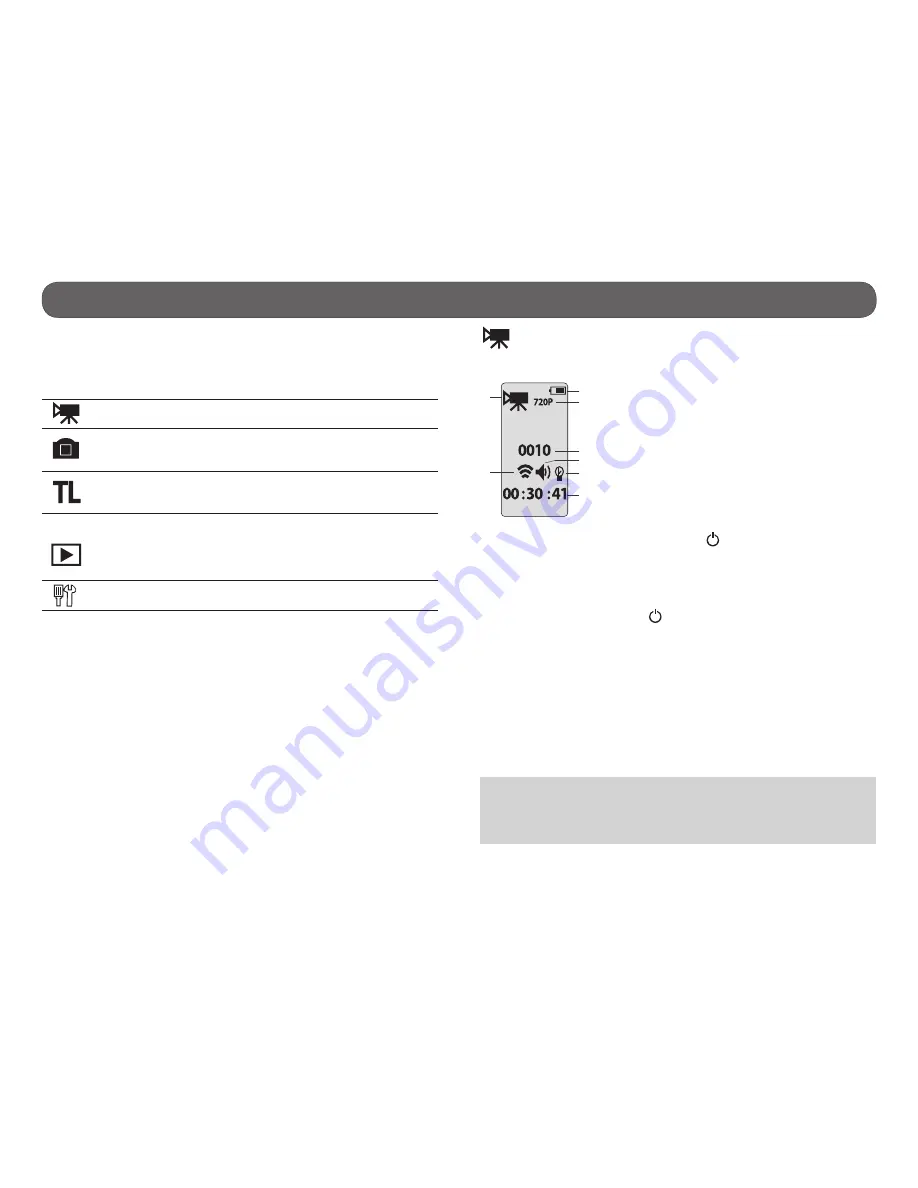
DESCRIPTION OF ICONS
Turn on the device and switch from one mode to another by pressing the M
button. It is possible to see on the configuration screen 5 different modes.
VIDEO
HD video recording
(WVGA, 720p or 1080p)
PHOTO
Taking photos
(1mp, 3mp or 5 mp and
1 to 6 consecutive photos)
TIME LAPSE
Taking photos at predefined regular
intervals
(0.5, 2, 5, 10, 30 or 60 seconds)
VIEW
• Allows to see the number of recorded
files.
• Allows to view photos and videos
when the camera is connected to a
television using the HDMI cable.
SETTINGS
Allows to set the advanced settings of
the camera.
See “Settings” section for more details.
VIDEO MODE
• Allows to see the current configuration of the VIDEO mode.
1) Battery level
2) Icon of video mode
3) Video resolution
4) Number of recorded videos
5) Icon of the remote control (wireless)
6) Icon of the sound signal
7) Icon of the LED lights
8) Estimated remaining recording time
•
To start recording a video, press the button. The camera emits a
sound signal (if the sound signal option is enabled), the recording time
is displayed on the screen and the LED lights flash while recording (see
“Operation of the LED lights and screen depending on selected options”
section for more details).
•
To stop recording, press the button. The camera emits a sound signal
(if the sound signal option is enabled) and the remaining recording time
on the memory card will reappear on the screen.
When the microSD card is full, the camera automatically stops recording
and the current video will be saved. (see “Memory card” section)
When the battery is empty, the camera automatically stops recording and
the current video will be saved before the camera turns off.
It is possible to record a video with a maximum duration of approximately
45 minutes (3.66Go). When this maximum is reached, the camera stops
recording and automatically starts a new video. The first video will be
identified XCEL0001 and the second XC010001.
Note
: It is possible to take videos with the camera installed upside down.
The camera automatically displays the video in the right direction when
viewing on a computer or a TV. To do this, the camera must be installed
upside down before recording the video.
1
2
3
4
5
6
7
8


