


5
USER GUIDE
Page
PLAYING MUSIC
Display the
Library
by pressing the
à
Library
key on
the remote control.
The
Library
menu allows you to choose how you want to
browse your music collection. You can browse by track,
album, cover, artist, genre, year, era, playlist or preset.
Press the
U
and
V
keys to step between categories.
For example, if you select
Albums
you will see an
alphabetical list of your album titles.
To play music
Use the
U
and
V
keys to highlight the item you
would like to play.
Press the
T
key to view the contents of the selected
item.
Press the
O
Play
key to begin playback
.
To stop play
Press the
g
key on
the front panel or
the Audio Server
remote control.
To pause play
Press the
h
key on
the front panel or
your Audio Server
remote control.
To skip to the next or
previous track
Press the
f
or
e
key on the front panel or your
Audio Server remote control.
To seek within a track
Hold down the
d
or
c
key on the front panel or
your Audio Server remote control.
Play resumes from the new position when you release
the key.
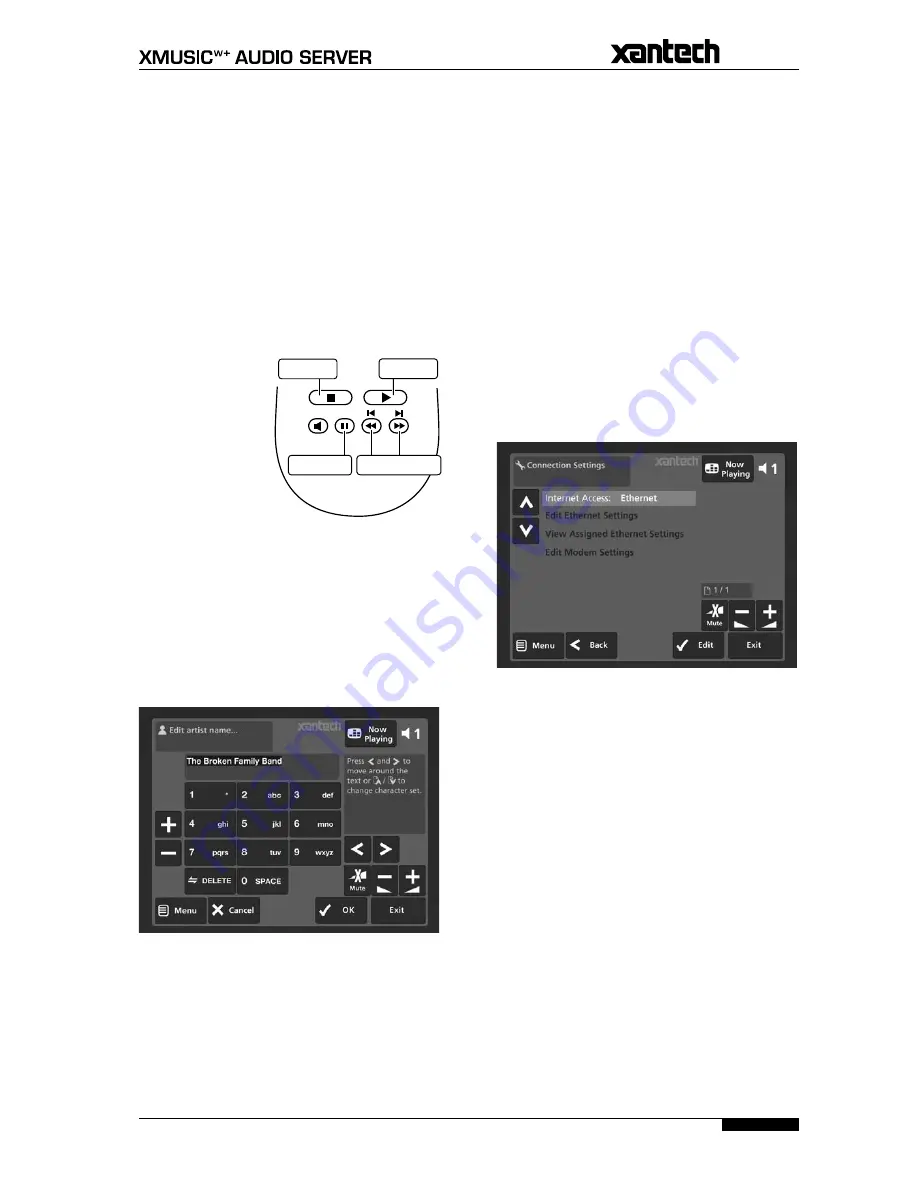
ENTERING TEXT
When text is editable using the Audio Server remote
control, the text entry screen will be displayed:
•
•
•
•
•
•
•
•
•
Play key
Stop key
Pause key Skip/Seek keys
To enter text using the alphanumeric keypad
Use the
S
and
T
keys to move the cursor to the
required position.
Use the keys on the alphanumeric keypad to enter
a letter.
For example, to enter S press the
7
key four times,
because S is the fourth letter on the
7
key.
Press the
DELETE
key on your Audio Server remote
control to delete characters.
Press the
G
Page +/-
key to toggle the character
set and switch between upper-case and lower-case
letters.
CONNECTING TO THE INTERNET
Press the
J
Menu
key on your Audio Server remote
control.
Use the
U
and
V
keys to highlight the
Set Up
option and press the
O
Select
key.
Use the
U
and
V
keys again to highlight
Settings
and press the
O
Select
key.
Choose the
Connection Settings
option and press
O
Select.
The
Connection Settings
menu is displayed:
Select between
Ethernet
and
Modem
as the
Internet Access
method.
Connecting via Ethernet
Use the
U
and
V
keys to highlight
Edit Ethernet
Settings
and press the
O
Select
key.
If you are using a broadband router or connecting via a
home network with DHCP enabled, select
DHCP
as the
Mode
. Otherwise select
Static
and enter your Ethernet
details manually in the
IP Address
,
Subnet Mask
,
Gateway
and
DNS
fields.
Note:
When making changes to the
Static Ethernet
Settings
it may be necessary to switch your Audio Server
off and then on again in order for the changes to take
effect.
Connecting via modem
Use the
U
and
V
keys to highlight the
Edit
Modem
Settings
option and press the
O
Select
key.
Enter your ISP details in the
Username
,
Password
and
Telephone No.
fields.
•
•
•
•
•
•
•
•
•
•
•


