background image

CAPSURE User Manual 


38


Bluetooth Device Pairing Procedures (CAPSURE Bluetooth only) 

To use your Bluetooth enabled phone or tablet with CAPSURE you must first pair the devices 
together before you can connect to an App. Once the pairing process is complete the 
connection remains in memory enabling quick reconnection when the devices are switched ON 
and Off. The following devices/operating systems are supported by CAPSURE Bluetooth.  

Apple: iPhone 4, 4S, 5;  iPad 2, 3;  iPod Touch 4, 5 (operating system iOS 5 and 6) 

Android: 2.3 Gingerbread, 3.0 Honeycomb, 4.0 Ice Cream Sandwich, and 4.1 / 4.2 Jellybean 

General Notes 


When Bluetooth is ON the CAPSURE sleep time is set to 5 minutes. 


When Bluetooth is OFF the CAPSURE sleep time is set to 10 seconds. 


When the CAPSURE sleeps the Bluetooth connection is dropped. The Bluetooth 
connection will automatically be remade when the CAPSURE awakes. This process may 
take up to 20 seconds. 

Preparing CAPSURE 

1.


Turn CAPSURE power On. 

2.


If not already done, turn the Bluetooth option on and set the Bluetooth Standby timer. 
Refer to the Setting Menu section earlier in this manual. 

3.


Calibrate the CAPSURE if required. 

The CAPSURE remembers the last state of the Bluetooth and will restart in this state when 
the Power is switched On/Off. 

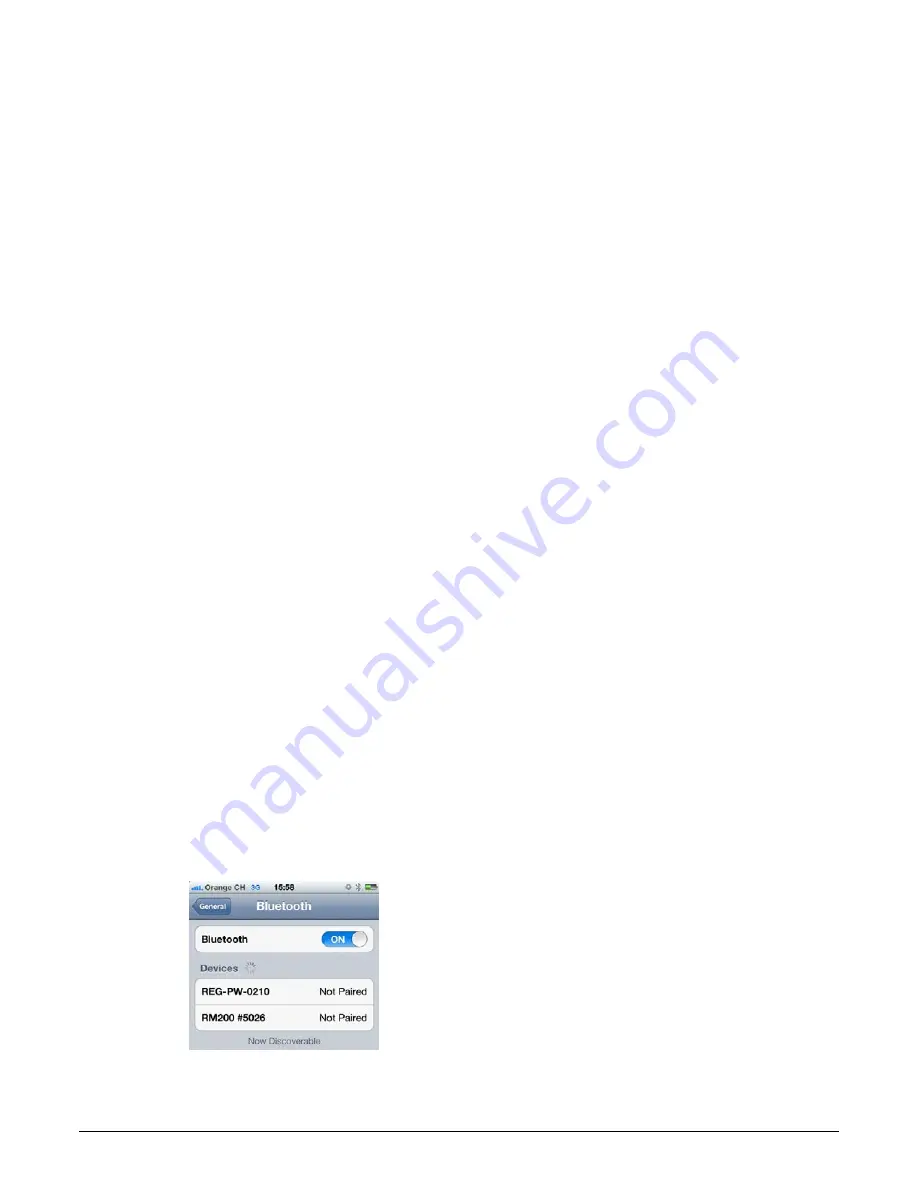
Connecting an Apple iOS device 

1.


Switch on the iPhone/iPad/iPod and enter the settings menu. 

2.


Select Bluetooth and turn Bluetooth ON. 

3.


The iOS device will now scan the area for available Bluetooth devices. All available 
Bluetooth devices with Apple connectivity will be listed here. 

4.


The CAPSURE device should now appear on the iOS device screen as an available 
Bluetooth device. The CAPSURE will be listed as RM200 #XXXX and it should be shown in 
black text. 


Summary of Contents for capsure

Page 1: ...User Manual ...

Page 2: ...E Declaration Hereby X Rite Incorporated declares that this RM200 Series is in compliance with the essential requirements and other relevant provisions of Directive s 2014 30 EU EMC 2014 35 EU LVD and RoHS 2011 65 EU Bluetooth equipped devices additional comply with R TTE 1999 5 EC FCC Notice NOTE This equipment has been tested and found to comply with the limits for a Class B digital device pursu...

Page 3: ...and if not installed and used in accordance with the instructions may cause harmful interference to radio communication However there is no guarantee that interference will not occur in a particular installation If this equipment does cause harmful interference to radio or television reception which can be determined by turning the equipment off and on the user is encouraged to try to correct the ...

Page 4: ...ithin the warranty period is proven to X Rite s reasonable satisfaction to have been defective Repairs or replacement by X Rite shall not revive an otherwise expired warranty nor shall the same extend the duration of a warranty Customer shall be responsible for packaging and shipping the defective product to the service center designated by X Rite X Rite shall pay for the return of the product to ...

Page 5: ...anual may be reproduced transcribed transmitted stored in a retrieval system or translated into any language or computer language in any form This product may be covered by one or more patents Refer to the instrument for actual patent numbers 2013 by X Rite Incorporated ALL RIGHTS RESERVED X Rite is a registered trademark of X Rite Incorporated All other logos brand names and product names mention...

Page 6: ...on 17 Operation 18 Settings Menu 18 Set Aperture 18 Calibrate 19 Language 19 Fan decks 19 Volume 20 Product Info 21 Date and Time 21 Illumination 21 BT Unpair CAPSURE Bluetooth only 22 Tutorial 22 Reset Device 23 BT Standby Timer CAPSURE Bluetooth only 23 Bluetooth on off CAPSURE Bluetooth only 24 Matching a Sample 25 Saving a Match with a Tag 27 Matching a Patterned or Multicolored Sample with Co...

Page 7: ... Appendices 34 Troubleshooting 34 Screen Messages 34 Cleaning 35 Cleaning the Optics 35 Cleaning the Calibration Reference 36 Technical Specifications 37 FAQs 37 Bluetooth Device Pairing Procedures CAPSURE Bluetooth only 38 ...

Page 8: ...rmation on Bluetooth operation refer to Bluetooth Device Pairing Procedure in the Appendices Description 1 Lanyard loop Provides a secure way to carry your device 2 Power on off Used to turn the instrument on and off 3 Measure button Two stage button press lightly to start preview and firmly to measure Lightly pressing this button always returns you to the Match screen 4 Navigation control Navigat...

Page 9: ...are meant to serve as guidelines only You should always visually confirm that the color specified by the instrument is an acceptable match to the sample X Rite is not liable and assumes no responsibility for inaccurate color identification by the instrument It is recommended that you refer to your fan deck for final color acceptability Variables that may affect the results given by the instrument ...

Page 10: ... also appears Refer to the Initial Startup section on the following page for first time operation Note Some computers have low power USB ports which are typically located at the front It is recommended that CAPSURE is ONLY connected to high power ports During charging the instrument switches on and indicates charging with a lightning bolt in the battery icon The CAPSURE will not power off while pl...

Page 11: ...ing the Power button highlighting Yes from on the screen and pressing the Enter button Make sure to always position the white reference slider over the optics when powering down the instrument You will need to press the Power button to turn on the instrument when this power down method is used Initial Startup The very first time CAPSURE is powered on you are asked to select the desired operating l...

Page 12: ... the up and down sides of the Navigation control 2 Press the Enter Select button to activate green or deactivate red the fan deck Refer to the Setting menu in the Operation section for additional information on fan deck options 3 Press the right side Exit of the Navigation control to continue with Calibration Instrument Calibration 1 Perform a calibration as described on the screen For additional ...

Page 13: ...ker Match Navigator Records Configure the instrument Select from a multicolored sample Matched color and quality indictor Find alternative colors History of saved records Press Enter Press Navigation control bottom Tag Nav left Nav left Nav right Nav right Tag menu is for adding notes to a saved color Match detail indicates additional information associated to the active color Nav bottom Battery i...

Page 14: ...o indicate the measurement status It is important that the instrument is held steady for the duration of the measurement Color information appears in the display after the progress bar reaches 100 Refer to the Operation section later in this manual for additional details Horizontal vertical and angled orientations are acceptable as long as the instrument makes good contact with the sample When the...

Page 15: ...ed by pressing the left side of the Navigation control Select indicates that the option or item highlighted in the screen will be selected This is chosen by pressing the Enter button Exit indicates that the current screen will be closed and returned to the main match screen This is selected by pressing the right side of the Navigation control Screens that contain images of arrows indicate that the...

Page 16: ...r Measure textile samples that do not have an opaque weave by the removal of the background color Obtaining a Good Match The instrument works best on samples that are dry and opaque Samples can be oriented horizontally on a table top vertically on a wall or at an angle To obtain a good match make sure the instrument is flat against the sample and is held steady during the match Curved or uneven sa...

Page 17: ... slider that protects the white reference when not in use 1 When displayed to do so move the white reference slider to the closed calibration position over the optics 2 Press Measure to initiate the calibration when the reference slider is positioned A progress bar appears at the bottom of the display to indicate the calibration status 3 After a successful calibration you are prompted to repositio...

Page 18: ...the up and down sides of the Navigation control 3 Press the Enter button to select the option Refer below for an explanation of each option Set Aperture The aperture option is used to set the aperture size that the instrument defaults to when a color match is started You can select Automatic Large 8 mm Medium 4 mm or Small 2 mm Automatic is the setting that is used for automatic multicolor extract...

Page 19: ...p to a total of 15 fan decks Each fan deck can be enabled or disabled allowing for a color match to be found from the desired collections A fan deck can also be set as a priority fan deck This allows the first match to be found to preferentially come from the priority fan deck The priority fan deck is highlighted with a star icon A list of the installed fan decks is displayed with a red or green i...

Page 20: ...t side of the Navigation control Exit to go to the Match screen Volume The volume option is used to set the system volume and the voice tag volume 1 Select System volume or Voice tag volume by pressing the up and down sides of the Navigation control 2 Press the Enter Select button to open the volume level screen 3 Press the up or down sides of the Navigation control to set the desired volume level...

Page 21: ...wn sides of the Navigation control to set the selected date and time attribute When format is selected pressing the up and down sides of the Navigation control will alternate between US and Europe format 5 Press the Enter button to save your settings and return to the Settings window Illumination The illumination option is used to display the Match Detail under the selected lighting condition A 10...

Page 22: ...tooth device fails to pair or disappears from the available list of Bluetooth devices a BT Unpair may be required After unpairing repeat the connection process for Apple iOS or Andriod 1 Select the BT Unpair option from the list by pressing the up and down sides of the Navigation control 2 Press the Enter button to unpair the device An Unpair succeeded screen appears 3 Refer to the Bluetooth Devic...

Page 23: ... the Enter button The instrument is now reset and all stored records are deleted BT Standby Timer CAPSURE Bluetooth only The BT standby timer option is used to set the amount of time that the CAPSURE will remain connected to a device without any activity before timing out The time can be set from 1 minute to 60 minutes in one minute increments 1 Select the BT standby timer option from the list by ...

Page 24: ...option is activated After CAPSURE is paired with the other device the color of the Bluetooth icon will change to blue The icon will remain blue until the connection is lost or unpaired Bluetooth Status Off Enabled Connected 1 Select the Bluetooth option from the list by pressing the up and down sides of the Navigation control 2 Press the Enter button to turn the option on or off 3 Refer to the Blu...

Page 25: ...down side of the Navigation control while lightly holding down the Measure button 2 mm 4 mm 8 mm Note You can preset your aperture preference in the Settings menu 3 When you have located the area you wish to measure press the Measure button firmly An audible camera click sound indicates the start of the measurement A progress bar appears at the bottom of the display to indicate the measurement sta...

Page 26: ...match The bars are for informational purpose only Three green bars is the best possible match where as one red or two yellow bars indication basically informs you that instrument made a suitable match The fewer color bars on a measurement the more likely color differences will be noticed Additional details about the identified color can be displayed by pressing down side of the Navigation control ...

Page 27: ...nter button down Speak into the microphone located below the power button You have a maximum of 30 seconds recording time per record When finished release the Enter button To listen to the voice tag you just recorded select Play voice tag from the list and press the Enter button To delete the voice tag you just recorded select Clear voice tag from the list and press the Enter button 3 Text Tag To ...

Page 28: ...or in the measurement area 2 Take a measurement as described in the Matching a Sample section earlier in this manual The initial color displayed in the Match window is the average color across the measurement area Once CAPSURE detects a sample containing more than one color the Color Picker icon in the function bar begins rotating and an audible tone is heard The screen then automatically advances...

Page 29: ... wish to use to locate an alternate color by pressing on the up or down sides the Navigation control 4 Press the Enter button after the method is selected Fan deck Browser Allows you to search through a fan deck visually to find a color 1 Select the fan deck you wish to use by pressing on the up or down sides the Navigation control 2 Press the Enter Select button to select the fan deck and enter t...

Page 30: ...tailed description on using this screen Similar Colors Displays a list of close colors searched across active fan decks Refer to Selection Screen later in this section for a detailed description on using this screen Color Direction Lighter Darker Yellower Bluer Redder Greener Displays a range of colors across all active fan decks moving in each of the color directions Refer to Selection Screen lat...

Page 31: ... the alternate 2 To make the alternate color the active color press the Enter button All colors set as activate are saved to the Records To exit without activating an alternate color press on the left side of the Navigation control Back to return to the Navigator screen or press the right side of the Navigation control Exit to go to the Match screen Active color description Active color swatch Alt...

Page 32: ...urement records by pressing the up and down sides of the Navigation control 3 You can view more details for the selected record by pressing the Enter button to expand the record Set as active color This recalls all information for the saved color and allows editing of tags and viewing of alternate colors Play associated voice tag Used to identify the saved color if a recording is present Display a...

Page 33: ...s on the instrument 1 Press the up and down sides of the Navigation control to highlight Delete all records 2 Press the Enter button You are asked to confirm that you want to delete all 3 Highlighting Yes on the screen and press the Enter button All records are now deleted from the instrument ...

Page 34: ...ce sample on a white background Instrument requests a Recalibrate Recalibrate the instrument using the Calibrate function in the Settings menu Reference slider not closed continually displays after calibrating more than once You will need to perform seven calibration procedures in a row This will set a new reference point and correct the problem I can t hear the voice recording Increase the volume...

Page 35: ...m dust and dirt for the highest level of accuracy Cleaning the Optics The optics are recessed and therefore protected from dirt during normal usage However if the optics do require cleaning follow the procedure below IMPORTANT If can air is used for cleaning do not invert or tilt the can during use This could cause damage to the optics 1 Carefully place your thumb over the optics opening and rotat...

Page 36: ... housing and turn 45 clockwise to lock into place Cleaning the Calibration Reference The calibration tile is imbedded in the underside of the white reference slider 1 Opening reference slider to a halfway position 2 Blow short bursts of clean dry air onto the calibration tile This should remove any accumulated debris Calibration tile Canned air straw Optics port Canned air straw ...

Page 37: ... does the instrument store 100 color matches 2 What are the ideal samples to match The samples should be smooth dry solid in color and opaque 3 How do I clean the instrument Please see the instructions in the Cleaning section 4 What should I do if the instrument doesn t power up If the battery is too low the instrument will not power up Charge the unit through its USB connection 5 How do I contact...

Page 38: ...ps the Bluetooth connection is dropped The Bluetooth connection will automatically be remade when the CAPSURE awakes This process may take up to 20 seconds Preparing CAPSURE 1 Turn CAPSURE power On 2 If not already done turn the Bluetooth option on and set the Bluetooth Standby timer Refer to the Setting Menu section earlier in this manual 3 Calibrate the CAPSURE if required The CAPSURE remembers ...

Page 39: ...ith another device you must first unpair from the connected device Connecting an Android device 1 Open the Settings application 2 Touch Wireless networks Bluetooth settings 3 Check Bluetooth to turn it on Your tablet scans for and displays the IDs of all available Bluetooth devices in range If the CAPSURE you want to pair with isn t in the list ensure that the CAPSURE is turned on and Bluetooth is...

Page 40: ...ser Manual 40 7 Once the pairing process is complete the RM200 XXXX will turn appear in your Paired devices indicating you have successfully connected your two devices The Apple or Android App can now be started ...

Reviews: