


CAPSURE User Manual
10
Getting Started
Installing the Software
The software that is included with your instrument must be installed before plugging the USB
cable into the computer. The software installs the required USB drivers for the instrument and
a fan deck loader application.
1.
Insert the CD into the CD drive. If the CD does not autorun, double-click the Setup.exe file
on the CD.
2.
The setup program guides you through the rest of the installation process. Follow the
instructions on each setup screen to complete the installation. When finished, remove the
CD and store in a safe location.
3.
Refer to the software help system for information on using the application.
Charging the Battery
Before using your CAPSURE for the first time it is important that you charge the battery. If these
guidelines are not followed, the internal lithium-ion battery may experience a shortened life.
1.
Install the software that accompanied the instrument if you have not already done so.
2.
Connect the USB cable to the CAPSURE and your computer’s USB port. A battery charging
screen momentarily appears. For the first time connection, a language selection screen also
appears. Refer to the Initial Startup section on the following page for first time operation.
Note: Some computers have low power USB ports which are typically located at the front. It
is recommended that CAPSURE is ONLY connected to high power ports.
During charging, the instrument switches on and indicates charging with a “lightning bolt” in
the battery icon. The CAPSURE will not power off while plugged into the computer USB port.
A full charge from empty will take 6 hours connected to a computer USB port.
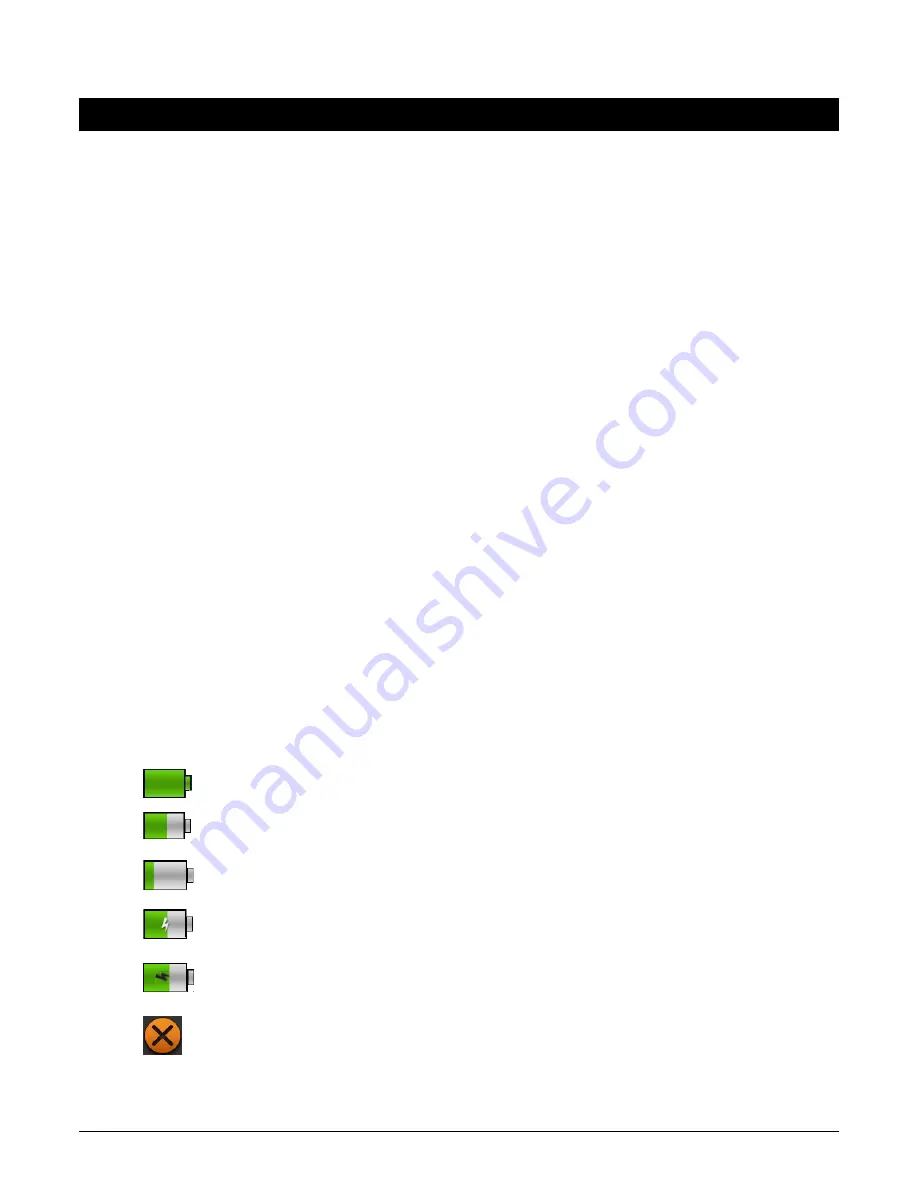
Battery Icon Information
This icon at the top of the screen would indicate the battery is fully charged.
This icon at the top of the screen would indicate the battery has a sufficient
charge for a substantial number of measurements.
This icon at the top of the screen would indicate the battery pack is low, but
measurements are still possible. Battery should be charged soon.
This icon momentarily appears in the center of the screen and at the top when
the instrument is connected to the computer, indicating the battery is charging.
The “lightning bolt” in the center of the icon at the top of the screen indicates the
battery is charging.
This icon momentarily appears in the center of the screen when the instrument is
disconnected from the computer.
Battery status is also reported in the Product Info menu item of the Settings window.
Summary of Contents for capsure
Page 1: ...User Manual ...


