12
C
L
E
A
N
I
N
G
A
N
D
S
A
N
I
T
I
Z
I
N
G
I
N
S
T
R
U
C
T
I
O
N
S
EQUIPMENT AND SUPPLIES NECESSARY
•
Clean 5 gallon bucket (1)
•
Clean cloth towel (1)
•
Safety goggles and rubber gloves
•
CLEANING SOLUTION
Kay-5
® Sanitizer/Cleaner, chlorinated alkaline product is approved for use as a
manual type cleaner or for use as a chlorinating sanitizer. Kay-5® is available in 1
oz. packets. Two, 1 oz. packets of Kay 5® mixed with 5 gallons of water, will
deliver the appropriate cleaner concentration.
PREPARATION:
Prepare sanitizing solution by adding two, 1 oz. packets of Kay-5® to 5 gallons of
potable water (not greater than 100°F) in a clean 5 gallon bucket. This produces a
100 PPM chlorine solution. Stir to ensure Kay-5
®
crystals are completely
dissolved.
CAUTION: Chlorinated detergents are corrosive. Wear rubber gloves and safety
goggles while performing all cleaning and sanitation procedures.
Note:
If a chlorinated sanitizer/cleaner other than Kay-5® is used, follow the manufac-
turer’s instructions for proper dilution to produce 100 PPM Sanitizer/Cleaner solution.
DO NOT USE BLEACH. Bleach is abrasive and harsh on the numerous plastic
components in our dispensing systems. We have confirmed that using a buff-
ered chlorinated detergent and following the prescribed procedures ensures
optimum sanitation and maintenance of dispensing equipment. This will limit
sanitizer odor/off-taste carryover that could be perceived as a hazard
CLEANING THE SHEATHING
Materials Required:
Cleaning Solution (see CLEANING SOLUTION, above)
Flexible soft plastic bristle brush
Clean, dry Bar Towel
1.
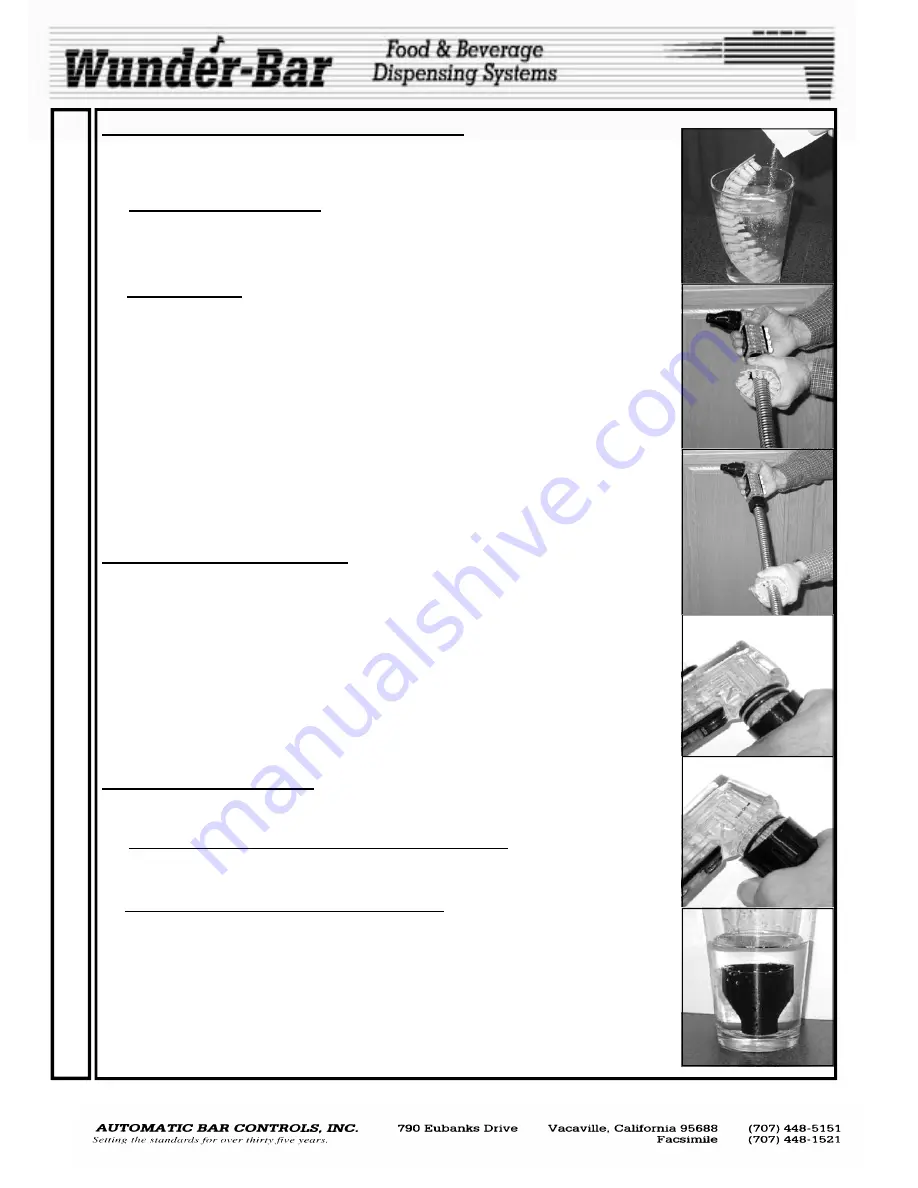
Immerse the Brush in Cleaning Solution as shown in
Fig.1
.
2.
Wrap the brush around the sheathing at the Heel end (
Fig.2
). Move the brush up and down
the entire length of the Sheathing, from Heel to Manifold (
Fig.3
), a minimum of 6 times.
3.
Immerse the Brush in the Cleaning Solution. Rotate the Sheathing Brush 1/2 turn. Move
the Brush up and down the entire length of the Sheathing 6 more times.
4.
Immerse the Sheathing Brush in the Cleaning Solution. Rotate the Sheathing Brush an
other 1/2 turn. Move the Sheathing Brush up and down the entire length of the Sheathing
a minimum of 6 more times. Dry the entire length of the Sheathing with a clean bar towel.
CLEANING THE NOZZLE
Material Required:
Cup of Cleaning Solution (see
CLEANING SOLUTION
above)
1a.
SERIES II NOZZLE REMOVAL: (Compression Fit, two O-rings) (
Fig.4
)
Grasp the nozzle and twist back and forth while pulling the nozzle away from the
handle. If he nozzle is difficult to remove, immerse nozzle end of the handle in a cup of
carbonated water for five minutes before attempting removal again.
1b.
SERIES 2.5 and SERIES III: (Twist-Lock, one O-ring) (
Fig.5
)
Grasp and twist the nozzle counterclockwise to unscrew the nozzle from the Handle.
If the nozzle is difficult to remove, immerse nozzle end of the handle in a cup of
carbonated water for five minutes before attempting removal again.
2.
Remove nozzle and place in cup of cleaning solution (see CLEANING SOLUTION above)
for 2 minutes. Immerse a clean brush in the sanitizer solution. Scrub nozzle and diffuser
with a clean brush until any and all buildup is removed.
3.
Remove nozzle from sanitizer solution. Allow nozzle and diffuser to air dry.
4.
Reinstall nozzle onto diffuser.
5.
Dispense a beverage to confirm proper operation.
Fig.5
Fig.1
Fig.4
Fig.2
Fig.6
Fig.3
MARK 4 MANUAL
www.wunderbar.com
Summary of Contents for Mark 4
Page 15: ...15 15 www wunderbar com ...
Page 16: ...16 16 www wunderbar com ...
Page 17: ...17 17 www wunderbar com FR 73 ...
Page 18: ...18 18 www wunderbar com ...
Page 19: ...19 20 www wunderbar com ...
Page 20: ...20 19 www wunderbar com ...
Page 21: ...21 21 www wunderbar com ...
Page 22: ...22 www wunderbar com 22 FR 73 ...
Page 23: ...23 23 www wunderbar com ...
Page 24: ...24 24 www wunderbar com ...
Page 25: ...25 25 www wunderbar com ...
Page 26: ...26 26 www wunderbar com ...


