background image


Page 81


Local Update from the Front Panel 

Use the following steps to update the iVAM2-2 software: 

1.


Copy the unzipped Wohler Update Package file(s) from your computer to the 
root directory (not inside of a folder) of a USB flash drive. It must be FAT32 
file type, and does not need to be empty. Refer to the 

Download the 

Software

 section of this chapter for the specifics of download and file transfer 

to the USB flash drive. 

2.


Insert the USB flash drive with iVAM2-2 update package(s) into the front 
panel USB jack.  

3.


From the 

Menu

 screen, touch 

System Options

. The screen shown in Figure 

A-1 will appear. 

Figure A-1 - System Options Screen  

System Options

Menu

Network Settings

System Reboot

Factory Reset

System Update


4.


In the 

System Options

 menu, touch 

System Update

. The 

Software 

Upgrade

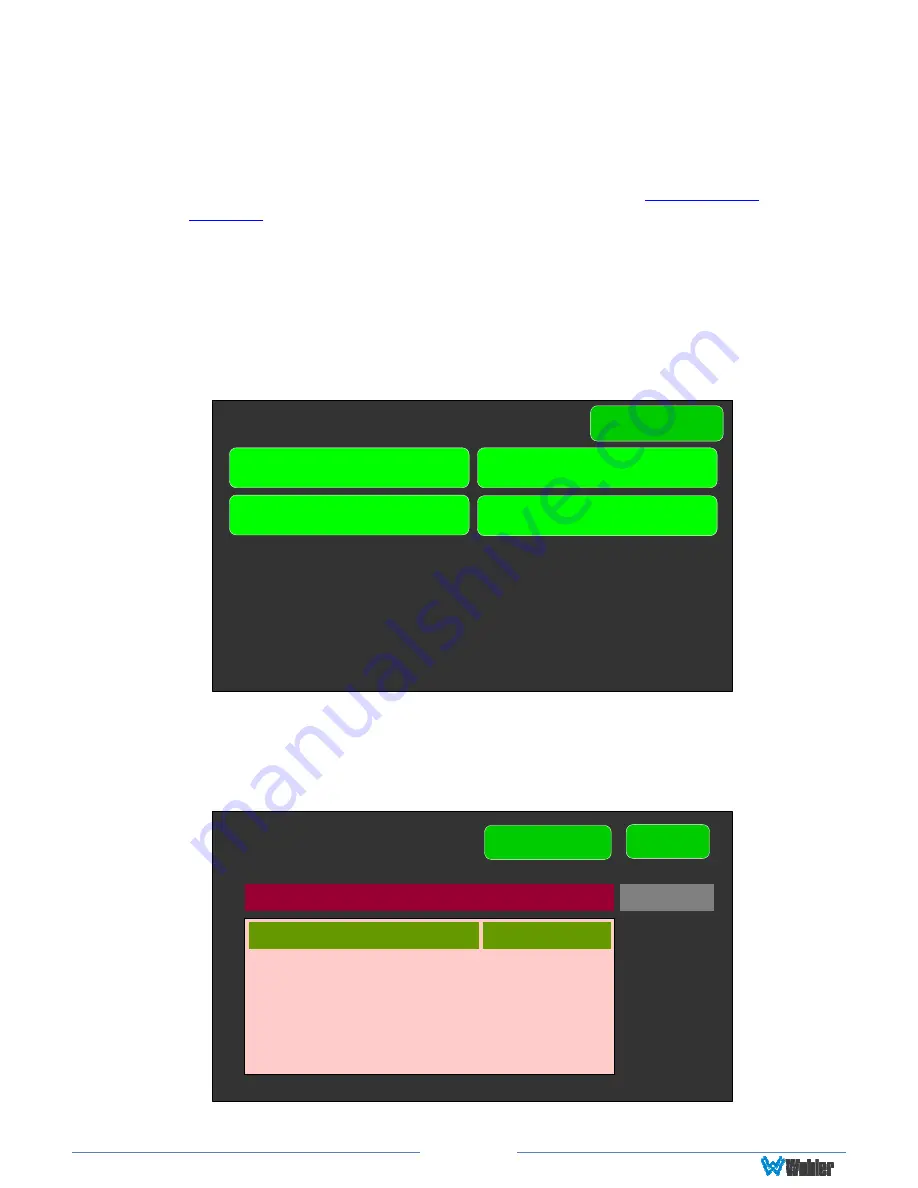
 screen will appear, as shown in Figure A-2.  

Figure A-2 - Software Upgrade Screen  

 System Update

Software Version

1.0.1

Back

Refresh

Wohler iVAM

1.0.1


Summary of Contents for 8121-0200

Page 1: ...iVAM2 2 2RU Multi Channel Audio Video Monitor User Guide Part Number 821831 Revision B...

Page 2: ...ss or implied with respect to software documentation their quality performance merchantability or fitness for a particular purpose In no event will Wohler Technologies Inc be liable for direct indirec...

Page 3: ...ompliance 8 FCC 8 ICES 003 8 CHAPTER 2 Local Operation 9 Operation 9 Startup 9 Front Panel 9 Rear Panel 11 SFP 2022 6 SFP 2110 Address Setup 15 Channel Meters and Touch Operations 16 Video Screen 18 D...

Page 4: ...do I have a downmixed pre fade output on AES Pair 1 combined with a post fade output on the Analog XLRs 67 How do I make the XLR outputs follow the Audio Meter screen solos mutes while the AES Pair 1...

Page 5: ...vice Lock 96 Dante Firmware Upgrades 97 Additional Information 97 DanteTM Legal Disclosures 97 APPENDIX D Ravenna ZMAN Setup 98 Introduction 98 What is in the iVAM2 2 for Ravenna 98 RAVENNA Compatible...

Page 6: ...etups are created and configured using local menus and a web browser over a network connection to the integral web server of the iVAM2 2 The web server will also allow you to view the audio meters rem...

Page 7: ...des 1 75 Top and Bottom if either radiates heat 0 Top and Bottom if no heat Heat Dissipation The ambient temperature inside the mounting enclosure should not exceed 40 Celsius 104 Fahrenheit Adjacent...

Page 8: ...se of shielded cable however satisfactory results can sometimes be obtained without it The internal circuitry ground is connected to the chassis Power The unit connects to an AC mains power source 100...

Page 9: ...Depending upon optional settings all channel pairs will either be in the muted condition or set in a predetermined way You may then use the Source and Channel controls to enable only the program chan...

Page 10: ...rce Turning this control right or left selects between the available licensed input sources The selected Source input is displayed in the center of the Audio Meters Screen as follows Pressing the Sour...

Page 11: ...SDI or SFP module input signal 3 HDMI Output An HDMI output of the monitored 3G HD SD SDI or SFP module video source is available from this connection 4 Network Port This Ethernet port can connect to...

Page 12: ...interface with this connector is to use an HD 15 to VGA adaptor cable Channels are selected as AES 1 8 A software license must be installed for these inputs to function Refer to the System Setup secti...

Page 13: ...option It is available from Wohler Technologies Technical Service e SMTPE 2110 or 2022 6 Receiver This uses Multi Mode 850 NM LC fiber connectors It allows the iVAM2 2 to monitor SDI audio transmitte...

Page 14: ...Tascam cables may be used and can be purchased by contacting Wohler Sales Refer to Figure 2 6 for the pinout of this connector Note PCM channels marked as data channels such as those containing encod...

Page 15: ...Secondary Gigabit Ethernet interfaces are provided with the AoIP option module SFP 2022 6 SFP 2110 Address Setup While the optional SFP 2022 6 and SFP 2110 modules monitor program audio created from...

Page 16: ...ific audio channel or pair Audio meters are displayed on touchscreen LCD display s in up to 8 channel pairs as shown in Figure 2 8 Figure 2 8 Audio Level Meter Screen 1 Channel Identifiers Above the l...

Page 17: ...wered all of the channel pairs are muted Touching a muted channel pair un mutes it and removes the violet box Muting and un muting by touching is an alternate action function b Solo Selector Touch for...

Page 18: ...5 or 10 seconds and you wish them to reappear simply touch the video screen Dolby Zoom Screen Dolby Zoom is a very powerful analysis tool Much as a camera lens can zoom into a single subject of inter...

Page 19: ...ams P 1 M o n o P 2 M o n o P 3 M o n o P 4 M o n o P 5 M o n o P 6 M o n o P 7 M o n o P 8 M o n o D o w n m i x When the Dolby Zoom screen appears the speakers will automatically begin monitoring th...

Page 20: ...Menu Unit Settings Source Select Speaker Options Screen Network Settings Screen Factory Reset Screen Source Selection Screen Unit Settings Speaker Options Unit Configuration Meter Scales System Update...

Page 21: ...12 Figure 2 12 Main Menu Unit Settings Touching the Unit Settings selection on the Main Menu screen proceeds to the Unit Settings Menu which contains additional menu selections The Unit Settings Menu...

Page 22: ...he control can be touched and moved left or right to adjust in 2 dB increments After touching the Treble control the Channel knob can also be turned to make the adjustment 2 Low Cut Low Cut is provide...

Page 23: ...l be applied to the audio meters Figure 2 15 Meter Scales Screen The controls function as follows 1 Scale This meter scales standard to be used when displaying audio levels A choice of seven scales is...

Page 24: ...oating Segment Not Displayed When you have made your choices touch Save to retain them Touch Back to exit this screen Default Color Bounds Default Ballistics Scale Bottom Limit Top Limit Default Refer...

Page 25: ...ing determines if or how video information is displayed when the video screen is selected by pressing the Source knob The possible selections are as follows a Always On The video information is always...

Page 26: ...shown in Figure 2 18 Figure 2 18 Phase Configuration Menu Phase Config Save Exit Cancel Exit Pair 1 Pair 3 Pair 5 Pair 7 Off Pair 2 Pair 4 Pair 6 Pair 8 On On On On On On On The controls function as f...

Page 27: ...MI Output on the rear panel The HDMI Output will allow you to view the monitored video on an external HDMI monitor 2 Use EDID HDMI monitors can produce Extended Display Identification Data EDID to dis...

Page 28: ...urces so that they may be used contact Wohler Technologies Figure 2 20 shows the Source Select Menu Figure 2 20 Source Select Menu Source Select Menu MADI BNC AoIP SDI 1 MADI OPTICAL AES SDI 2 SFP Ana...

Page 29: ...H 49 64 AoIP CH 17 32 AoIP CH 33 48 Back Touch Back to return to the Source Select menu or touch Menu to return to the Main Menu Presets Presets are pre arranged input and monitoring setups that can b...

Page 30: ...screen is shown in Figure 2 22 Figure 2 22 Preset Favorites Screen Preset Favorites Comedy Time Satire Today 1 of 1 Menu In this screen the currently selected Preset is shown in bright yellow Touch an...

Page 31: ...select which Preset containing Group to examine After selecting one of the Groups the Preset Selection screen shown in Figure 2 25 is shown Figure 2 25 All Presets Screen Preset Selection Preset Page...

Page 32: ...Loudness Meter button proceeds to the Loudness Meter Screen as shown in Figure 2 27 Figure 2 27 Loudness Meter Screen 24 9 6 3 Ref 3 6 9 12 15 18 21 LU M LRA 0 1 PROG 21 5 MAX 20 1 TP 20 0 Menu Audio...

Page 33: ...program period shown as TP 20 0 above Note Further and more detailed descriptions of all of the above Loudness terms may be found in the ITU R BS 1770 3 loudness standard The controls available on th...

Page 34: ...reen can be manually used to begin and end a loudness measurement interval The reading for that interval is then held on the Loudness Meter 2 Continuous Touch the Continuous button to enable Continuou...

Page 35: ...all of the above Loudness terms may be found in the ITU R BS 1770 3 loudness standard When you have completed reviewing or changing the settings touch the Loudness Meters button to go the Loudness Met...

Page 36: ...Screen 1 To change the IP Address Net Mask Gateway or DNS tap the item you would like to change A keypad will appear as shown in Figure 2 31 Figure 2 31 Network Configuration Setting Change 2 Touch th...

Page 37: ...addressing scheme change touch the Save button This will save the changes you selected 2 Touch the Cancel button to return to the previous screen without saving any changes Important There is no confi...

Page 38: ...rect an issue The System Reboot function should be used with a bit of forethought It puts the system out of service for several minutes while it is rebooting Figure 2 33 System Reboot System Reboot Ar...

Page 39: ...ware locally from the iVAM2 2 front panel follow the procedure in the Local Update from the Front Panel section of Appendix A Figure 2 34 System Update Screen System Update Back Software Version 0 0 0...

Page 40: ...m everything from the start Figure 2 35 Factory Reset Factory Reset Set system to factory default settings No Yes Back Note Factory Reset will also reset your IP address to the default one After a Fac...

Page 41: ...oduct Serial Number Software Version and various other information Figure 2 36 System Details Screen System Details System State Mode System IP Address Valid Normal 169 254 1 100 Menu Software 1 0 7 S...

Page 42: ...oice of AES BBC DIN EBU EXTVU NORDIC or VU Sample Rate 48kHz De Multiplexing 16 channels from 16 channel SD HD 3G SDI 64 channel AES10 MADI SDI Inputs Outputs 2 SDI Inputs and 1 SDI Output Optional Si...

Page 43: ...balanced Analog Input Impedance 40k balanced Analog Outputs Stereo XLR 3 Male balanced 28 dBU max Analog Output Frequency Response 40 Hz to 20 kHz 1dB Analog Output Distortion 0 01 THD N Analog Outpu...

Page 44: ...ey Use emSET to configure SFP SFP 2110 829086 SMTPE 2110 receiver Multi Mode 850 NM LC fiber connectors SFP module with software activation key Use emSET to configure SFP SFP 2110 2022 6 829087 SMTPE...

Page 45: ...Enable monitoring of 8 Analog channels on DB 25 TOSLINK included OPT DANTE iVAM 829172 Enable decoding and monitoring of DanteTM input streams Includes AoIP card Enables 2 x RJ 45 ports for 2022 7 sup...

Page 46: ...onitored Source 64 2 64 2 S W Updates Presets USB L R 2 Toslink SPDIF Input 4 Stereo ADCs L R 4 Stereo DACs L R Primary 1 GB ENET Toslink SPDIF Input Secondary 1 GB ENET AoIP SFP Cage for Fiber Module...

Page 47: ...lling making operation challenging The Chrome web browser is recommended for speed and compatibility First Time IP Assignments The iVAM2 2 can operate with a static fixed or dynamic DHCP IPv4 address...

Page 48: ...ular network Immediately after the host setup is complete change the iVAM2 2 s address Make the corresponding address mask and gateway changes in the iVAM2 2 Network Setup page Refer to the Network Se...

Page 49: ...lly be 255 255 255 0 unless your network can work across multiple subnets 4 Gateway Address This should usually be the same domain and subnet address numbers as the IP Address but with the last octet...

Page 50: ...ft side The Dashboard page shows all of the available Preset configurations at a glance The iVAM2 2 allows you to assign Presets to particular groups In Figure 4 3 two groups Operator 1 and Operator 2...

Page 51: ...n the upper right of the screen This enables you to see the total number of Groups Presets and Favorite Presets in the iVAM2 2 Use the button as shown in Figure 4 4 to toggle between Favorite Presets...

Page 52: ...or a Preset are 1 Delete Remove the Preset from the system Do Not delete the currently active Preset 2 Rename Rename the Preset but keep all of its other characteristics 3 Make Favorite Make this Pres...

Page 53: ...3 Figure 4 6 Dashboard Group Edit The Edit options for a Group are as follows 1 Delete Delete the Group and all of the Presets it contains 2 Rename Rename the Group but keep all of its other character...

Page 54: ...io Meters to remotely display the audio meters of the iVAM2 2 This display is shown in Figure 4 7 Also displayed is the name of the source that the meters are displaying In Figure 4 7 this is SDI BNC...

Page 55: ...made as to whether an alarm should be displayed 3 LRA Window This is a moving window of time over which the loudness measurement is made 4 Default Cluster When a Metering Screen is entered this is the...

Page 56: ...nished making the settings click Apply to save them or click Cancel to discard them Phase Indicator Configuration Tab The Phase Indicator Configuration tab is as shown in Figure 4 9 It allows you to s...

Page 57: ...xisting Preset To create a new Preset enter the name for the new Preset in the field to the left of the word Preset Then make all of the settings needed and save it To make changes to an existing Pres...

Page 58: ...eft of the screen 5 Autofill Selection If you simply want to map all 16 input channels to all 16 meters in the same order click the Autofill button The Preset Input Output Matrix will automatically fi...

Page 59: ...dicators tab is as shown in Figure 4 11 It allows you to select which channel pairs will receive a phase meter on the Metering Screen in this Preset Generally it is useful to monitor the relative phas...

Page 60: ...h input channels are routed to which outputs It then appears as shown in Figure 4 13 This very flexible capability allows you to route signals according to Preset or as a default for the whole system...

Page 61: ...reating a Preset or making changes to a Preset either click the Save button to save the Preset click the Save Apply button to save the Preset and make it the current Preset or click the Reset button t...

Page 62: ...Figure 4 14 use the following steps to set up a Dolby Preset 1 Click the Dolby Input Source as indicated in Figure 4 14 A list of all of your physical inputs will display Select the one containing the...

Page 63: ...ense for the OPT OUTPUT ROUTING feature If Output Routing is not licensed then any of the inputs can be monitored in stereo or mono only through the internal speakers The headphone jack the analog XLR...

Page 64: ...lected inputs will be mixed to AoIP transmit channels 59 and 60 Note that configuration for channels 1 58 is not supported Use a Dante Controller or Coveloz web interface to route these channels appro...

Page 65: ...s and mutes The Speaker Headphone output is always affected by solos and mutes Note also that all outputs in Speaker Mix mode also are affected by solos and mutes 3 Mute on Headphone Insertion This op...

Page 66: ...s the internal speakers They are controlled by the Volume and Balance knobs and are muted whenever a headphone is inserted into the Headphone jack These outputs also follow the solo mute selections on...

Page 67: ...me Control checkbox for that AES pair For a Post fade output on the Analog XLRs check Volume Control checkbox How do I make the XLR outputs follow the Audio Meter screen solos mutes while the AES Pair...

Page 68: ...put Routing feature works great But what if we don t want to create any Presets and want to monitor audio only using Source Select How would I configure different outputs for Source Select choices Use...

Page 69: ...the Global Output Routing configuration if the Mute on Headphone Insertion checkbox is ON then the outputs get automatically muted when a headphone is inserted into the Headphone jack As shown below i...

Page 70: ...re Preset Replication Preset Replication allows you to copy presets from a master unit to multiple iVAM2 2 units This can save a lot of setup time if multiple units all need basically the same setup T...

Page 71: ...les would be files that you have previously stored in the computer running the Web GUI You may add a descriptive name or version to the Presets being copied This may aid in remembering what tag or ver...

Page 72: ...eset Change Field They allow you to quickly resolve questions about which Presets on various units are the most up to date They will also allow you to determine whether Presets have been modified If t...

Page 73: ...e Preset configuration into the iVAM2 2 1 Click the Import Presets button on the Import Export Presets page shown in Figure 4 19 2 Select either the USB Flash Drive button or the Hard Drive button 3 I...

Page 74: ...Page 74 Figure 4 20 Database Import iVAM1 3...

Page 75: ...se tabs are explained in the following three sections System Information This tab displays a variety of information about the iVAM2 2 It is shown in Figure 4 21 This information could be useful to vie...

Page 76: ...useful to view if you need to ascertain what module if any is installed or if you are contacting Wohler Technical Service Figure 4 22 SFP Information Tab System SFP Information Note SFP Information a...

Page 77: ...ling these numbers Figure 4 23 Licenses Tab System Licenses The example above shows an iVAM2 2 with license keys for inputs and license keys for SFP modules installed To enter the license key provided...

Page 78: ...you should perform a Factory Reset do not click the Initiate Factory Reset button Contact Wohler Technical Service for advice Note Factory Reset will also reset your IP address to the default one Afte...

Page 79: ...correct an issue The Reboot System function should be used with a bit of caution It puts the iVAM2 2 out of service for several minutes while it is rebooting and this may unexpectedly interfere with t...

Page 80: ...e front panel USB socket and the update is then accomplished using the self contained menu system If this method seems most suitable then refer to the Local Update from the Front Panel section of this...

Page 81: ...fics of download and file transfer to the USB flash drive 2 Insert the USB flash drive with iVAM2 2 update package s into the front panel USB jack 3 From the Menu screen touch System Options The scree...

Page 82: ...Yes No 6 To proceed touch Yes To back out touch No After you touch Yes the screens will change as shown in Figure A 4 The left screen will display Software Upgrade in Progress until the upgrade is com...

Page 83: ...to the iVAM2 2 with the Wohler Web GUI Navigate to the System System Update menu as shown in Figure A 5 If the iVAM2 2 has recently been powered and it contains the Dolby Decoder option then a messag...

Page 84: ...e version has been selected click the Yes button Figure A 7 System Update Verification 6 Next the update begins showing the screen in Figure A 8 The circle in the center of the screen along with statu...

Page 85: ...ine rectangle at the right of the screen A file selection window will open as shown in Figure A 9 Figure A 9 System Update Menu 2 Click the two update files One will have a suffix of wx and the other...

Page 86: ...2 wx 60149760 bytes x Figure A 11 Invalid Checksum iVAM2 2 3 At this point wait for the update to complete It may take several minutes but it is critical not to disturb the iVAM2 2 or the Web GUI unti...

Page 87: ...date Remote System Update menu The screen shown in Figure A 12 will appear and the Web GUI will scan the network for any active iVAM2 2 units Figure A 12 Scanning for iVAM2 2 Units Note The scanning p...

Page 88: ...Selected Devices The window shown in Figure A 14 will appear Figure A 14 Apply System Package 5 Click Apply System Update The screen shown in Figure A 15 will appear This screen contains a table show...

Page 89: ...AM2 2 iVAM2 2 iVAM2 2 Wohler iVAM2 2 Monitor version 1 6 52 will be applied 6 At this point wait for each update to complete It may take several minutes but it is critical not to disturb any of the iV...

Page 90: ...provided to receive the AoIP signal using network fiber SFPs These are 1G SFP slots The SFP slot always acts as a primary interface On iVAM2 2 the AoIP source can be selected through the Source Select...

Page 91: ...in the iVAM2 2 The iVAM2 2 transmits up to 20 channels 1 to 16 are the monitored channel in prefade mode The remaining four are reserved for future use Currently they are mapped to channels being moni...

Page 92: ...rk but that will not change the iVAM2 2 s unit name appearing on GUI pages and iVAM2 2 Remote Metering or Discovery pages Figure B 3 iVAM2 2 Name During initial setup you may want to manually change t...

Page 93: ...Figure B 5 The iAM Brooklyn Dante card will serve as a temporary fallback clock source if preferred masters are interrupted It functions as an accurate slave clock synchronized to the master clock on...

Page 94: ...evice View AES67 Config menu enables disables AES67 Figure B 6 AES67 Enable Disable Further Dante AES67 discovery and operational protocol requires manual assignments for static multicast transmit and...

Page 95: ...Page 95 Figure B 7 Device View Network Config...

Page 96: ...te Multicast Flows window shown in Figure B 8 Figure B 8 Multicast Device Lock Audinate recently added a feature whereby a remote controller can send a command to lock Dante network device configurati...

Page 97: ...licable technical notes available Additional Information The following links are provided for those who need more information about the Dante controller or the Dante Firmware update manager https my a...

Page 98: ...Talker Listener 1 RFC 3551 RTP Profile for Audio and Video Conferences a L16 16 bit linear format defined in RFC 3551 clause 4 5 11 b L24 24 bit linear format defined in RFC 3190 clause 4 c AM824 24...

Page 99: ...for use within the iVAM2 2 The card will not function correctly if the user downloads and installs firmware from any source besides Wohler The Wohler augmentation includes the ability to support 64 ch...

Page 100: ...avenna devices on the subnet 2 Sample Rate 44100 48000 88200 96000 176400 192000 352800 384000 3 Frame size 1Fs current frame size 64 AES67 48 32 16 12 6 4 Safety Playout Delay 1Fs The value is descri...

Page 101: ...ou must first check the Manual checkbox a Priority 1 is the main priority value b Class This is the Device class This value should not be modified c Accuracy This field cannot be modified d Priority 2...

Page 102: ...Streams are to be Sourced from this card It is shown in the following figure Figure D 3 Getting Started Session Sources The elements of this tab are as follows 1 Create session button Create a new ses...

Page 103: ...the stream The drop down menu allows selection of specific channel range if the number of channels is less than 8 14 The URL of the SDP of this session This allows saving of the Session Description in...

Page 104: ...ate the connection status 0x10 receiving RTP packets OK 0x01 wrong RTP sequence id 0x02 wrong RTP SSRC 0x04 wrong RTP payload type 0x08 wrong RTP SAC 0x20 stream has been muted 0x40 Horus implementati...

Page 105: ...puts and or Outputs Figure D 5 Getting Started Ins Outs Getting Started I O Router This page allows remapping of incoming channels to different internal channel assignments For example Stream channel...

Page 106: ...Merging ZMAN device in Aneman This brings up the browser page with tab set to General configuration GUI for the ZMAN card This is shown in Figure D 1 Use the following procedure 1 Select the Session S...

Page 107: ...o direct Flows to higher channel ranges For example for monitoring 2 SDI sources four 8 channel Flows assign two flows to 1 8 and 9 16 and the next SDI signal to 17 24 and 25 32 Touch the iVAM2 2 AOIP...

Page 108: ...alized with the correct Wohler firmware load In case of future upgrades use the following steps 1 In Aneman right click the ZMAN entry on the bottom Devices section and select Maintenance Mode This br...

Page 109: ...uses JavaScript Object Notation JSON as its communication language Follow the instructions in the First Time IP Assignments section of Chapter 4 to achieve the required network connection API Presets...

Page 110: ...umberOfMeters 2 FirstMeter 1 Name Stereo 2 0 1 Type Stereo MuteOnPresetRecall true NumberOfMeters 2 FirstMeter 3 Name Stereo 2 0 2 Type Stereo MuteOnPresetRecall true NumberOfMeters 2 FirstMeter 5 Nam...

Page 111: ...s 2 FirstMeter 15 Name Stereo 2 0 8 Type Stereo MuteOnPresetRecall true MeterSet 13 Source Slot 1 Cage 1 Channel 13 ConnectorType BNC InputNo 1 InputIndex 0 Type SDI VolumeDb 0 DelayMs 0 Speaker Left...

Page 112: ...Ms 0 Speaker Left 4 Source Slot 1 Cage 1 Channel 4 ConnectorType BNC InputNo 1 InputIndex 0 Type SDI VolumeDb 0 DelayMs 0 Speaker Right 16 Source Slot 1 Cage 1 Channel 16 ConnectorType BNC InputNo 1 I...

Page 113: ...0 Cage 0 ConnectorType None Source Slot 1 Cage 1 Channel 5 ConnectorType BNC InputNo 1 InputIndex 0 Type SDI VolumeDb 0 DelayMs 0 Speaker Left 9 Source Slot 1 Cage 1 Channel 9 ConnectorType BNC Input...

Page 114: ...ource Slot 1 Cage 1 Channel 7 ConnectorType BNC InputNo 1 InputIndex 0 Type SDI VolumeDb 0 DelayMs 0 Speaker Left 10 Source Slot 1 Cage 1 Channel 10 ConnectorType BNC InputNo 1 InputIndex 0 Type SDI V...

Page 115: ...layMs 0 Speaker Left SystemClockSource Slot 0 Cage 0 ConnectorType None InputNo 0 Type None Pair 0 Favorite 0 PresetId 1 GroupName G1 3 GET list of groups presets Method GET api cf groups Example Resp...

Page 116: ...Method GET api op presets int presetID activate Example Response error null params PresetId 1 result PresetId 1 GroupId 1 PresetName SDI GroupName G1 5 POST to delete the group Method POST api op gro...

Page 117: ...esetID delete Example Response error null params PresetId 4 result PresetId 4 7 POST to rename group Method POST api op group int groupID newGrpNameSdi rename Example Response error null params GroupI...

Page 118: ...ameTest result PresetId 1 PresetName newPresetNameTest 9 POST to set preset as Favorite Method POST api op preset int presetID favoriteVal favorite Example Response error null params PresetId 4 Favori...

Page 119: ...Note Allowed MADI input sources are Madi Coax and Madi Optical ChannelGroup 1 Channels 1 16 and ChannelGroup 2 Channels 17 32 and so on 3 Body content for Analog SourceType Analog XLR SourceType Anal...

Page 120: ...age 120 6 Body content for TOSLINK SourceType Toslink Example Response unit_name iVam model iVam api_version 1 message Input Source Toslink has been applied successfully serial_number 162978 status 20...

Reviews: