41
Annotation Pro & Annotation Pro Plus
2. The
Get Image
dialog appears. Select the image you wish to retrieve from the list that is presented. The image is
displayed on the screen.
To retrieve a .bmp image file using TFTP
1. Type
ALT+F7
on your keyboard or touch the area on your touch screen if you assigned this command. The Get
Image dialog appears.
2. Enter the image index number for the image you wish to retrieve and select OK.
Only the number is to be entered. The prefix of the file is determined by the settings in the Image File dialog
.
If you
have changed the prefix setting in order to help group files for a particular purpose, make sure the prefix in the
Image File dialog matches the prefix of the file you are attempting to retrieve.
The file extension must be .bmp.
The image is displayed on the screen.
To retrieve an image using Windows Share (SMB)
1. Retrieve a .bmp image in one of the following ways:
•
Touch Screen:
Touch the appropriate area if you assigned this command.
•
Keyboard:
Type
ALT+F3.
The Get Image dialog appears.
2. Select the image you wish to retrieve from the list that is presented. The image is displayed on the screen.
Printing Images
The Annotation Pro allows you to print to a printer either directly or over a TCP/IP network. If you print directly, the
configuration requires a USB to Centronics cable. To print over a TCP/IP network requires an Ethernet cable and the
address of the printer
.
Printer Setup
The Annotation Pro can print to a printer over a TCP/IP network. This section shows you how to set it up.
1. Activate the menu system. The Main Menu appears.
2. Select the
Network
option. The Network Menu appears
.
3. Select the
Printer
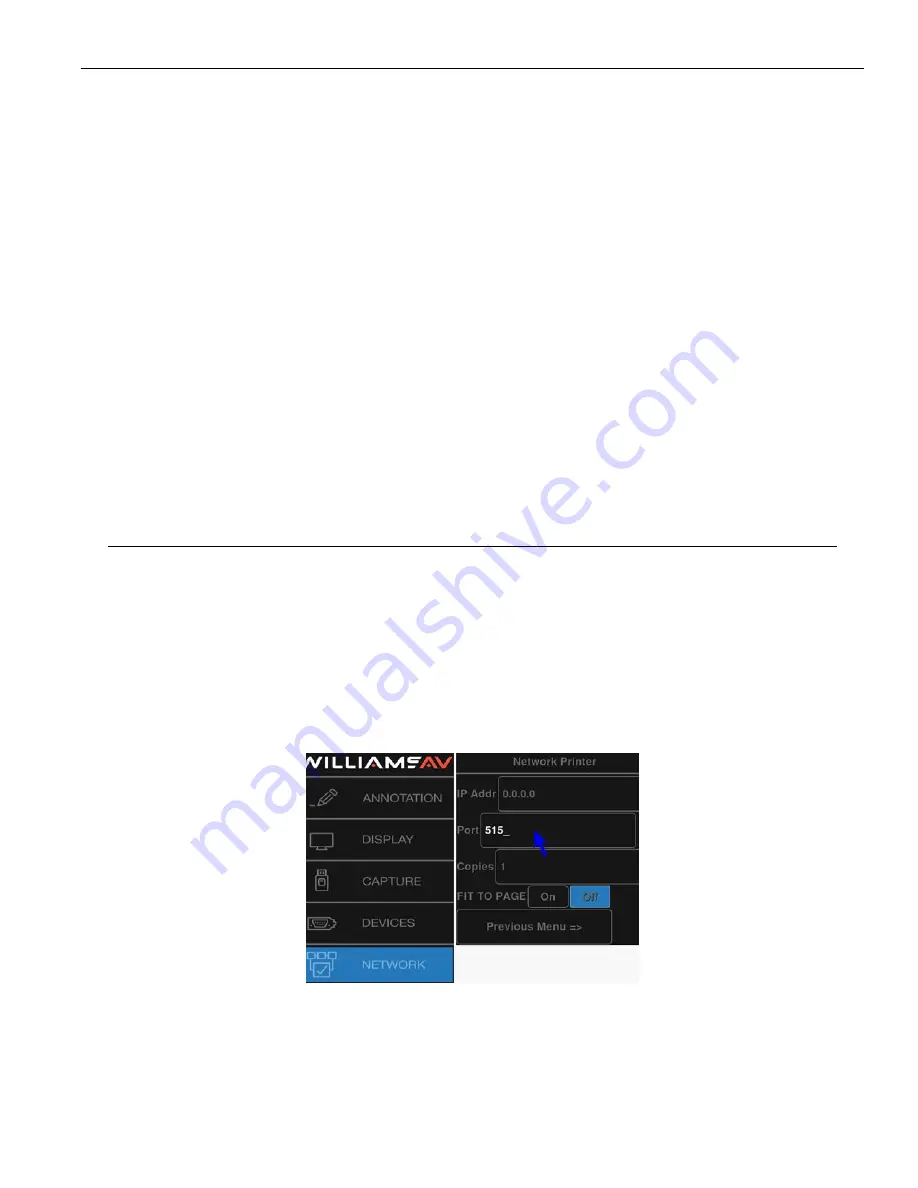
option. The Network Printer dialog menu.
Network Printer menu
4. Enter the
IP address of the printer
. Check with your IT administrator if you don’t know this address.
5. Enter the
Port number
. This is usually 515.
6. Enter the
number of copies
to be printed each time you give the Print command.


