background image

Mini convection ovens, electric models  Analogic 


18


ISTRUZIONI PER L’UTENTE 

INSTRUCTIONS FOR THE USER 

ANWEISUNGEN FÜR DEN BENUTZER 

INSTRUCTIONS POUR L’USAGER 

INSTRUCCIONES PARA EL USUARIO


SOSTITUZIONE LAMPADA FORNO 

Assicurarsi che il forno sia spento e che la spina sia staccata prima di sostituire la lampada, per evitare la 
possibilità di scosse elettriche. 
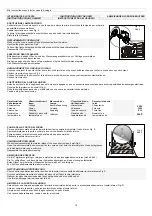
Svitare la protezione in vetro Fig. 4. 
Togliere la lampada svitandola e sostituirla con una nuova di pari caratteristiche. 
Riavvitare la protezione. 
 

REPLACEMENT OF OVEN LIGHT


Make sure the oven is switch-off and disconnected from the mains. 
Unscrew the glass protection Fig.4.  
Take out the light and replace it with another one with the same characteristics. 
Reassemble it all inversely.


ERSETZUNG DER OFENLAMPE 

Bitte beachten, dass der Ofen zu  und der Stecker ausgeschaltet sind, um Schläge zu vermeiden. 
Den Glasschutz Abb.4 abschrauben. 
Die Lampe wegnehmen und sie mit einer anderen mit gleichen Merkmalen ersetzten. 
Den Glasschutz wiederverschrauben. 
 

REMPLACEMENT DE L'AMPOULE DU FOUR 

Avant de remplacer l’ampoule vérifier que le four soit éteint et que la prise soit débranchée, pour éviter le risque de coups de courant. 
Dévisser la protection en verre Fig.4 
Extraire l’ampoule en la dévissant et la remplacer par une ampoule neuve ayant les mêmes caractéristiques. 
Revisser la protection


SUSTITUCIÓN DE LA LUZ DEL HORNO 

Antes de sustituir la luz, asegúrese de que el horno esté apagado y que se encuentre desenchufado, para evitar la posibilidad de descargas eléctricas. 
Desatornille la protección de cristal (Fig. 4). 
Quite la bombilla desenroscando, y sustitúyala con una nueva de características similares. 
Vuelva a atornillar la protección. 


Caratteristiche 
della lampada 

Characteristics of 

lamp 

Merkmale der 
Lampe 

Caractéristiques 

de l’ampoule 

Características de 
la luz 


Alimentazione 

Voltage 

Anschlußspannung 

Alimentation 

Alimentación 


230V 

Potenza 

Power 

Leistung 

Puissance 

Potencia 


15W 

Attacco tipo 

Coupling 

Kupplung 

Type de raccord  

Toma tipo 


E 14 

Resistente a 
temperature di 

Suitable to work with 
temperature of 

Hitzefest 

Résiste à des 
températures de 

Resistente a 
temperaturas de 


300°C 


PULIZIA DELLA PORTA DEL FORNO 

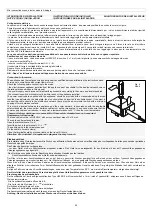
Per una pulizia accurata all’interno dei cristalli porta si consiglia di smontare il vetro interno Fig. 5; 
Aprire completamente la porta e svitare le due viti che fissano il cristallo interno. 
Pulire ambedue i cristalli solo con acqua calda ed un panno morbido. 
Effettuata la pulizia rimontare il tutto. 
 

CLEANING OF OVEN DOOR 

We advise disassembling the internal glass of the oven door to clean it well Fig.5:  
Open the door completely and unscrew the two screws  that hold the internal glass Clean both glasses 
only with warm water and a soft cloth. 
Reassemble the parts after cleaning. 


REINIGUNG DER OFENTÜR 

Um die Türgläser sorgfältig zu reinigen, empfehlen wir das Innenglas abzumontieren (siehe Abb.5) 
Die Tür völlig öffnen, und dann die zwei Schrauben abschrauben, die das Innenglas festhalten. 
Beide Gläser nur mit warmem Wasser und einem weichen Tuch reinigen. 
Zum Schluss alle Bestandteile wiedermontieren. 
 

NETTOYAGE DE LA PORTE DU FOUR 

Pour un nettoyage méticuleux entre les vitres de la porte, il est conseillé de démonter la vitre intérieure Fig.5 ; 
Ouvrir complètement la porte et dévisser les deux vis qui fixent la vitre intérieure. 
Nettoyer les deux vitres exclusivement avec de l’eau chaude et un chiffon doux. 
Une fois le nettoyage terminé, remonter le tout. 


LIMPIEZA DE LA PUERTA DEL HORNO 

Para obtener una limpieza apropiada del interior de los cristales de la puerta, le aconsejamos desmontar el cristal interno (Fig. 5). 
Abra por completo la puerta y quite los dos tornillos que fijan el cristal interno. 
Limpie ambos cristales, usando sólo agua caliente y un paño blando. 
Una vez acabada la limpieza, vuelva a montar el conjunto. 


Fig. 4 
Abb.4 

Fig. 5 
Abb.5 

Summary of Contents for AGS 776

Page 1: ...G INSTALLATION AND MAINTENANCE INSTRUCTIONS HEISSLUFTDÄMPFER INSTALLATIONS BEDIENUNGS UND WARTUNGSANLEITUNG FOURS À CONVECTION INSTRUCTIONS POUR L INSTALLATION L UTILISATION ET LA MAINTENANCE HORNOS CONVECCIÓN INSTRUCCIONES PARA LA INSTALLACIÓN EL USO Y EL MANTENIMIENTO Serie CAM Mod Analogic AGS 776 ...

Page 2: ...d read all the instructions carefully and keep the booklet handy The manufacturer shall not be held responsible for damage caused by improper use of the appliance moving of the appliance with unsuitable means unauthorised modifications and whatever else is not considered in this book VORWORT Das Buchlein gehört zur Dokumentation des Gerätes und enthält alle nützliche Informationen zum richtigen Ge...

Page 3: ...n Behörden Ihrer Gemeindeverwaltung an den lokalen Recyclinghof für Haushaltsmüll oder an den Händler bei dem Sie dieses Gerät erworben haben um weitere Informationen über Behandlung Verwertung und Wiederverwendung dieses Produkts zu erhalten DIRECTIVE EUROPÉENNE 2002 96 CE Cet appareil porte le symbole du recyclage conformément à la Directive Européenne 2002 96 CE concernant les Déchets d Équipem...

Page 4: ...uite a while after switching the appliance off After using the appliance make sure that the knobs are in the off position If the appliance is placed near other units make sure their cables and pipes are far enough from the hot parts of the appliance Make sure enough air can circulate all round the appliance Do not install the appliance near flammable materials Clean the appliance regularly Residua...

Page 5: ...usement l intérieur avec de l eau chaude et un produit d entretien délicat Cet appareil ne doit être utilisé que pour la cuisson des aliments Pendant le fonctionnement certaines parties de l appareil peuvent surchauffer Eloigner les enfants des alentours du four SEGURIDAD Sólo personal cualificado puede instalar y conectar el equipo al sistema eléctrico siempre según las normas vigentes y siguiend...

Page 6: ... Garraums und niedriger im unteren Teil Wählschalterdrehknob und Thermostatdrehknopf Um den belüfteten Ofen zu benutzen mit Hilfe des Drehschalters 2 siehe Abb 1 den geeigneten Gartyp wählen und mit Hilfe des Thermostatdrehschalters die geeignete Temperatur wählen Die Zeichenerklärung wird in der Folge die verschiedenen Heizungsarten beschreiben immer wenn der Thermostat die gewählte Temperatur er...

Page 7: ...ventilado La acción combinada del grill y del ventilador asegura una cocción bien distribuida Es perfectamente posible cocinar a la parrilla incluso carnes de mucho grosor y comidas especialmente voluminosas Cottura intensiva Il funzionamento della ventola abbinato alla cottura tradizionale assicura cotture rapide e uniformi anche per preparazioni delicate come biscotti e pasticceria Grill tradizi...

Page 8: ...el termostato con el fin de mantener constante la temperatura en el interior del horno Orologio contaminuti I forni sono dotati di contaminuti meccanico che si carica ruotando la manopola 5 Fig 1 in senso orario di un giro completo e poi posizionandola sul tempo desiderato da 0 a 60 minuti La Fig 3 evidenzia l impostazione per 30 minuti Lo scadere del tempo selezionato sarà segnalato dalla suoneri...

Page 9: ...andteile oder unkorrekten Gebrauch des Gerätes zu vermeiden ist der Ofen mit einem Sicherheitsthermostat versehen Er hat die Funktion bei erhöhten Temperaturen im Garraum die Elektrozufuhr zu unterbrechen Die Rückstellung des Thermostates erfolgt automatisch man soll nur die Abkühlung des Ofens warten andernfalls wenn einige Bestandteile mangelhaft sind muss man den Kundendienst anrufen Thermostat...

Page 10: ...tura in minuti Pasticceria Dolci a stampo con impasto sbattuto Panettoni e focacce 175 C 55 65 Focaccia reale 175 C 60 70 Torta sublime 175 C 60 70 Dolci senza stampo Fondo torta 175 C 30 40 con guarnitura di frutta 175 C 50 60 con guarnitura asciutta 200 C 40 50 Dolci a stampo di pastafrolla Fondo torta 200 C 8 10 con ricotta 200 C 25 35 con frutta 200 C 25 35 Dolci a stampo con impasto lievitato...

Page 11: ...ough Focaccia reale 175 C 60 70 Sublime cake 175 C 60 70 Cakes without baking tin Cake base 175 C 30 40 With fruit garnish 175 C 50 60 With dry garnish 200 C 40 50 Pastry cakes in baking tin Cake base 200 C 8 10 With ricotta cheese 200 C 25 35 With fruit 200 C 25 35 Cakes in baking tin with leaven White bread 1 kg of flour 200 C 25 35 Small cakes Pastry 200 C 10 15 Puff pastry 200 C 30 45 Biscuits...

Page 12: ... Garzeit in Minuten Patisserie Kuchen in der Kuchenform mit geschlagenem Teig Panettone und Fladen 175 C 55 65 Königler Fladen 175 C 60 70 Kuchen sublime 175 C 60 70 Kuchen ohne Kuchenform Kuchenboden 175 C 30 40 Mit Fruchtgarnitur 175 C 50 60 Mit trockener Garnitur 200 C 40 50 Kuchen in der Kuchenform aus Mürbeteig Kuchenboden 200 C 8 10 Mit Quark 200 C 25 35 Mit Frucht 200 C 25 35 Kuchen in der ...

Page 13: ...s de cuisson en minutes Pâtisserie Desserts avec moule avec pâte fouettée Fougasses et brioches 175 C 55 65 Fougasses 175 C 60 70 Torta sublime 175 C 60 70 Desserts sans moule Fond de tarte 175 C 30 40 garni avec des fruits 175 C 50 60 garniture sèche 200 C 40 50 Desserts à moule en pâte brisée Fond de tarte 200 C 8 10 avec fromage frais à pâte molle 200 C 25 35 avec des fruits 200 C 25 35 Dessert...

Page 14: ...comida Selector Temperatura Tpo de cocción minutos Panadería Dulces de molde con masa batida Bizcochos y tortas 175 C 55 65 Torta real 175 C 60 70 Tarta sublime 175 C 60 70 Dulces sin molde Base de tarta 175 C 30 40 con guarnición de fruta 175 C 50 60 con guarnición seca 200 C 40 50 Dulces de molde con masa pastelera Base de tarta 200 C 8 10 con queso 200 C 25 35 con fruta 200 C 25 35 Dulces de mo...

Page 15: ...ilure persists call the after sales service The thermostat control light does not turn on Turn the knob to any function Turn thermostat to any temperature The oven light does not work Check that the feeding cable is connected to the network Replace the oven light with one with the same characteristics following the instructions on paragraph Maintenance and cleaning Humidity in the oven Do not leav...

Page 16: ...l intérieur du four pendant la cuisson Augmenter la température du four de 15 20 C Si les problèmes persistent ou ne sont pas résolus par les conseils reportés ci dessus s adresser à un centre d Assistance technique PROBLEMAS Y SOLUCIONES Problema Sugerencias Los indicadores luminosos no se encienden Compruebe la correcta conexión del aparato a la red eléctrica Controle la correcta posición de los...

Page 17: ... Elektroheizelemente sichtbar im oberen Teil des Ofens spritzen Achtung Man darf nicht das Gerät mit einem Dampfreiniger reinigen Innenreinigung des Ofen Die emaillierten Teile mit lauwarmem Wasser und Reinigungsmittel mit Hilfe eines weichen Schwammes waschen Keinesfalls normale Stahlwolle oder Schleifmittel verwenden um den emaillierten Stahl nicht zu schaden Danach mit Wasser nachspülen und sor...

Page 18: ... de la luz Alimentazione Voltage Anschlußspannung Alimentation Alimentación 230V Potenza Power Leistung Puissance Potencia 15W Attacco tipo Coupling Kupplung Type de raccord Toma tipo E 14 Resistente a temperature di Suitable to work with temperature of Hitzefest Résiste à des températures de Resistente a temperaturas de 300 C PULIZIA DELLA PORTA DEL FORNO Per una pulizia accurata all interno dei ...

Page 19: ...m Supply voltage Spannung Tension alim Tensión alim V 230 1 50Hz 230 1 50Hz Accessori Accessories Zubehör Accessoires Accesorios Leccarda Drip tray Fettfänger Lèchefrite Bandeja grasa n 2x 44 2 x36 5 n 2x 44 2 x36 5 Griglia Grid Rost Grille Rejilla 1 1 LAVORI DI RIPARAZIONE PARTE ELETTRICA Prima di chiamare il Servizio di Assistenza Tecnica controllare che La spina sia ben inserita nella presa di ...

Page 20: ...ce installed The power supply cable supplied with the appliance should be provided with a standardized plug that can take the load indicated on the data plate the plug should then be inserted in a suitable socket If you want to connect the cable directly to the distribution network there must be an omnipolar switch with a minimum opening of 3mm between contacts This must be located between the app...

Page 21: ...lé par les couleurs jaune vert Fixer le fil dans le serre fils Refermer le connecteur en exerçant une pression sur le couvercle jusqu à ce que ce dernier se bloque N B Après l installation la prise de l appareil doit rester accessible Conexión eléctrica Las operaciones de instalación deben ser llevadas a cabo con mucho cuidado por personal cualificado y según las normas en vigor Antes de proceder ...

Reviews: