background image

Document: 1632en03.doc

WESTERSTRAND

Author: CAn

Date: 2003-09-03

Page: 3 of 12

WESTERSTRAND URFABRIK AB

Box 133

Tel. +46 506 48000

Internet:: http://www.westerstrand.se

SE-545 23  TÖREBODA

Fax. +46 506 48051

e-mail:

 [email protected]

Installation

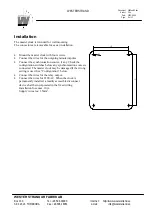
The master clock is intended for wall mounting.
The connectors are removable for easier installation.


Mount the master clock with four screws.


Connect the wires for the outgoing minute impulse.


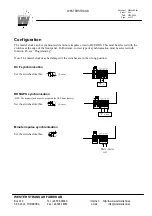
Connect the synchronisation source, if any. Check the
configuration switches before any synchronisation source is
connected. The master clock may be damaged if the wrong
setting is used. See ”Configuration” below.


Connect the wires for the relay output.


Connect the wires for 230VAC. When the clock is
permanently installed, a readily accessible disconnect
device shall be incorporated in the fixed wiring.
Installation fuse max. 10A.
Supply wire area: 1,5mm

2

.

145

100

Ø4

Summary of Contents for 121346-00

Page 1: ...PS synchronisation 4 Minute impulse synchronisation 4 Programming 5 General 5 Functions 5 Manual control 5 Set time function F1 6 Set slave clock time function F2 7 Relay output programming function F...

Page 2: ...e synchronisation is also possible Changing from winter time to summer time and vice verse is fully automatic and does not need programming In case of power failure an internal memory keeps the correc...

Page 3: ...the master clock with four screws Connect the wires for the outgoing minute impulse Connect the synchronisation source if any Check the configuration switches before any synchronisation source is con...

Page 4: ...CF RDS This must be selected with the switches at the edge of the front panel Furthermore correct type of synchronisation must be selected with function F6 see Programming Note The master clock may be...

Page 5: ...and with a certain signal type e g switch ON at 07 00 on Mondays Functions Select with button F F1 Set time F2 Set slave clock time F3 Relay programming F4 Impulse length for the relay output This se...

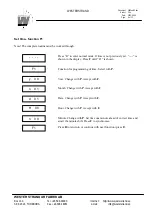
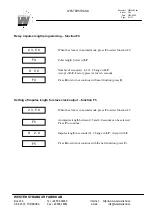
Page 6: ...ss R to enter normal mode If time is not previously set is shown in the display Press F until F1 is shown Function for programming of time Select with P Year Change with P Accept with F Month Change w...

Page 7: ...de press F to select function F2 Function for correction of slave clocks Select with P Note Set the time shown by the slave clocks The time of the slave clock is automatically adjusted by rapid impuls...

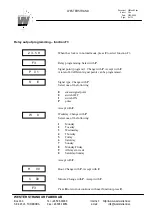
Page 8: ...rogram 1 Change with P Accept with F A total of 40 different signal points can be programmed Signal type Change with P Select one of the following E erased signal point 0 switch OFF 1 switch ON P puls...

Page 9: ...e length Select with P Number of seconds 1 to 59 Change with P Accept with F Factory preset value is 6 seconds Press R to return or continue with next function press F Setting of impulse length for sl...

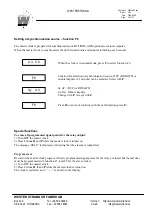
Page 10: ...or minute impulse 1 1 minute can be selected Select with P Sy dC DCF or RDS GPS Sy Im Minute impulse Change with P Accept with F Press R to return or continue with the next function press F Special f...

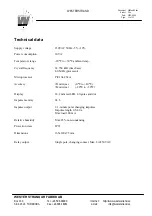
Page 11: ...on 10VA Temperature range 20 C to 50 C ambient temp Crystal frequency 32 768 kHz time base 4 0 MHz processor Microprocessor PIC16LC62A Accuracy 1 min year 0 C to 40 C 4 min year 20 C to 50 C Display 1...

Page 12: ...Date 2003 09 03 Page 12 of 12 WESTERSTRAND URFABRIK AB Box 133 Tel 46 506 48000 Internet http www westerstrand se SE 545 23 T REBODA Fax 46 506 48051 e mail info westerstrand se Programming form No Si...

Reviews: