Noran Tel
Page 4 of 16
a subsidiary of Westell, Inc
A
.
SiteVu Main Menu
All the menus have a similar look and feel as
well as try to operate in a consistent manner.
•
Numbers between “<” and “>” signs are
action numbers.
•
Typing a number and pressing <Enter> will
either bring up a new menu or select a
setting that may be changed.
•
When a menu items contain a right arrow
(
→
) a submenu will open to display more
menu options.
•
Text after a colon (:) is the setting for that
item and may be changed by the user.
•
Press ESC to back out of submenus
•
Press Y or y and <enter> to change settings
•
Press N or n and <enter> to discard
changes
•
Press Ctrl+B to go to Main Menu
•
Press Ctrl+Q to close current connection
When entering a submenu, the previous menus
are displayed on the top row of the serial
communication software screen along with the
current menu the user is viewing. For example,
if the user is viewing the SNMP Settings Menu,
“(Main/Comm_settings)
-> SNMP Settings
Menu” is displayed. The text underlined after
the arrow is the current menu. Text inside the
brackets refers to previous menus. The user
can back out of the current menu to return to
these previous menus.
When the user types in a number that is
associated with changing a setting (a menu
item that contains a colon) and presses the
<Enter> key, the menu item selected is
displayed along with its previous setting. Also,
a prompt is displayed for the user to enter a
new value for the setting. This prompt will
contain an example of how to enter a new
value. After the user types or selects the new
setting for the menu item and presses the
<Enter> key, a conformation prompt is
displayed to accept the or discard the change.
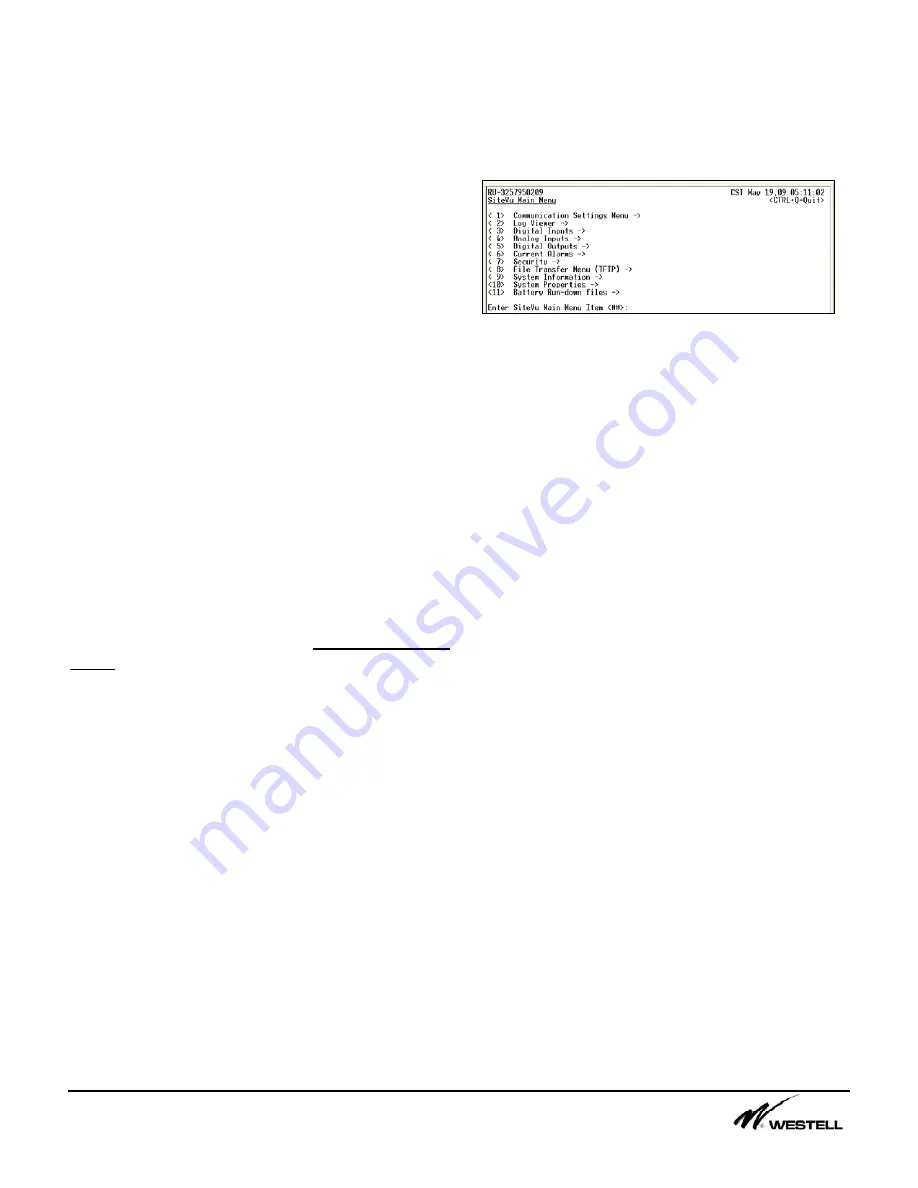
The SiteVu Main menu is shown in Figure A-1
and contains the following options:
Figure A-1 Site Vu Mini Main Menu
¾
Communication Settings Menu (1)
•
Configure the communication options
¾
Log Viewer (2)
•
View the 1000 most recent alarm events
¾
Digital Inputs (3)
•
View the status of the digital inputs
•
Configure the digital input sensors
¾
Analog Inputs (4)
•
View the status of the analog inputs
•
Configure the analog input sensors
¾
Digital Outputs (5)
•
View the status of the digital output relay
•
Configure the digital output relay
¾
Current Alarms (6)
•
View all the current active alarms
¾
Security (7)
•
Configure users and set access levels
•
View the security log
•
Configure Access Control List (ACL)
¾
File Transfer Menu (TFTP) (8)
•
Setup files for remote firmware upgrade
•
Upload and download configuration files
•
Download event/security logs
¾
System Information (9)
•
View extra information
¾
System Properties (10)
•
Set the time and the remote units name
¾
Battery Run-down Files (11)
•
Rename and delete files
•
Modify Battery Run-down settings


