background image

Rockbook X130 User Manual

90 / 92

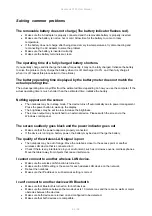
Restore User Defaults: Load factory defaults for all items.

Saves Changes: Saves the changes you have made.

Discard Changes: Reset all elements to their original values.

Appendix

Technical specifications

Physical characteristics

Dimensions

332 x 233 x 26 mm

Weight

2.1 kg

Housing

Rugged magnesium alloy case, black, carrying
handle, reinforced edges

Battery

Battery life up to 10 hrs.
2 x 31 Wh lithium-ion battery, exchangeable, hot-
swap functionality

Input voltage

19 V DC / 3.42 A, power supply 100-240 VAC

Buttons

Power button, 1 function key (screen lock),
touchpad (can be deactivated)

Keyboard

Keyboard with white LED backlight, Intl.
QWERTY layout, other layouts on project basis

Status indicators

1 x blue LED power indicator, 1 x multicolor LED
charging status, 1 x red LED Caps lock

Operating temperature

-20° C – 60° C

Storage temperature

-30° C – +70° C

Humidity

95%, non-condensing

Sealing

IP65 Dust and waterproof

Vibration resistance

MIL-STD-810G 514.7

Drop resistance

MIL-STD-810H 1.22 m

System features

Operating system

Windows 10 Pro*, Windows 11 Pro, Windows
10 IoT Enterprise*, Windows 10 Enterprise*

Processor options

■    Intel® Core™ i5-1135G7 quad-core up to
4.2 Ghz, 8 MB cache
■    Intel® Core™ i7-1165G7 quad-core up to
4.7 Ghz, 12 MB cache
■    Other 11th generation Tiger Lake UP3
processors on a project basis.

Graphics processor

Intel® Iris Xe Graphics

System memory

256, 512 GB, 1 TB or 2 TB PCIe M.2 SSD,
expandable via SD card slot by up to 512 GB

Memory

8, 16 or 32 GB Dual Channel DDR4 RAM 2133
MHz

Summary of Contents for Rockbook X130

Page 1: ...Copyright 2021 by WEROCK All Rights Reserved Rockbook X130 User Manual ...

Page 2: ...creens 34 Benutzen der LAN Schnittstelle 36 Verwenden der WLAN Funktion Wi Fi 36 Verwendung der Bluetooth Funktion 37 Verwendung des Fingerabdruckscanners 37 Wartung und Instandhaltung 38 Störungsbeseitigung 39 Wechsel der SSD 42 BIOS Setup 44 Anhang 47 Technische Daten 47 Aktualisierungen 49 EN User Manual 49 Read me First 49 Basic Safety Instructions 56 Intended use 58 Warranty 59 Proper and env...

Page 3: ...2 Using the WLAN function Wi Fi 80 Using the Bluetooth function 81 Using the fingerprint scanner 82 Service and maintenance 82 Troubleshooting 83 Replacing the SSD 86 BIOS Setup 87 Appendix 90 Technical specifications 90 Updates 92 ...

Page 4: ...sionsnummer Version number 1 0 Zuletzt geändert Last modified Friday February 4 2022 Verfügbare Sprachen Available languages DE Deutsch EN English DE Betriebsanleitung Betriebsanleitung von Rockbook X130 in deutscher Sprache Impressum WEROCK Technologies GmbH Kallhardtstr 20 75173 Pforzheim Deutschland Tel 49 7231 4709405 10 Mail info werocktools com www werocktools com ...

Page 5: ... ltig Schlagen Sie gegebenenfalls immer wieder fu r Sie entscheidenden Sachverhalte nach Die Betriebsanleitung informiert und warnt Sie vor Restrisiken gegen die eine Risikominderung durch Konstruktion und Schutzmaßnahmen nicht oder nicht vollkommen wirksam ist Der digitale Aufbau dieser Anleitung ermöglicht die permanente Anpassung Sollte ein bestimmtes Thema nicht oder nicht ausreichend behandel...

Page 6: ...rstellung von Warnhinweisen Gefahrenstufe Signalwort Bedeutung und Folgen bei Nichtbeachtung Warnhinweis GEFAHR Unmittelbar drohende Gefahr die zu schweren Körperverletzungen oder zum Tod führt WARNUNG Möglicherweise gefährliche Situation die zu schweren Körperverletzungen oder zum Tod führen könnte VORSICHT Möglicherweise gefährliche Situation die zu leichten Körperverletzungen führen könnte HINW...

Page 7: ... kann Mögliche Symbole in der Betriebsanleitung Die möglichen Symbole in der Betriebsanleitung teilen sich auf die Kategorien Warn Gebots und Verbotssymbole auf Warnsymbole warnen vor Gefahrenstellen Risiken und Hindernissen Gebotssymbole dienen der Unfallverhütung am Arbeitsplatz Verbotssymbole tragen zu mehr Sicherheit bei Allgemeines Gebotssymbol Allgemeines Warnsymbol Allgemeines Verbotssymbol...

Page 8: ...ende in Tabellenform unterhalb des Bildes erläutert Für die Verweise verwendet man Positionsziffern oder buchstaben 1 Sensor 3 Micro USB Anschluss 2 Start Stopp Taste 4 Batteriestatus LEDs Darstellung von Voraussetzungen Sind für das Ausführen einer Tätigkeit an der Maschine bestimmte Voraussetzungen zwingend werden diese im Text mit einer Checkbox gekennzeichnet und im Fettdruck dargestellt Beisp...

Page 9: ...chenresultate und Endresultate auszuführen Zwischenresultate stellen Abläufe da die nicht vom Nutzer ausgeführt werden und sind mit einem Pfeil gekennzeichnet Endresultate zeigen das Ende der Handlung an und sind mit einem Doppelpfeil gekennzeichnet Beispiel für eine Handlungsanweisung mit Ergebnissen 1 Schalten Sie die Kaffeemaschine am Hauptschalter 1 ein Die Kaffeemaschine wärmt auf solange der...

Page 10: ...ir erklären hiermit dass unsere Produkte der RoHS Richtlinie 2011 65 EU des Europäischen Parlaments und des Rates vom 08 06 2011 zur Beschränkung der Verwendung bestimmter gefährlicher Stoffe in Elektro und Elektronikgeräten entsprechen Es handelt sich namentlich um folgende Stoffe Blei Pb Kadmium Cd Sechswertiges Chrom Cr Polybromierte Biphenyle PBB Polybromierte Diphenylether PentaBDE OctaBDE De...

Page 11: ...ngen das Gerät zu benutzen Behalten Sie dieses Handbuch zur späteren Referenz es ist Bestandteil des Produkts Alle Warnungen und Hinweise am Produkt sind zu beachten Wenn ein ernstes Problem bei der Verwendung dieses Produkts auftritt hören Sie sofort auf es zu benutzen Allgemeine Betriebssicherheit Allgemeine Hinweise zum Anschluss des Produkts an Stromkreise Verbinden Sie das Produkt ausschließl...

Page 12: ... Displays kann zu Überhitzung führen und die Funktionsweise des Produkts beeinträchtigen Beachten Sie unbedingt die Betriebstemperatur in den technischen Daten HINWEIS Explosive oder brennende Umgebung Sie sollten es vermeiden das Produkt in der Nähe einer explosiven oder brennenden Umgebung zu platzieren Wenn das Produkt zu nah an eine explosive oder brennende Umgebung platziert wird kann das Ger...

Page 13: ...kku defekt Der Akku könnte anfangen zu brennen oder explodieren Hören Sie sofort auf das Gerät zu benutzen Entfernen Sie den Akku aus dem Gerät und entsorgen diesen bei einer Rücknahmestelle Bringen Sie auf garkeinen Fall den Akku mit Wasser in Verbindung Lithium reagiert mit Wasser und erhöht eine Explosionsgefahr Ein sicherer Transport ist beispielsweise in einer mit Sand gefüllt Box möglich Pro...

Page 14: ...s Gerät ist nicht für den Gebrauch im privaten Haushalt bestimmt Jede andere Verwendung gilt als nicht bestimmungsgemäß und kann zu Personen und Sachschäden führen Gewährleistung Gewährleistungszeitraum 12 Monate WEROCK sichert dem Käufer zu dass alle Produkte frei von Material und Verarbeitungsfehlern sind für den oben angegebenen Zeitraum ab Rechnungsdatum Gewährleistungsanspruch Es bestehen Gew...

Page 15: ...t zu entsorgen können Sie uns dies auch kostenfrei zum Recycling und zur Aufarbeitung einschicken Ob das Gerät noch funktionsfähig ist spielt für WEROCK hierbei keine Rolle Dies ist nicht nur gut für die Umwelt sondern hilft uns auch unsere Produkte noch weiter zu verbessern Wir nehmen Teil am System Stiftung elektronik altgeräte register unter der Regstrierungsnummer DE95468698 Unsere Batterie Me...

Page 16: ...tterie ganz entleert ist Der Akku wird bei längerem Betrieb heiß Berühren Sie das heiße Akkupaket nicht mit bloßen Händen Legen Sie das Akkupaket nach dem Ausbau an einem belüfteten Ort ab Hinweis Wenn Ihr Computermodell mit mehr als einem Akku ausgestattet ist können Sie den anderen Akku bei laufendem Betrieb einstecken solange einer der Akkus mit Strom versorgt wird 1 Legen Sie den Computer vors...

Page 17: ...cm dick und 2 1 kg leicht 13 3 Full HD Display mit optionalem Touchscreen Leistungsstarker Intel Core i5 11357G Quad Core Prozessor mit bis zu 4 20 GHz Bis zu 32 GB DDR4L Arbeitsspeicher Inklusive Windows 11 Pro Intelligente Sicherheit dank integriertem Manipulationsschutz TPM 2 0 Einfaches Login mit Windows Hello Fingerabdrucksensor 2 x 31 Wh Hot Swap fähige Akkus für unterbrechungsfreies Arbeite...

Page 18: ...be und Aussehen Ihres Modells möglicherweise nicht genau mit in diesem Dokument gezeigten Grafiken überein HINWEIS Schutz vor Wasser und Staub Sie müssen die Schutzabdeckungen öffnen um an die Anschlüsse zu gelangen Wenn Sie einen Anschluss nicht verwenden müssen Sie die Abdeckung vollständig schließen damit der Schutz vor Wasser und Staub gewährleistet ist Vorderseite 1 Deckelverriegelung Verrieg...

Page 19: ...es Geräts mit RJ45 Verbindung 4 HDMI Verbindung mit einem HDMI Monitor oder Fernseher Rechte Seite 1 USB 3 0 Anschluss Schließt USB Geräte an 4 3 5 mm Headsetanschluss Anschluss eines Kopfhörers oder Headsets 2 USB 3 0 Anschluss Schließt USB Geräte an 5 Stromanschluss Dies ist ein elektrischer Anschluss für die Stromversorgung mit Gleichstrom DC 3 USB C Anschluss Schließt Thunderbolt oder USB Gerä...

Page 20: ...Rockbook X130 User Manual 20 92 Linke Seite 1 Kensington Anschluss Zum Anschluss von Notebookschlössern 2 Externer Antennanschluss optional Ermöglicht den Anschluss einer externen GPS Antenne ...

Page 21: ...s Computers Batteriestatus und den Status der Feststelltaste aus 2 Display Ausgabedisplay des Computers Je nach Modell ebenfalls kombiniert mit einem Touchscreen 7 Fingerabdruckscanner Dient als Verifikation um den Computer vor unerlaubtem Zugriff zu schützen 3 Tastatur Dient der Eingabe von Daten in den Computer 8 P Taste Sperrt den Bildschirm 4 Mikrofon Nimmt Töne auf 9 An Aus Schalter Schaltet ...

Page 22: ...geladen wird Blink rot wenn die Batterie entfernt wurde Leuchet grün wenn das Gerät an die Stromversorgung angeschlossen ist und der Akku vollständig aufgeladen wurde Batteri e 2 Leuchtet rot wenn die Batterie geladen wird Blink rot wenn die Batterie entfernt wurde Leuchet grün wenn das Gerät an die Stromversorgung angeschlossen ist und der Akku vollständig aufgeladen wurde Festst elltaste Leuchte...

Page 23: ...eln Entriegeln der Batterie 2 Batterieverriegelung Zum Verriegeln Entriegeln der Batterie Erste Inbetriebnahme Vor der erstmaligen Inbetriebnahme und Verwendung des Produkts im Alltag lesen Sie die folgenden Anweisungen Dieses Kapital gibt Aufschluss u ber die korrekte Montage Anschluss und Verwendung des Produkts Hinweis Gegenstände die nicht in im Lieferumfang aufgeführt sind werden separat verk...

Page 24: ...etzen Sie den Akku nur mit den optionalen Akkupacks des Computerherstellers Entsorgen Sie verbrauchte Akkus entsprechend den Anweisungen dieses Handbuchs Versuchen Sie nicht das Akkupaket zu zerlegen Der Akku wird bei längerem Betrieb heiß Berühren Sie das heiße Akkupaket nicht mit bloßen Händen Legen Sie das Akkupaket nach dem Ausbau an einem belüfteten Ort ab Hinweis Wenn Ihr Computermodell mit ...

Page 25: ...il Vor der ersten Verwendung müssen Sie das Gerät an eine Stromversorgung anschließen Gehen Sie dabei wie folgt vor 1 Öffnen Sie die wasserdichte Anschlussklappe des Stromanschluss Ziehen Sie dafür die Lasche nach Links um diese zu öffnen 2 Stecken Sie das Rundstecker Anschlusskabel des Netzteils an den Computer an 3 Verbinden Sie nun das Netzanschlusskabel mit dem Netzteil und schließen es anschl...

Page 26: ...gehen Sie wie folgt vor 1 Ziehen Sie an der Lasche um die Displayverriegelung zu lösen Öffnen Sie danach das Notebook und positionieren Sie das Display in eine für Sie angenehme Position Das Display lässt sich bis zu 180 öffnen 2 Drücken Sie den An Aus Schalter Windows sollte nun starten ...

Page 27: ...ufgeladen ist hängt die Stromversorgungszeit davon ab wie Sie den Computer verwenden Wenn die von Ihnen verwendete Software die häufige Verwendung von Peripheriegeräten erfordert kann der Strom bald aufgebraucht sein Sie finden das Akkusymbol in der Windows Taskleiste untere rechte Ecke Das Symbol zeigt den ungefähren Akkustand an Bei Modellen die sowohl über einen Hauptakku als auch über einen zw...

Page 28: ...Ihre Zeitzone und tippen Sie dann auf Next 3 Lesen Sie auf dem Bildschirm Hier ist das Rechtliche die Angaben durch und tippen Sie dann auf Akzeptieren 4 Windows versucht dann eine Verbindung zum Netzwerk herzustellen Tippen Sie aufDiesen Schritt überspringen um ohne WLAN Verbindung fortzufahren da Sie das Netzwerk dann später einrichten können 5 Klicken Sie im Bildschirm Schnell loslegen auf Expr...

Page 29: ...orgesehenen Felder ein und tippen Sie dann auf Weiter 7 Die anfänglichen Einrichtungsbildschirme sind abgeschlossen und der Desktop wird angezeigt 8 Lesen Sie alle Einführungsbildschirme in denen die Funktionen Ihres Computers beschrieben werden und tippen Sie auf Weiter wenn Sie jeden Bildschirm abgeschlossen haben Sie sind nun mit der Ersteinrichtung fertig Bedienung des Geräts Dieses Kapitel bi...

Page 30: ...Sie den Computer ausschalten in den Energiesparmodus oder in den Ruhezustand versetzen Über die Windows Energieeinstellungen können ebenfalls automatisierte Energiespareinstellungen programmiert werden Computer ausschalten Um den Computer auszuschalten gehen Sie wie folgt vor 1 Klicken Sie auf das Windows Symbol 2 Klicken Sie anschließen auf das Power Symbol 3 Klicken Sie abschließend auf Herunter...

Page 31: ... für spezielle Zwecke hinzugefügt worden z B die Strg Alt Esc und Sperrtasten Die Steuerungstaste Strg Alternativtaste Alt wird normalerweise in Kombination mit anderen Tasten für programmspezifische Funktionen verwendet Die Escape Taste Esc wird normalerweise zum Anhalten eines Prozesses verwendet Beispiele sind das Beenden eines Programms und das Abbrechen eines Befehls Die Funktion hängt von de...

Page 32: ...mbinationen die jederzeit gedrückt werden können um spezielle Funktionen des Computers zu aktivieren Die meisten Tastenkombinationen funktionieren zyklisch Jedes Mal wenn eine Tastenkombination gedrückt wird wird die entsprechende Funktion auf die andere oder nächste Auswahl Sie können die Tastenkombinationen leicht an den Symbolen erkennen die auf der Tastatur aufgedruckt sind Die Tastenkombinati...

Page 33: ...izieren können indem Sie die Position des Zeigers auf dem Bildschirm steuern und mit den Tasten eine Auswahl treffen Das Touchpad besteht aus einem rechteckigen Pad Arbeitsfläche und einer linken und rechten Taste Um das Touchpad zu verwenden legen Sie Ihren Zeigefinger oder Daumen auf das Pad Das rechteckige Pad wirkt wie ein Miniaturduplikat Ihres Displays Wenn Sie mit Ihrer Fingerspitze über da...

Page 34: ...lättern Scrollen bzw Bild hoch Bild runter Funktion Scrollen Sie schnell durch Dokumente Applikationen oder Internetseiten in dem Sie zwei Finger auf dem Touchpad in beliebige Richtung verschieben Zoom Funktion Einige Programme unterstützen das Vergrößern und Verkleinern Zoom einer Darstellung Zoomen Sie mit dem spreizen oder zusammenführen zweier Finger auf dem Touchpad Am besten eignen Sich hier...

Page 35: ... 1 oder 2 Finger nach oben oder unten Durch Scrollen können Sie einen anderen Teil einer Seite der Bildlaufleisten hat sehen Zoomen Bewegen Sie zwei Finger auseinander aufeinander zu Verwenden Sie die Zoomfunktion um ein Element z B ein Foto auf dem Bildschirm zu vergrößern oder zu verkleinern Die Geste funktioniert in Anwendungen die das Zoomen mit dem Mausrad unterstützen Drehen Bewege zwei Fing...

Page 36: ...nen Sie Ihren Computer an ein Netzwerk anschließen Stecken Sie das eine Ende des Netzwerkkabels in den RJ45 Anschluss des Computers und das andere Ende in den Netzwerk Hub Verwenden der WLAN Funktion Wi Fi Um die WLAN Funktion Wi Fi für die Verbindung mit dem Netzwerk zu verwenden gehen Sie wie folgt vor WLAN Funk ein ausschalten So schalten Sie den WLAN Funk ein 1 Klicken Sie auf das Windows Symb...

Page 37: ... Ein So schalten Sie das Bluetooth Radio aus Sie können das Bluetooth Radio auf die gleiche Weise ausschalten wie Sie es einschalten Schieben Sie den Bluetooth Schalter in die Position Aus Wenn Sie schnell alle Funkverbindungen ausschalten möchten schalten Sie einfach den Flugzeugmodus ein Verbinden mit einem anderen Bluetooth Gerät 1 Vergewissern Sie sich dass die Bluetooth Funktion aktiviert ist...

Page 38: ...Wartung und Instandhaltung Hinweise zu Wartungs und Instandhaltungsarbeiten Nur erfahrenes Elektronik Personal sollte das Computergeha use o ffnen O ffnen Sie das Geha use nicht Es entha lt keine Teile die durch den Benutzer gewartet werden ko nnen Das O ffnen des Geha uses fu hrt zum erlo schen der Gewa hrleistung Entfernen Sie immer vollsta ndig das Stromkabel vom Geha use wenn Sie mit der Hardw...

Page 39: ... com support Wissensdatenbank mit zahlreichen weiteren produktübergreifenden Informationen https www werocktools com docs Onlineportal für technischen Support und Reparaturanfragen https www werocktools com technical support Download von Treibern Software Handbücher und weiteren produktbezogenen Dateien https www werocktools com support drivers manuals Serviceadresse WEROCK Technologies GmbH Kallh...

Page 40: ...hlichen Betriebszeit überein Die tatsächliche Betriebszeit kann von der geschätzten Zeit abweichen je nachdem wie Sie den Computer verwenden Wenn die tatsächliche Betriebszeit viel kürzer ist als die geschätzte Zeit initialisieren Sie den Akku Auf dem Bildschirm wird nichts angezeigt Das Notebook befindet sich möglicherweise im Ruhezustand Das Gerät schaltet sich aufgrund der Energieverwaltung aut...

Page 41: ...rwenden stellen Sie sicher dass das Kabel richtig angeschlossen ist Ich kann die Anzeige des Notebooks nicht auf einen anderen Monitor projizieren Stellen Sie sicher dass die gewählte Ausgabeeinstellung korrekt ist Der Computer erkennt ein neu installiertes Gerät nicht Überprüfen Sie ob ein Gerätetreiber installiert werden muss Siehe die mit dem Gerät gelieferte Dokumentation Das Gerät ist im BIOS...

Page 42: ...ustand zurück o Der Computer wechselt automatisch in den Ruhezustand oder den Ruhemodus wenn der Akku leer ist Führen Sie einen der folgenden Schritte aus Schließen Sie den Netzadapter an den Computer an Ersetzen Sie den leeren Akku durch einen vollständig geladenen Akku Ein Anwendungsprogramm funktioniert nicht richtig Vergewissern Sie sich dass die Software richtig installiert ist Wenn eine Fehl...

Page 43: ...Rockbook X130 User Manual 43 92 5 Entfernen Sie die Abdeckung des SSD Moduls 6 Entfernen Sie die Schrauben am SSD Modul und ziehen Sie das SSD Modul von einer Seite heraus ...

Page 44: ...e Fehlermeldung auf dem Bildschirm sehen die Sie auffordert das BIOS Setup Utility auszuführen Sie die werkseitigen BIOS Standardeinstellungen wiederherstellen möchten Sie einige spezifische Einstellungen entsprechend der Hardware ändern möchten Sie möchten bestimmte Einstellungen ändern um die Systemleistung zu optimieren So führen Sie das BIOS Setup Dienstprogramm aus 1 Klicken Sie auf Einstellu...

Page 45: ...BIOS version date Gibt die Bios Version des Computers aus Serial Number Zeigt die Seriennummer des Computers an EC FM Version Zeigt die EC Firmware Version an System Language Systemsprache einstellen System Date Stellt das Systemdatum ein System Time Stellt die Systemzeit ein Advanced Menu Chipset Menu Die Einstellungsoptionen im Menü Erweitert und im Menü Chipsatz sind für Entwickler zur Fehlersu...

Page 46: ...zum Starten des Systems und oder zum Aufrufen des BIOS Setups erforderlich ist Secure Boot Richtet die sichere Boot Funktion ein Dieses Element kann nur verwendet werden nachdem das Supervisor Passwort festgelegt wurde Die Secure Boot Funktion kann verhindern dass nicht autorisierte Firmware Betriebssysteme oder UEFI Treiber während des Bootens ausgeführt werden Boot Menü Das Boot Menü legt die Re...

Page 47: ...r Hot Swap Funktionalität Eingangsspannung 19 V DC 3 42 A Netzteil 100 240 VAC Tasten Power Button 1 Funktionstaste Bildschirmsperre Touchpad deaktivierbar Tastatur Tastatur mir weißer LED Hintergrundbeleuchtung Intl QWERTY Layout andere Layouts auf Projektbasis Statusanzeigen 1 x LED blau Betriebsanzeige 1 x Multicolor LED Ladestatus 1 x rote LED Feststelltaste Betriebstemperatur 20 C 60 C Lagert...

Page 48: ...ad LTE FDD B1 B3 B5 B7 B8 B20 B28A LTE TDD B38 B40 B41 WCDMA B1 B2 B5 B8 GSM 850 900 1800 1900MHz Bluetooth Bluetooth 5 1 Ethernet 1 x RJ45 10 100 500 1000 Mbit LAN IEEE 802 1P Layer 2 Priority Encoding 802 1Q VLAN tagging 802 3 802 3u 802 3ab 802 3az 2010 EEE 802 3x Multimedia Lautsprecher Zwei eingebaute Lautsprecher an Gehäusevorderseite Mikrofon Zwei eingebaute Noice Cancelling Mikrofone Kamer...

Page 49: ... 4709405 10 Mail info werocktools com www werocktools com Copyright All rights to this documentation in particular the right to reproduction and distribution as well as translation are reserved by WEROCK Technologies GmbH These operating instructions are to be treated confidentially and are intended for operating personnel only The passing on or transfer of these operating instructions to third pa...

Page 50: ...rt werocktools com x130 Rockbook X130 User Manual pdf Please note that interactive elements that this manual may contain are not available in this version Target groups of the operating manual Zielgruppe Aufgaben Betreiber Diese Anleitung und mitgeltende Dokumente am Einsatzort der Anlage verfügbar halten auch für spätere Verwendung Mitarbeiter zum Lesen und Beachten dieser Anleitung und der mitge...

Page 51: ...ion that could lead to possible material damage to the product Signal word Danger DANGER Nature and source of the risk Explanation of the nature and source of the risk Measures to avert the risk Signal word Warning WARNING Nature and source of the risk Explanation of the nature and source of the risk Measures to avert the risk Signal word Caution VORSICHT Nature and source of the risk Explanation ...

Page 52: ... to more safety General commandment symbol General warning symbol General prohibition symbol Warning symbols in the operating instructions Warning of suspended load Warning of hot surface Warning of danger of crushing Wear protective goggles Wear safety shoes Wear protective gloves Prohibition symbols in the operating instructions Do not enter the area Access for unauthorised prohibitions Ban on p...

Page 53: ...ichnet und im Fettdruck dargestellt Beispiel für die Darstellung von Voraussetzungen The coffee machine is set up and connected The coffee machine is switched off Presentation of action steps In fixed sequence Instructions for action in a fixed order are numbered consecutively The sequence of the work steps must be strictly observed Example of an instruction for action with fixed sequence 1 Remove...

Page 54: ...h the coffee machine on at the main switch 1 The coffee machine warms up as long as the main switch is flashing If the main switch permanently the coffee machine is ready for use 5 Place a container under the spout 6 Press the main switch 1 again The coffee is prepared The coffee dispensing function ends automatically Further notes WEROCK Technologies GmbH is also abbreviated as WEROCK in these op...

Page 55: ... octaBDE decaBDE Mercury Hg WEROCK Technologies GmbH hereby declares that all our products are manufactured RoHS compliant REACH Declaration of Conformity WEROCK Technologies GmbH is a manufacturer of electronic hardware We are therefore considered a downstream user as far as the REACH document is concerned WEROCK Technologies GmbH is therefore not obliged to register with the European Chemicals A...

Page 56: ... using it immediately General operating safety General instructions for energy efficient use of the product Save energy by following these points Terminating programs and data connections that are not needed Reduce display brightness and speaker volume Turn off unnecessary sounds such as the touch screen sound Disconnect the power supply unit from the electricity supply when you do not need the ch...

Page 57: ...N Risk of injury during overhead installation If the product is mounted above a work area where people are working the bracket may fail Use an additional safety rope to secure the product in case of failure of the bracket CAUTION Danger of short circuit due to defective cables Defective cables can lead to short circuits and fires Before using electrically live cables check that they are not damage...

Page 58: ...it board or mechanics If the glass is broken do not attempt to touch or remove any glass parts of the product Avoid operating the product with unsuitable styli Do not bend the product Do not use the product again until it has been replaced by qualified service personnel Intended use Please use this device only as intended Our devices are designed to be maintenance free or low maintenance so that n...

Page 59: ...ity Act shall also remain unaffected by the exclusion of liability Obligation to give notice of defects Customers must report obvious defects immediately in text form otherwise the assertion of warranty claims is excluded Timely dispatch suffices to comply with the deadline The customer bears the full burden of proof for all conditions of entitlement in particular for the defect itself for the tim...

Page 60: ...m unsorted municipal waste Used portable batteries are collected exclusively at collection points that are connected to the common take back system or a manufacturer s own take back system There are currently over 200 000 collection points in Germany You are also welcome to return batteries to WEROCK Technologies However in the interest of sustainability we recommend the nearest collection point F...

Page 61: ...TB M 2 Solid State Drive user swappable Ultra compact design only 2 6 cm thick and 2 1 kg light 13 3 full HD display with optional touchscreen Powerful Intel Core i5 11357G quad core processor with up to 4 20 GHz Up to 32 GB DDR4L memory Windows 11 Pro included Intelligent security thanks to integrated tamper protection TPM 2 0 Easy login with Windows Hello fingerprint sensor 2 x 31 Wh hot swappab...

Page 62: ...y provide the Customer with additional operating instructions Operating and display elements Depending on the model the color and appearance of your model may not exactly match graphics shown in this document NOTE Protection from water and dust You must open the protective covers to access the ports When you are not using a port you must close the cover completely to ensure protection from water a...

Page 63: ...andle Provides a comfortable way to carry the laptop 2 Loudspeaker Output sound Rear Side 1 RS232 port Connects devices with serial interface 3 USB 3 0 port Connects USB devices 2 RJ 45 connector Connects a LAN cable or a device with RJ45 connection 4 HDMI Connection to an HDMI monitor or TV ...

Page 64: ...nes or headset 2 USB 3 0 port Connects USB devices 5 Power connector This is an electrical connector for Direct current DC power supply 3 USB C port Connects Thunderbolt or USB devices Left side 1 Kensington connector Connects notebook locks 2 External antenna connector optional Allows connection of an external GPS antenna ...

Page 65: ...mputer battery status and Caps Lock status 2 Display Output display of the computer Depending on the model also combined with a touchscreen 7 Fingerprint scanner Serves as verification to protect the computer from unauthorized access 3 Keyboard Used to enter data into the computer 8 P key Locks the screen 4 Microphone Records sounds 9 On Off Switch Turns the device on or off 5 Touchpad Touch sensi...

Page 66: ... is charging Flashes red when the battery has been removed Lights green when the unit is connected to power and the battery is fully charged Battery 2 Lights red when the battery is charging Flashes red when the battery has been removed Lights green when the unit is connected to power and the battery is fully charged Caps lock key Lights red when the Caps Lock key has been activated ...

Page 67: ... locking unlocking the battery 2 Battery lock For locking unlocking the battery First start Before using the product for the first time and before using it in everyday life read the following instructions This chapter provides information on the correct installation connection and use of the product Hint Items not included in the delivery are sold separately HINT ...

Page 68: ...Replace the battery only with the computer manufacturer s optional battery packs Dispose of used batteries according to the instructions in this manual Do not attempt to disassemble the battery pack The battery pack becomes hot during extended operation Do not touch the hot battery pack with bare hands Place the battery pack in a ventilated place after disassembly Note If your computer model is eq...

Page 69: ...ginal power supply unit supplied Before using the device for the first time you must connect it to a power supply Proceed as follows 1 Open the waterproof connection flap of the power connector Pull the tab to the left to open it 2 Plug the round connector cable of the power supply into the computer 3 Now connect the power cable to the power supply unit and then plug it into a power outlet Make su...

Page 70: ... turn on the computer do the following 1 Pull the tab to release the display latch Then open the notebook and position the display in a position that is comfortable for you The display can be opened up to 180 2 Press the on off button Windows should now start ...

Page 71: ...are you use requires frequent use of peripherals the power may soon be depleted You can find the battery icon in the Windows taskbar lower right corner The icon indicates the approximate battery level For models that have both a main battery and a secondary battery both are discharged in parallel Note The battery level displayed is an estimate Actual operating time may differ from the estimated ti...

Page 72: ...hen try to connect to network Tap Skip this step to continue without a wireless connection as you can then set up the network later 5 On the Get going fast screen click Use Express settings for the fastest setup If you would like more information tap Learn more or if you would like to select your own options click Customize settings ...

Page 73: ...d and then tap Next 7 The initial setup screens are complete and the desktop is displayed 8 Read any introductory screens describing features of your computer and tap Next upon completing each You are now done with the initial setup process Operating the device This chapter provides information on how to use the computer CAUTION ...

Page 74: ... your lap or touch it with bare hands for extended periods of time Prolonged physical contact may cause discomfort and possibly burns Turning off the computer When you are not using the computer you can turn off the computer put it into power saving mode or hibernate it Automated power saving settings can also be programmed through Windows Power Settings Turning off the computer To turn off the co...

Page 75: ... functions of a full computer keyboard plus an additional Fn key for special functions The standard keyboard functions can be divided into four main categories Enter keys Cursor control keys Numeric keys Function keys Input keys The input keys are similar to the keys on a typewriter Some keys have been added for special purposes such as the Ctrl Alt Esc and Lock keys The control key Ctrl alternate...

Page 76: ...er left corner of the keyboard is used together with another key to perform the alternative function of a key To perform a desired function first press and hold Fn then press the other key Hot Keys Hot keys are key combinations that can be pressed at any time to activate special functions of the computer Most key combinations work cyclically Each time a key combination is pressed the corresponding...

Page 77: ...ndows key opens the Start menu and performs software specific functions in combination with other keys Using the touchpad The touchpad is a pointing device that allows you to communicate with the computer by controlling the position of the pointer on the screen and making selections with the buttons The touchpad consists of a rectangular pad work surface and a left and right button To use the touc...

Page 78: ...e cursor to the item or object on the screen and then tap the touchpad twice or press the left button twice Drag To drag an item or object hold down the left button and move your finger on the touchpad to move the item or object Scroll To scroll through a page press and hold the left button then slide your finger on the touchpad to scroll Scroll or Page Up Page Down Function Scroll quickly through...

Page 79: ...ppears Right mouse click Drag Hold your finger on the screen and drag across the screen until you reach your destination Drag Multi Touch Gestures You can interact with your computer by placing two fingers on the screen Moving your fingers across the screen creates gestures that you use to send commands to the computer Here are the multi touch gestures you can use Gesture Action Description Scroll...

Page 80: ...n Swipe left or right to navigate forward or backward in a browser or other applications Applications The gesture works in most applications that support forward and backward scrolling Using the LAN Port The internal 10 100 1000 Base T LAN Local Area Network module allows you to connect your computer to a network Plug one end of the network cable into the computer s RJ45 port and the other end int...

Page 81: ...ction to the network using an Internet browser such as Edge Using the Bluetooth function Bluetooth technology enables wireless communication between devices over short distances without the need for a wired connection Data can be transmitted through walls bags and briefcases as long as two devices are within range Turning Bluetooth radio on and off To turn on Bluetooth radio 1 Click the Windows ic...

Page 82: ...d security mechanism verification before it starts the fingerprint sensor Enroll a fingerprint 1 Click the Windows icon Settings Accounts Login Options 2 Click Setup on the right side under Fingerprint 3 Follow the on screen instructions to complete the process Service and maintenance Notes on service and maintenance work Only experienced electronics personnel should open the computer housing Do n...

Page 83: ...werocktools com docs Online portal for technical support and repair requests https www werocktools com technical support Download drivers software manuals and other product related files https www werocktools com support drivers manuals Service adress WEROCK Technologies GmbH Kallhardtstr 20 75173 Pforzheim Deutschland Tel 49 7231 4709405 13 Mail EMEA Region contact emea werocktools com Mail ander...

Page 84: ...n sleep mode The device turns off automatically due to power management Press the power button to wake up the display The brightness may be set too low Increase the brightness The screen output may be switched to an external device Please switch the screen via the Windows control panel The screen suddenly goes black and the power indicator goes out Make sure that the power adapter is properly conn...

Page 85: ...vice that has its own power switch make sure the device is turned on The keyboard does not respond Try connecting an external keyboard If it works contact an authorized dealer because the internal keyboard cable may be loose The touchpad does not work or the pointer is difficult to control with the touchpad Make sure the touchpad is clean I cannot access the LAN network Make sure the LAN cable is ...

Page 86: ...cumentation for more information If you are sure the operation has stopped reset the computer Replacing the SSD 1 Turn off the computer and unplug the power adapter 2 Carefully turn the computer upside down 3 Remove the two batteries 4 Remove the screws on the cover of the SSD module 5 Remove the cover of the SSD module 6 Remove the screws on the SSD module and pull out the SSD module from one sid...

Page 87: ...of devices installed and to set up special functions This chapter tells you how to use the BIOS Setup utility When and how to use it You need to run the BIOS Setup utility when You see an error message on the screen prompting you to run the BIOS Setup Utility you want to restore the factory default BIOS settings You want to change some specific settings according to the hardware You want to change...

Page 88: ...bed in this chapter The availability of some setting items depends on the version of Windows running on your computer Menu Descriptions Main Menu The Main Menu contains the various system settings Build Date and Time BIOS version date Outputs the Bios version of the computer Serial Number Displays the serial number of the computer EC FM Version Displays the EC firmware version System Language Sets...

Page 89: ... user password to be required to boot the system and or enter BIOS setup Secure Boot Sets up the secure boot feature This item can be used only after the supervisor password is set The Secure Boot feature can prevent unauthorized firmware operating systems or UEFI drivers from running during boot Boot Menu The boot menu determines the order of devices to be scanned for the operating system Save Ex...

Page 90: ...ntl QWERTY layout other layouts on project basis Status indicators 1 x blue LED power indicator 1 x multicolor LED charging status 1 x red LED Caps lock Operating temperature 20 C 60 C Storage temperature 30 C 70 C Humidity 95 non condensing Sealing IP65 Dust and waterproof Vibration resistance MIL STD 810G 514 7 Drop resistance MIL STD 810H 1 22 m System features Operating system Windows 10 Pro W...

Page 91: ...1Q VLAN tagging 802 3 802 3u 802 3ab 802 3az 2010 EEE 802 3x Multimedia Loudspeaker Two built in loudspeakers at the front of the case Microphone Two built in noise cancelling microphones Camera 2 MP front camera with activity LED Other specifications Innovative features Adaptix AES New Instructions AVX2 AVX 512 Boot Guard Control Flow Enforcement Technology DL Boost High Definition Audio Hyper Th...

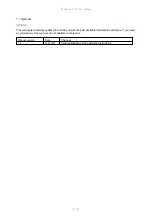
Page 92: ...manual is constantly updated to provide you with the best available information at all times If you need an old version of the manual do not hesitate to contact us Manual version Date Changes 1 0 04 02 2022 Initial publication of the operating instructions ...

Reviews: