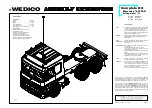
hçãéäÉííJ_~ìë~íò=^Åíêçë=
cÉêíáÖëíÉääìåÖ=ÇÉê=_~ìÖêìééÉå
`çãéäÉíÉ=háí==^`qolp=
`çãéäÉíáçå=çÑ=~ëëÉãÄäó=Öêçìéë
1387
109
109
114
114
1017
1
12
12
12
12
12
1
1018
222
1022
1
1
1025
1025
1016
1019
1021
1020
15
15
355
355
1
1
1
1
1
80-e.DOC / K-Actros
Page 6
T
^ëëÉãÄäáåÖ=íÜÉ=Å~Ä=
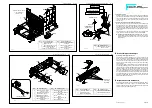
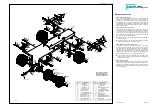
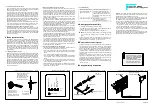
7.1 Cutting threads (see small drawing)
Threads have to be cut into eight screw holes on the front panel. Use
self-cutting screws 111 to cut these threads by the same method as
described under chapter 4.1.
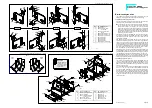
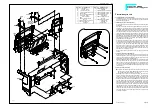
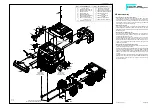
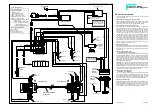
7.2 Mounting the front- and side panels
Don't tighten all screwed connections as the cab skeleton has still to
be adjusted.
Start by securing the left-hand fixing plate 1020 into the suiting cut-
out made for this purpose on the front panel 1016; use countersunk
screw 355, serrated washer 15 and nut M3 for that. Afterwards slide
two square nuts 12 into both upper slots on the fixing frames of the
left side panel 1017; then fix the side panel with screws 1 onto the
fixing plate. Make sure that the external sides of both, front- and side
panels, are exactly in alignment. Now mount the right-hand fixing
plate 1021 and the right-hand side panel 1018 in the same way. Slide
another square nut 12 into each of the rear upper fixing slots on the
side panels; with screws 1 secure then the fixing angle 1022 into
place between the two side panels.
At this stage of assembly adjust the external contours of the pre-
mounted cab with the roof assembled at chapter 4.1. From top slide
that rear panel you have already mounted onto the roof into the verti-
cal grooves on the side panels. Both lateral fixing plates mounted
onto the cab, as well as the fixing angle include fixing holes; these
holes have to be aligned with those pilots which previously were
added to the roof. At the screwed connections on the panels all com-
ponents may now suitably be moved.
Once all parts have been adjusted correctly, tighten all nuts and
screws.
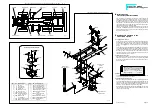
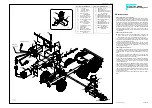
7.3 Doors, windscreen and dashboard
Set the doors you have assembled at stage 3.2 into their places on
the cab. With screws 1 fix the hinge supports to the front panel. When
closed, the doors should stay parallel to the side panel; by moving
the supports you achieve the final adjustment.
Press the windscreen 1019 into the front panel. For this purpose slide
the screen from inside into the groove on the left side of the front
panel. In order to fit the screen into the groove on the right hand side
you need to bow it inwards slightly, then press it forward gently until
it clicks into place. Finally attach the dashboard with screws 1 onto
the front panel.
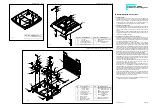
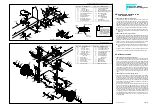
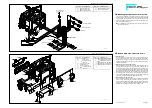
7.4 Seat- and lower rear panel
First pass the switch toggles at the switch panel through the holes
provided in the seat rear panel 222; secure from the front using
four knurled nuts 210 (see therefore illustration 14).
Attach the switch sticker onto the seat rear panel - above the four
holes for the toggle switches on the switch panel - ; the letters indi-
cating the switches are now upside down. Slide one square nut 12
into each of the slots on the centre fixing frames of the side panels.
Afterwards attach the seat rear panel 222 that way that those sides
with the fixing holes lay underneath the fixing frames on the side
panels; insert screws 1 from the bottom and tighten them on the right
side. Don't tighten the screws on the left-hand side as the left side
panel has still to remain moveable. With screws 114 and nuts 109 fix
the stopping devices for the cab lock 1025 onto the lower rear panel
1387. Slide the lower rear panel into the suiting groove on the right
side panel, press then the left side panel outwards and slide the rear
panel also into same groove. Now tighten the screws on the left side
on the seat rear panel.
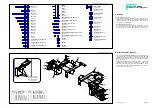
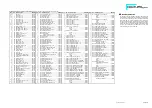
Assembling the cab ill. 7
Qty.
No. Assembly part
2
--- Nut M3
16
1 Screw M3 x 6
10
12 Square nut M3
2
15 Serrated washer A 3.2
4
109 Nut M2
2
111 Self-cutting screw M3 x 8
4
114 Screw M2 x 6
1
222 Seat rear panel
2
355 Countersunk screw
M3 x 8
1
1016 Front panel ACTROS
1
1017 Side panel, -lh-
ACTROS
Qty.
No. Assembly part
1
1018 Side panel, -rh-
ACTROS
1
1019 Windscreen ACTROS
1
1020 Fixing plate for front, -lh-
1
1021 Fixing plate for front, -rh-
1
1022 Fixing angle for
side panels
2
1025 Stopping device for
cab lock
1
1387 Rear panel, bottom
Complete Kit
ACTROS. “C“
--- Switch sticker
B-80-4
Break the
inner edge at
the bottom
B-233-1

