BDA UP 14 Z – 03/15 – REV. 0
Page 42 / 71
9.1.1 Daily
+
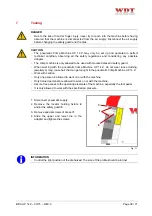
Visual inspection of the pneumatic Crimp Machine UP 14 Z.
+
Check air pressure (max. 6 bar.) of the house installation (manometer not in the scope of
the delivery).
+
Check oil-level of service unit of the house installation (not in the scope of the delivery).
9.1.2 Monthly
+
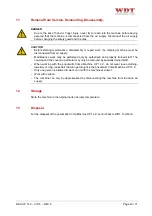
Lubricating all moving levers and bolts.
Procedure:
1. Disconnect pneumatic supply.
2. Remove left and right housing cover.
3. Lubricate all moving levers and bolts with Blasolube Fluid Art.-No. 00761-01.
4. Mount left and right housing cover.
10
Problem Handling and Fault Diagnostics
DANGER
+
Due to the risk of hand or finger injury, never try to reach into the machine before having
assured that the machine is disconnected from the air supply. Disconnect the air supply
before changing the safety guard and the dies.
CAUTION
+
Before starting maintenance, disassembly or repair work, the crimping machine must be
disconnected from air supply.
+
Maintenance work may be performed only by authorized and properly trained staff. The
housing and the covers in particular may only be removed by specially trained staff.
+
When working with the pneumatic Crimp Machine UP 14 Z, do not wear loose clothing,
jewellery or long, loose hair that can get caught in the pneumatic Crimp Machine UP 14 Z.
+
Work with caution.
+
Before commissioning the machine, it is always important to check whether all safety
devices, especially the safety guard and the die set, are installed and are functioning
correctly.
In the event of a problem our customer service personnel will be able to help you.
Service address:
WDT ToolTech AG
Eichenstraße 6
CH-8808 Pfäffikon (SZ)
Schweiz
Telephone: +41 (0) 55 417 00 30
Please have the following information ready when you contact service.
+
Machine Type
+
Machine Serial Number
Summary of Contents for UP 14 Z
Page 22: ...BDA UP 14 Z 03 15 REV 0 Page 22 71 14 Ersatzteilliste 14 1 Explosionszeichnung Abb 14 1...
Page 25: ...BDA UP 14 Z 03 15 REV 0 Page 25 71 14 3 Pneumatik Schema Abb 14 2...
Page 47: ...BDA UP 14 Z 03 15 REV 0 Page 47 71 14 3 Pneumatic Diagram Fig 14 2...
Page 70: ...BDA UP 14 Z 03 15 REV 0 Page 70 71 14 3 Sch ma pneumatique Fig 14 2...


