Wavetek Wandel Goltermann CLI-1450 Operation Manual Download Page 1

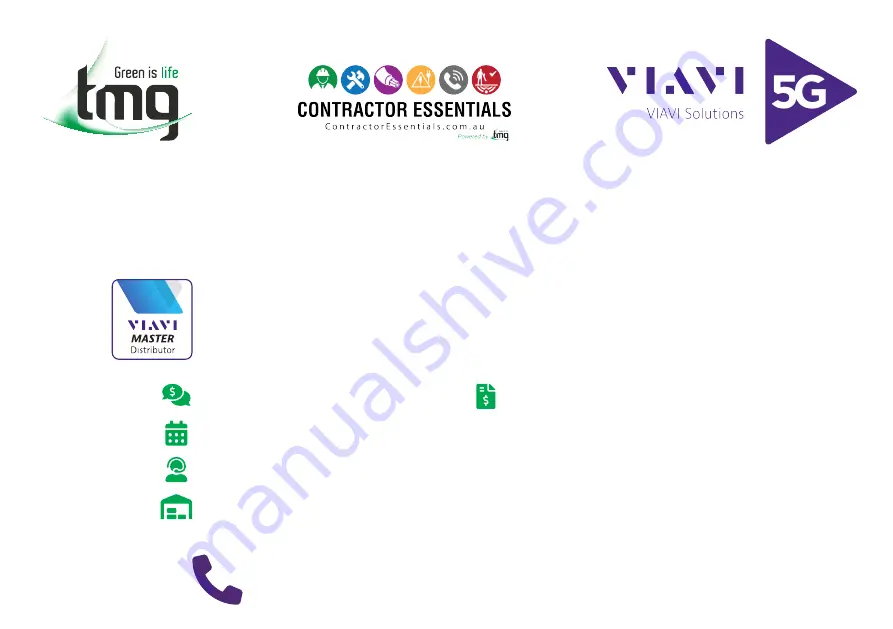
This reference material is provided by TMG Test Equipment,

VIAVI’s 

only

 Master Distributor for Contractors in Australia

Enabling Australia’s Field Technicians to build, troubleshoot

and maintain better communications networks.  

Industry Best Pricing

Finance Available

Short to Medium Project-Based Rental Solutions

Dedicated Technical & After-Sales Support

In-house Diagnostics, Repair & NATA Calibration Laboratory

FREECALL 

1800 680 680

Summary of Contents for CLI-1450

Page 1: ...alia Enabling Australia s Field Technicians to build troubleshoot and maintain better communications networks Industry Best Pricing Finance Available Short to Medium Project Based Rental Solutions Ded...

Page 2: ...3 E Mail catvsupport wavetek com Internet http www wavetek com 11 99 Rev D Manual Part No 6510 00 0416 Copyright 1999 Wavetek Wandel Goltermann This document contains information proprietary to Wavete...

Page 3: ...e maintenance accident or for any Product which has been repaired or altered by anyone other than WavetekWandelGoltermannoritsauthorizedrepresentativeornotinaccordancewithinstructions furnished by Wav...

Page 4: ...uaintedwiththeScreen 1 9 The Navigator 1 12 Configure 1 12 GlobalConfiguration 1 13 MeasurementConfiguration 1 17 LeakageConfiguration 1 21 Channel Plan Configuration 1 25 Using the CLI 1450 2 1 Intro...

Page 5: ...14 WarningIndicators 2 15 Full Scan 2 15 Moving the Marker 2 16 Adjusting the Reference Level 2 16 Adjusting the Scale 2 16 Zooming In and Out 2 16 CheckingLimits 2 17 Checking Limits on an Individual...

Page 6: ...View 2 30 The File Directory 2 30 Viewing Installation Files 2 31 Viewing Scan Files 2 32 Viewing Auto Test Files 2 33 IngressScan MSSUBOptionOnly 2 36 Moving the Marker 2 37 Adjusting the Reference...

Page 7: ...on B 1 Charging the Battery Pack B 1 Battery Tips B 1 Appendix C Interface Port C 1 Connector C 1 Cable Specifications C 2 Appendix D Setting up a Calibrated Leak Field D 1 Introduction D 1 Setup D 2...

Page 8: ...nd measuring RF leakage easy Because it can accurately detect and measure video signals it is not necessary to inject an additional RF carrier for the purpose of monitoring leakage Your CLI 1450 is fr...

Page 9: ...our CLI 1450 will calculate what the equivalent field strength would be at the reference distance These measurements are adequate for grading leaks you have found and prioritizing your repair schedule...

Page 10: ...curately measuring their carriers is needed The 1450DIG digital carrier measurement option provides an average power measurement of QPSK 16 QAM 64 QAM 256 QAM QPR BPSK CAP 16 and other modulation sche...

Page 11: ...450 for more than one plant You can quickly select the correct channel plan for the plant at which you are working DOCKING STATION OPTION The DS 1 docking station simplifies connection to a vehicle an...

Page 12: ...1 5 1 1 1 1 1 2 2 2 2 2 5 5 5 5 5 3 3 3 3 3 6 6 6 6 6 4 4 4 4 4 7 7 7 7 7 7 7 7 7 7...

Page 13: ...Serial Port Serial Port Serial Port Serial Port Serial Port Charger Charger Charger Charger Charger Port Port Port Port Port Docking Station Port Docking Station Port Docking Station Port Docking Stat...

Page 14: ...represented by an icon immediately above the key 2 2 2 2 2 POWER KEY ON OFF POWER KEY ON OFF POWER KEY ON OFF POWER KEY ON OFF POWER KEY ON OFF Turns your CLI 1450 on and off 3 MODE SELECTION KEYS 3 M...

Page 15: ...acter is displayed move the cursor to the next position using the right arrow Be sure to terminate your entry by pressing the key 6 6 6 6 6 SHIFT KEY SHIFT KEY SHIFT KEY SHIFT KEY SHIFT KEY Some keys...

Page 16: ...LP HELP HELP HELP HELP View a description of each icon found in the current soft key menu PRINT PRINT PRINT PRINT PRINT Print a measurement screen installation report auto test report or configuration...

Page 17: ...it may need repair The Status Bar The Status Bar The Status Bar The Status Bar The Status Bar Look for the status bar in the lower portion of the screen It displays the current date and time A bar met...

Page 18: ...l bar appears along the right hand edge of the list You can use this to get an idea of where you are When you have reached the first or last item an arrow appears inside the scroll box pointing to the...

Page 19: ...us bar To get a description of the highlighted mode press the SHIFT key To travel to the mode you have highlighted press any one of the soft keys or the key Tip Tip Tip Tip Tip You can also use the nu...

Page 20: ...soft key to select the highlighted category PRINTING A CONFIGURATION REPORT PRINTING A CONFIGURATION REPORT PRINTING A CONFIGURATION REPORT PRINTING A CONFIGURATION REPORT PRINTING A CONFIGURATION RE...

Page 21: ...n off your CLI 1450 at any time by pressing the button Note Note Note Note Note TheShutoffTime outfeatureisdisabledduringLEAKAGEmode BACKLIGHT TIME OUT BACKLIGHT TIME OUT BACKLIGHT TIME OUT BACKLIGHT...

Page 22: ...ATE DATE DATE Sets the date for the internal real time clock You can specify the format in which the date is set displayed and printed see DATE FORMAT PRINTER PRINTER PRINTER PRINTER PRINTER Select th...

Page 23: ...the configuration to Press the soft key to begin the transfer Cloning copies the configuration information and active channel plan only If you wish to copy only channel plans use the Copy Remote Chann...

Page 24: ...surement screens There is no indication however if the compensation value is zero Important Important Important Important Important The PROBE COMPENSATION value does not affect IN STALLATION mode Leve...

Page 25: ...st point If the highlighted test point is disabled you can enable it by pressing the soft key A check mark appears in the left hand column to indicate when a test point is enabled If the test point is...

Page 26: ...disable all of the limits within a test point the test point becomes disabled You cannot enable a test point that has no enabled limits You can edit the value of the highlighted limit by pressing the...

Page 27: ...CLI 1450 Press the key to initiate the calibration procedure Your CLI 1450 will guide you through the process IMPORTANT IMPORTANT IMPORTANT IMPORTANT IMPORTANT The CLI 1750 meter assumes that leakage...

Page 28: ...create only as many points as possible This means that the stop frequency may be lower than what you desired Dwell Dwell Dwell Dwell Dwell This setting affects the scan rate of the ingress feature Yo...

Page 29: ...nter the frequency of the carrier that you want to monitor for RF leakage You can select from 115 to 140 MHz MEASUREMENT CARRIER TYPE MEASUREMENT CARRIER TYPE MEASUREMENT CARRIER TYPE MEASUREMENT CARR...

Page 30: ...the analog meter This setting allows you to specify how often the peak hold value is reset In the Find and Fix mode the graph scale is updated to reflect the leakage reading in relation to the new pe...

Page 31: ...antenna type When a type is disabled you cannot use it when performing tests Use the up or down arrow to highlight the desired antenna If the highlighted type is disabled you can enable it by pressin...

Page 32: ...nel plan is necessary for the proper operation of the unit This is accomplished by specifying tilt and scan and taking full advantage of the Auto Test and Installation Check features intheWWGinstrumen...

Page 33: ...lt and other available channel plans stored in the unit The currently active channel is denoted by an arrow tip to its left To enable a different plan use the up or down arrow to highlight and then pr...

Page 34: ...LSEQUENCEsetting Learn the Channel Plan The CLI 1450 is capable of identifying which channels are on your cable plant This allows you to quickly and easily generate a custom ized channel plan With the...

Page 35: ...base channel plan from the list and then press Press the softkey to proceed to the Build Channel Plan STEP 3 screen Using the numeric keypad type in a value for the Stop Frequency in the Edit box and...

Page 36: ...essential for testing the cable system including limits for analog and digital carriers Editing is required to verify that the channel plan is built correctly hastherightparameters From the Channel Pl...

Page 37: ...nnel Plan Parameters Characteristics to edit Channel Plan Parameters Characteristics to edit Channel Plan Parameters Characteristics to edit Channel Plan Parameters Characteristics to edit The Configu...

Page 38: ...carriers that are in a state of continuous non burst transmission Frequency Frequency Frequency Frequency Frequency This is the frequency of the video carrier in MHz For a digital channel the center...

Page 39: ...RTANT IMPORTANT IMPORTANT CLI 1450 supports several scrambling formats including the following HorizontalSyncSuppression VerticalSyncSuppression Positive Trap Audio Offset TV and DUAL type only Audio...

Page 40: ...hlight Carrier and press Select a digital carrier QAM QPSK QPR CAP 16 andpress 5 Highlight Frequency press Type in a value for Center Frequency and press 6 Highlight Measurement BW MHz press Type in a...

Page 41: ...e CHANNEL PACKAGES Press to bring up the Channel Packages screen listing all available packages These are the packages that will be available when you edit a channel You can select from one of these p...

Page 42: ...ed in one unit it can be copied to another similar unit Example CLI 1450 to CLI 1450 Connect the two units with the cloning cable Set the baud rates for the two units equal On the host unit s Configur...

Page 43: ......

Page 44: ...d measure RF leakage the Measure mode and the Find and Fix mode The Measure mode is used to obtain the most accurate leakage measurements The Find and Fix mode is optimized for locating the source of...

Page 45: ...You can specify the frequency of the carrier you want to monitor when youconfigureyourunit seeMEASUREMENTFREQUENCYinthe LeakageConfigurationsection ANNUNCIATORS ANNUNCIATORS ANNUNCIATORS ANNUNCIATORS...

Page 46: ...nd portion of the display to help you set the volume You can mute the alarm by pressing the key The alarm will remain muted for a period of time You can adjust the length of this time see ALARM MUTE T...

Page 47: ...k and your CLI 1450 will calculate what the equivalent field strength would be at the reference distance These measurements are adequate for grading leaks you have found and prioritizing your repair s...

Page 48: ...for each antenna type The value automatically goes into effect when you select the antenna If you are using a calibrated leak field be sure to make the adjustment for each type of antenna that you wan...

Page 49: ...distance and compensation features established in the Measure mode When you want to change the parameters of these features or obtain a more accurate measurement of the leak press the softfkey to retu...

Page 50: ...Under range Under range Under range The leakage level is below the measurement range of the instrument Error Error Error Error Error A hardware problem exists If this condition persists the unit may n...

Page 51: ...to select it A check mark appears in the left hand column of the list indicating that the package is selected If the highlighted package is already selected pressing the soft key deselects it Tip Tip...

Page 52: ...INSTALLATION RESULTS SUMMARY INSTALLATION RESULTS SUMMARY INSTALLATION RESULTS SUMMARY INSTALLATION RESULTS SUMMARY INSTALLATION RESULTS SUMMARY This is the overall limit check summary for all channel...

Page 53: ...oft key or to sequence to the channel list screen Tip Tip Tip Tip Tip In addition to using the and keys you can also use the left and right arrows to sequence through the results screens The channel l...

Page 54: ...you can identify the reason s for the failure by looking at the symbols that appear in this indicator AdjacentChannelFailures lower adjacent channel level upper adjacent channel level both upper and l...

Page 55: ...it for futurereference STORING INSTALLATION RESULTS STORING INSTALLATION RESULTS STORING INSTALLATION RESULTS STORING INSTALLATION RESULTS STORING INSTALLATION RESULTS Press the SHIFT keys to store t...

Page 56: ...el are measured and displayed simultaneously The differ ence between the video and audio carriers DVA is also shown The channel number type and label for the channel that you are currently tuned to ap...

Page 57: ...upper left hand portion of the screen flashes when the measurement is on hold Press the SHIFT keys again to release the hold The hold is also released when you tune to a different channel or fre quenc...

Page 58: ...s Over range Over range Over range Over range Over range The signal level is above the measurement range of the instrument Under range Under range Under range Under range Under range The signal level...

Page 59: ...VEL The reference level setting is displayed above the graph This is the level at the very top line You can adjust the reference level using the up and down arrows When you press the SHIFT keys your C...

Page 60: ...etermines which set of limits are used Press the soft key to access the limits submenu A new set of soft keysappear Press the soft key to sequence through the available test points The test point that...

Page 61: ...hisscreen Your CLI 1450 can indicate the minimum and maximum carrier level limits on the graph The out of limit portions appears as diagonal hash areas You can toggle the hash lines on and off by pres...

Page 62: ...s not retained when another mode is selected or the CLI 1450 is shut off PRINTING THE SCREEN PRINTING THE SCREEN PRINTING THE SCREEN PRINTING THE SCREEN PRINTING THE SCREEN You can print the entire sc...

Page 63: ...surement range of the instrument Under range The signal level is below the measurement range of the instrument Error A hardware problem exists If this condition persists the unit may need repair TILT...

Page 64: ...sed for the tilt measurement To select the low pilot carrier move the cursor to the desired carrier and press the soft key To select the high pilot carrier move the cursor to the desired carrier and p...

Page 65: ...N You can print the entire screen at any time by pressing the SHIFT keys A bar graph appears indicating the status of the printout STORING A TILT FILE STORING A TILT FILE STORING A TILT FILE STORING A...

Page 66: ...can adjust the reference level using the up and down arrows When you press the SHIFT keys your CLI 1450 automatically sets the optimum reference level for you ADJUSTING THE SCALE ADJUSTING THE SCALE...

Page 67: ...d upon completion of each scan When the cursor is on an analog channel all the analog limits are displayed When the cursor is on a digital channel the digital limits are displayed as shown below Curso...

Page 68: ...of time Measurement data is stored into a file that can be viewed printed or uploaded to StealthWare See the section on VIEW mode to find out how to access files from Auto Tests that you have perform...

Page 69: ...appear in the list depend on the type of location you have selected If you regularly perform tests at this location you can save it for future use so that you only need to enter the information once...

Page 70: ...me Results File Name Results File Name Enter the name you want to use for the results file that is created Your CLI 1450 will let you know if there is already a results file with the name that you ent...

Page 71: ...ubsequent intervals will record the temperature as measured by the internal sensor For accurate measurements yourCLI 1450readstheinternaltemperature sensorimmediatelyuponpower up When you are ready to...

Page 72: ...and printing Note Note Note Note Note See the section on VIEW mode to find out how to access files from Auto Tests that you have performed CANCELING AN AUTO TEST CANCELING AN AUTO TEST CANCELING AN AU...

Page 73: ...and Auto Tests Use the up and down arrows to select the type of file that you want to view from the main menu and then press the key THE FILE DIRECTORY THE FILE DIRECTORY THE FILE DIRECTORY THE FILE D...

Page 74: ...t and then press SHIFT You can print multiple file by first selecting them using the soft key and then press SHIFT If a scheduled type Auto Test is highlighted all intervals contained in the file will...

Page 75: ...stored you cannot change its type Tip Tip Tip Tip Tip You can tell what type of scan you have selected in the directory without having to view it Just look at the icon in the upper right hand portion...

Page 76: ...n resave a Scan file by pressing the SHIFT keys This allows you to change the name of the file and or save any changes you have made to the screen settings VIEWING AUTO TEST FILES VIEWING AUTO TEST FI...

Page 77: ...hour format report use the up and down arrows to highlight the first interval that you want included in the report and then press SHIFT The report will include the highlighted interval plus the follo...

Page 78: ...o view the data for the channel highlighted in the list press the soft key or the key Use the PASS FAIL indicator to quickly determine whether the channel has passed the limits check If the channel fa...

Page 79: ...e that you have enabled all of the test points that you are interested in using The soft key is only available if there is more than one enabled test point see EDIT TEST POINTS Only the limits that ar...

Page 80: ...n adjust the scale to provide the best view of the ingress level by pressing the soft key A new set of soft keys appear Use the and soft keys to increment and decrement the scale value Press the soft...

Page 81: ...the hold The measurement is not retained when another mode is selected or the CLI 1450 is shut off PRINTING THE SCREEN PRINTING THE SCREEN PRINTING THE SCREEN PRINTING THE SCREEN PRINTING THE SCREEN Y...

Page 82: ...ormation and Technical Support HELP The HELP mode provides on line user assistance by means of context sensitive help screens During normal operations soft key icons appear at the bottom of the displa...

Page 83: ...not available is displayed INFORMATION Choose the icon from the NAVIGATOR Here you can view information concerning your CLI 1450 The type of information includes model frequency range serial firmware...

Page 84: ...is 317 317 317 317 317 788 9351 788 9351 788 9351 788 9351 788 9351 Questions may be e mailed to Technical Support Specialists at catvsupport wavetek com If you received your unit and found it to be...

Page 85: ......

Page 86: ...20 to 50 dBmV Resolution 0 1 dB Accuracy1 0 75 dB Flatness 0 75 dB Linearity at 25 C 77 F Digital Average Power 2 0 dB typical Optional Scan Mode Number of Channels 120 Scan Rate Approximately 6 carri...

Page 87: ...ht 1 36 kg 3 lb Operating Temp Range 10 to 50 C 14 to 122 F Water Resistance Meets or exceeds MIL STD 810D Method 506 2 Powering Battery Life 2 25 hours continuous backlight off replaceable battery ca...

Page 88: ...instrument is designed to perform accurate level measurements at frequencies greater than 550 MHz In order to achieve the desired accuracy at higher frequencies a precision F connector 2110 06 1029 is...

Page 89: ......

Page 90: ...tery packs are NOT interchangeable Use only the battery pack specified for use with the CLI 1450 Charging the Battery Pack To recharge the battery pack plug the AC adapter into the unit The unit will...

Page 91: ...B 2 To maximize battery life set Auto Shutoff to 1 minute and Back light Shutoff to always off These items are described in the Global Configuration section...

Page 92: ...or The serial interface has a driver built in for RS232 serial binary data interchange The connector is located on the bottom of the unit behind a water resistent cover Pin Assignments for Interface P...

Page 93: ...C 2 CABLE SPECIFICATIONS CLI 1450 TO PC 1019 00 0469 CLI 1450TOPRINTER STANDARD 1019 00 0468...

Page 94: ...C 3 CLI 1450 TO CLI 1450 1019 00 0470 CLI 1450TOPRINTER CITIZEN 1019 00 0467...

Page 95: ......

Page 96: ...er will have an effect on the measurement For these reasons we recommend using a calibrated leak to correlate each vehicle s measurement system It is sometimes desirable to use a vehicle mounted monop...

Page 97: ...s to be used the source dipole should also be vertical The drop should be fed through a bandpass filter and an attenuator for adjusting the leak to the correct calibration level Set the leak as follow...

Page 98: ...ay be driven through the field and calibrated using the Compensation feature in LEAKAGE mode A significant amount of compensation may be required when using vehicle mounted antennas While in the LEAKA...

Page 99: ...separate compensation value for each antenna type The value automatically becomes effective when you select the antenna If you are using a calibrated leak field be sure to make the adjustment for each...

Page 100: ...The VMA 3 is easy to install To adjust the VMA 3 antenna to the desired frequency 1 Using the cutting chart locate the desired frequency on the horizontal axis 2 Draw a vertical straight line to the p...

Page 101: ...it off with a pair of pliers Always cut from the bottom of the element 6 Insert the element all of the way into the base assembly and tighten with a 3 32 hexagon screw key Example of Antenna Cutting...

Page 102: ...antenna s response receiving or radiation pattern is determined by its ability to receive or radiate signals better when tuned or pointed in one direction If pointed or tuned elsewhere the antenna s...

Reviews: