


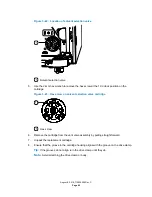


8.
Reinstall the outlet-tubing fitting on the side of the
i
2
Valve
, and minimally tighten it with
your fingers.
9.
Reattach the inlet-tubing fittings to the inlet manifold, tighten them with your fingers, and
then use the 1/4-inch open-end wrench to tighten them an additional 1/6-turn, for existing
fittings, or 3/4-turn for new fittings.
Figure 3–11: Inlet-tubing fittings on manifold
1
Inlet-tubing fitting (4)
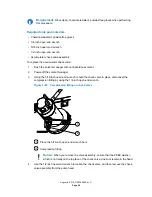
10. Reattach the outlet-tubing fitting to the inlet manifold, and tighten it with your fingers to the
extent possible.
Requirement:
Ensure the outlet tubing is fully engaged by raising the inlet manifold while
attaching the outlet-tubing fitting.
Figure 3–12: Reattaching outlet-tubing fitting
1
2
Outlet-tubing fitting
Inlet manifold
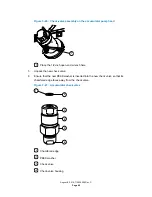
11. Tighten the outlet-tubing fitting, on the side of the
i
2
Valve
with your fingers, and then use
the 1/4-inch open-end wrench to tighten the fitting an additional 1/6-turn, for existing
fittings, or 3/4-turn for new fittings.
August 8, 2016, 715005050 Rev. C
Page 53