background image

Care of Your System 

To retain the attractive appearance of your new water softener, clean occasionally with mild 

soap solution.  Do not use abrasive cleaners, ammonia or solvents.  Never subject your sof-
tener to freezing or to temperatures above 100°F. 

Resin Cleaner 

An approved resin cleaner must be used on a regular basis if your water supply contains 

iron.  The amount of resin cleaner and frequency of use is determined by the quantity of 
iron in your water (consult your local representative or follow the directions on the resin 

cleaner package). 

Sanitizing Procedure 

Care is taken at the factory to keep your water softener clean and sanitary. Materials used 

to make the softener will not infect or contaminate your water supply, and will not cause 
bacteria to form or grow.  However, during shipping, storage, installing and operating, bac-

teria could get into the softener. For this reason, sanitizing as follows is suggested when in-
stalling. 


Sani-System Liquid Sanitizer Concentrate 


Item# 80030021—Softener Sanitizer 0.25 fl.oz (24 Pack) 

1. Be sure to complete all installation steps, including programming. 
2. For effective and complete sanitization, Sani-System Liquid Sanitizer Concentrate is rec-

ommended.  Pour one 0.25 fl. Oz. package into the brine well located in the cabinet or 
brine tank.  (Alternative use 3/4 oz of common 5.25% household bleach) 

3.  Start an immediate regeneration.  (See page 11) 
4. The Softener Sanitizer Solution is drawn into and through the water softener to sanitize 

it. This sanitizing regeneration is over in about two hours. Then, soft water is available 

for your use. 

NOTE: Sanitizing is recommended by the Water Quality Association for disinfecting. On 

some water supplies, they suggest periodic sanitizing. 

15  

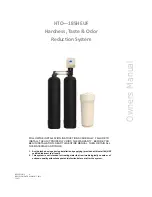
Summary of Contents for HTO-185HEUF

Page 1: ...OIDS THE WARRANTY BEFORE YOU BEGIN INSTALLATION READ THIS ENTIRE MANUAL THEN OBTAIN ALL THE MATERIALS AND TOOLS 1 Avoid pinched o rings during installation by applying provided with install kit NSF ce...

Page 2: ...water that is microbio logically unsafe or of unknown quality without adequate disinfection before or after the system For your safety the information in this manual must be followed to minimize the...

Page 3: ...nces Use only lead free solder and flux for all sweat solder connections as required by state and federal codes Maximum allowable inlet water pressure is 125 psi If daytime pressure is over 80 psi nig...

Page 4: ...rves the right to make product improvements which may deviate from the specifications and descriptions stated herein without obligation to change previously manufactured products or to note the change...

Page 5: ...hed 6 foot power cable Extension cables are available Be sure the electric outlet and transformer are in an in side location to protect from wet weather If installing in an outside location you must t...

Page 6: ...connected to the valve Failure to do this could cause damage to the valve 5 Connect the drain hose 10 ft included to the valve and secure it with a hose clamp also included Run the drain hose to the n...

Page 7: ...Installation 7...

Page 8: ...wer cable After the carbon has soaked for the recom mended time continue by plugging the power cable back in 6 Turn the water back on slowly to back wash until water runs clear to drain 7 Press any bu...

Page 9: ...ed to maximize your capacity but still operate the system with good efficiency Choose IRON MN if you have problem water containing these minerals The high salt setting will be needed since these miner...

Page 10: ...REGEN 06 DAYS LAST REGEN 9 24 12 TOTAL REGENS 10 TOTAL GALLONS 001590 GAL OVER RUN TOTAL 0500 GAL CURRENT 1 5 GPM PEAK 6 5 GPM DELAYED REGEN OFF REGEN TIME 2 00 AM REFILL TIME 3 00 MIN VALVE MODE SOFT...

Page 11: ...ake enough brine to regenerate only the exhausted portion of the ion exchange resin Note 70 of the required fresh water is added in Step 5 in the previ ous regeneration The default brine making time i...

Page 12: ...ly NUGGET or PELLET water softener salt Check the salt level monthly It is impor tant to maintain the salt level above the water level To add salt simply lift the salt lid and add the salt directly in...

Page 13: ...rol valve body 3 Carefully remove the assembly and disassemble as shown in above figure 4 The injector orifice is removed from the valve body by carefully turning it out with a large screwdriver Remov...

Page 14: ...he BLFC holder apart and remove the flow washer 4 Reassemble using the reverse procedure TIP Markings on the BLFC washer should face the direction as shown here Replacing Drain Line Flow Control DLFC...

Page 15: ...o form or grow However during shipping storage installing and operating bac teria could get into the softener For this reason sanitizing as follows is suggested when in stalling Sani System Liquid San...

Page 16: ...25020042 948 TANK 100 E 1 25020043 1054 TANK 150 E 1 25010058 1252 TANK 200 E 1 25030007 1465 TANK 300 E 1 50010005 DISTRIBUTOR 1X54 F 1 60010005 OVER FLOW FITTING ASSEMBLY G 1 55010023 SAFETY AIR CH...

Page 17: ...antity 60010020 3 4 NPT ELBOW A 2 60010019 1 NPT STRAIGHT A 2 60010023 3 4 NPT STRAIGHT A 2 60010079 VALVE COUPLING INLET B 1 60010101 VALVE COUPLING OUTLET METER SIDE C 1 60010025 PLASTIC SECURE CLIP...

Page 18: ...N ASSEMBLY 60010035 INJECTOR SET 00 VIOLET 60010130 85HE SEAL SPACER KIT 60010034 INJECTOR SET 0 RED 60010131 85HE DLFC 1 1 5 GPM 60010033 INJECTOR SET 1 WHITE 60010132 85HE DLFC 2 2 0 GPM 60010032 IN...

Page 19: ...9 1 5030013 O Ring 30 2 65 A20 1 5056063 O Ring 78 74 5 33 A21 1 26010103 O Ring 25 3 55 A22 1 7060007 Valve Bottom Connector A23 1 13000426 Screw ST2 9X13 Large Washer A24 2 5031022 O Ring 32 3 A25 1...

Page 20: ...Power Head Exploded View 20...

Page 21: ...0426 Screw ST2 9X13 Large Washer A24 2 5056139 Washer 3x13 B09 1 5030007 BNT85 Main Gear B10 1 5030005 BNT85 Mounting B11 1 5031009 BNT85HE Brine Gear Upflow B12 1 5010023 Magnet 3 2 7 B13 1 5056141 W...

Page 22: ...flow control DLFC button Check for proper flow rate 1 Plugged injector or screen Clean parts 2 Valve not regenerating Replace circuit board motor or control 3 Foreign material in brine valve Clean par...

Page 23: ...scribed in the general conditions of this warranty General Conditions Damage to any part of this water conditioner as a result of misuse misapplication neglect alteration accident installation or oper...

Reviews: