


40
94-0561-D
Manual data logging button enabled. Manual data logging not active.
5.5
Support Information
5
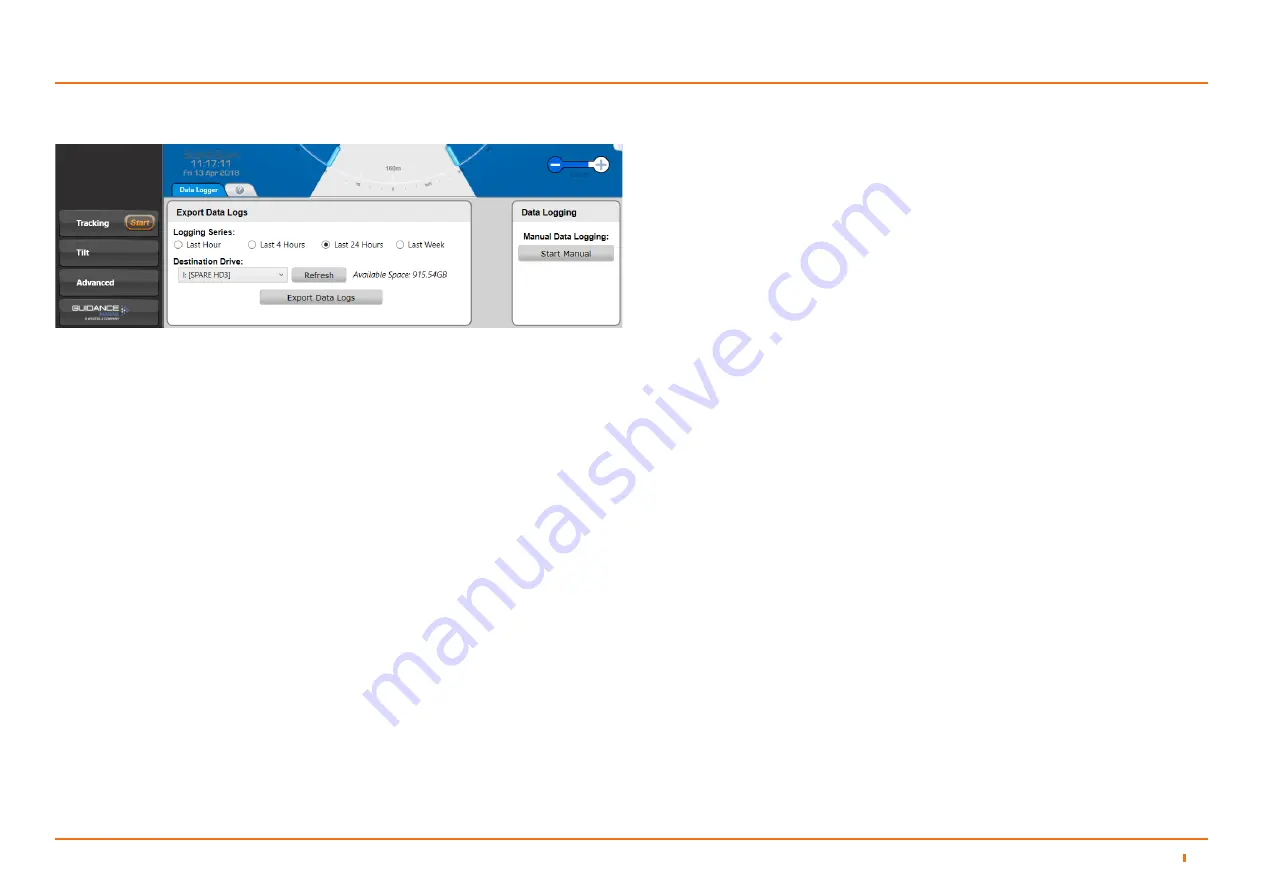
Data Logging
During tracking, the system automatically generates a set of operation logs that can
be analysed by a service engineer to diagnose any system faults. Logging can also
be started manually, when the system is not tracking (see below).
When logging is in progress, the following symbol is displayed in the bottom left-
hand corner of the main pane.
Logs can be exported and e-mailed to Wärtsilä Guidance Marine (customerservices.
[email protected]) or your DP supplier in the event of a problem.
Starting and Stopping Manual Logging
To start manual logging:
Firstly ensure that the Dashboard is in command (see Dashboard – In Command
mode on page 32) then either:
1. Navigate to Advanced > Data Logger.
2. Click on the Start button.
Or
Press Alt+L.
Or
1. Click on the Hotkeys tab.
2. Click on the Start Manual Data Log button.
To stop manual logging either:
1. Navigate to Advanced > Data Logger.
2. Click on the Stop button.
Or
Press Alt+L.
Or
1. Click on the Hotkeys tab.
2. Click on the Stop Manual Data Log button.
Or
Click on the flashing Data Logging Indicator in the top left of the main screen.
Or
Manual logging automatically stops when a Dashboard suspends the sensor or
relinquishes command, or when another Dashboard takes command.
Data Logging with Multiple Dashboards
On a SceneScan system with multiple Dashboards, data logs are written by
whichever Dashboard is in command. If another Dashboard then takes command,
data logging ceases on the Dashboard that is no longer in command and starts
automatically on the Dashboard that takes command.
Exporting Data Logs
The most recent data logs can be exported to a remote drive on the Dashboard
computer.
To Export Data Logs:
1. Insert a USB or other removable drive into the Dashboard computer.
2. Select the period for which you wish to export logs (Last Hour, Last 4 Hours,
etc).
3. Select Destination Drive from drop-down list, if not already displayed.
4. Click on Export Data Logs.
Use the Refresh button to update the list of USB drives and the Available Space
value.
N.B. In addition to data logs, screenshots from the selected time period and a list of alarms are also
exported.
Summary of Contents for SCENESCAN
Page 82: ...94 0561 D...


