To clean the extrusion gun cleaning solutions that are specified by the manufacturer
of the extrusion material and do not contain the following ingredients:
•
halogenated hydrocarbons
(eg 1,1,1, trichloroethane, methylene chloride, etc.)
•
Acids and acidic detergents
•
regenerated solvents (so-called cleaning dilutions)
•
Paint stripper.
The above-mentioned Constituents cause electroplated components, chemical
reactions and lead to corrosion damage.
For damages resulting from such treatment, WALTHER PILOT makes no warranty.
Clean the extrusion gun
•
before any material change
•
at least once a week
•
depending on material and depending on the degree several times a week.
This will give you the safe function of the extrusion gun.
Warn
i
ng
Turn off the extrusion pressure before cleaning the system (see 5.2 Starting and
shutting down).
1.
Disassemble the pistol as described in 5.5
extrusion gun retooling.
2.
Clean the fluid tip with a brush and cleaning agent.
3.
Clean all remaining parts and the gun body with a cloth and detergent.
4.
Lubricate the following parts with a thin film of grease:
•
material needle
•
valve
•
all moving parts and bearings
•
The internal moving parts must be lubricated at least once a week.
•
The springs should be constantly provided with a thin layer of grease.
Use an acid-free, non-resinous grease and a brush or enter a drop of oil from a
dosage bottle.
Then, the extrusion gun is set together in reverse order.
6.3
Routine Cleaning
When changing material or after work, you can also clean the extrusion gun, without
having to disassemble it.
Warn
i
ng
Turn off the extrusion pressure from the system before cleaning
(see 5.2 Starting
and shutting down).
10
Before you perform the Routine maintenance, the following condition must be met:
•
Make sure that the cleaning agent used to the process fits the material. Perform the
following steps:
1.
Place the extrusion gun into operation
(see 5.2 putting into operation).
2.
Flush the gun with the lowest possible pressure.
3.
To maintain grounding continuity when flushing must ensure the gun to be
pressed firmly against one side of a grounded metal pail, then trigger the
gun.
4.
Spray the extrusion gun until only a clear detergent is sprayed from the gun.
The entire extrusion line should now be depressurized until the next use.
7
Repair
Warn
i
ng
Turn power the extrusion pressure from the entire system before servicing
(see
5.2 Starting and shutting down).
Warn
i
ng
Disconnect all power before any repairs, the material feed to the extrusion
gun - risk of injury.
Notice
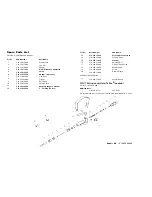
To carry out the operations listed below, please use the drawing at the
beginning of this manual.
7.1
Replace Leaking Valve Seat
1.
Remove the fluid nozzle in accordance with 5.5
retooling extrusion gun.
2.
Turn the valve (Item 5) out of the gun body (Item 7).
3.
Replace the two seals (Item 6) with new ones.
4.
Before beginning turn the valve again, you should secure the thread with a high-
strength adhesive coat to achieve optimum sealing.
The assembly of the remaining components is carried out in reverse order.
7.2
Replace Leaking Gasket
1.
Remove the fluid nozzle and needle material as described in 5.5
extrusion gun
retooling.
2.
Turn the pack screw (Item 14) with the packing pressure pin (Item 13) from the gun
body.
11
l
l
l
l


