5.5
Retooling Extrusion Gun
Warn
i
ng
Turn off pressure retooling the extrusion gun from the system and check the
gauge, otherwise there is a risk of injury.
Warn
i
ng
Disconnect all supply lines before retrofitting any supply of material to the
extrusion gun-injury.
Notice
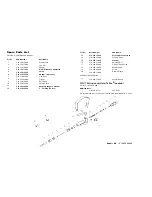
To carry out the operations listed below, please use the drawing at the beginning
of this manual.
Change Fluid Nozzle
1.
Remove the Cap Nut (Item 2)
2.
Remove the fluid nozzle (Item 1), together with adapter (Item 3) from the valve (Item 5)
•
Now you can unscrew the step nozzle from the adapter, look for the notch
indicating the appropriate diameter (see drawing) and cut it off at the notch.
•
But you can also use our special nozzle (Item 21).
Assemble in reverse order.
Replacement of Material Filter
For appropriate filtering of the material, you can use coarse-and fine-mesh filter.
1.
Make sure the complete extrusion system is depressurized
2.
Remove the hose material / material hoses.
3.
Remove the material filter.
Assemble in reverse order.
8
Change Material Needle
1.
Remove the cap nut (Item 2)
2.
Remove the fluid nozzle (Item 1), together with adapter (Item 3) from the valve (Item 5)
3.
Unscrew the needle securing (Item 18) from the gun body (Item 7)
4.
Twist out bolt screw (Item 9) to remove the trigger.
5.
Loosen the cylinder screw (Item 17) turn the adjusting nut (Item 16) of the fluid
needle (Item 4) and take the washer (Item 15).
6.
Turn the valve (Item 5) out of the gun body (Item 7).
7.
Pull the fluid needle (Item 4) from the gun body.
The assembly is done in reverse order, with needle valve and back bushing
applied with a high-strength adhesive.
Notice
An exact setting dimension does not exist. The adjustment nut is screwed as long
until the trigger play is approximately 5 mm and is secured to the cylinder screw
against rotation.
6
6.1
Cleaning and Maintenance
Safety
•
Turn power off before servicing the extrusion pressure from the system - risk
of injury.
•
Disconnect all material pressure before performing any maintenance to the extrusion gun.
•
In the workspace, Fire, naked flame and smoking is prohibited. Spraying of
highly flammable materials (eg cleaning agents) there is an increased risk of
explosion and fire.
•
Notice. the safety precautions of the detergent manufacturer's warnings.
Aggressive and corrosive cleaning agents can cause health damage.
6.2
Basic Cleaning
In order for the service life and function of the extrusion gun to be maximized,
the extrusion gun must be cleaned and lubricated.
Caution
Never place the extrusion gun in solvent or other cleaning agents. The proper
function of the extrusion gun can not otherwise be guaranteed.
Caution
When cleaning any hard or sharp objects. Precision parts, extrusion gun may
be damaged and deteriorate the extrusion result.
9
l
l
l
l


