background image

Touch Panel Standard Line 

Commissioning  121 

762-4xxx TP 600 


Manual 


Version 1.3.0  

</dg_ 

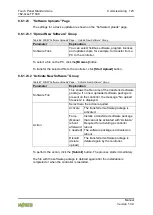
8.6.1.21  “System Partition” Page 

The settings for specifying the partition that the system will be started from are 

shown on the “System Partition” page. 

8.6.1.21.1 “Current Active Partition” Group 

The partition currently in use is displayed here. 

8.6.1.21.2 “Set Inactive Partition Active” Group 

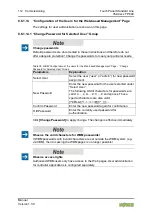
Click 

[Activate Partition]

 to start the system from a different partition at the next 

controller reboot. 


Ensure bootable partition! 

A functional firmware backup must be present in the boot partition! 


Summary of Contents for Standard TP 600 762-4 Series

Page 1: ...Manual Touch Panel Standard Line 762 4xxx xxxx xxxx TP 600 WAGO Touch Panel Version 1 3 0...

Page 2: ...Mail support wago com Every conceivable measure has been taken to ensure the accuracy and completeness of this documentation However as errors can never be fully excluded we always appreciate any info...

Page 3: ...Use Conditions for ETHERNET Devices 22 3 Overview 23 3 1 Web Panels 25 3 2 Visu Panels 25 3 3 Control Panels 26 4 Properties 27 4 1 Views 27 4 1 1 Front View 27 4 1 2 Other Views of the PIO1 Hardware...

Page 4: ...Supply 51 4 9 6 Touch Screen 53 4 9 7 Hardware 55 4 9 8 Software 55 4 9 8 1 Software of the Web Panels 55 4 9 8 2 Software of the Visu Panels 55 4 9 8 3 Software of the Control Panels 55 4 9 9 Commun...

Page 5: ...ng 75 7 1 Connection Example 75 7 2 Earthing 75 7 3 Connecting Devices 75 7 4 Connecting the Power Supply 76 8 Commissioning 77 8 1 Removing the Protection Film 77 8 2 Switching ON 77 8 3 Login 77 8 4...

Page 6: ...r State Xn Group 106 8 6 1 11 3 MAC Address Filter Whitelist Group 106 8 6 1 12 Configuration of User Filter Page 107 8 6 1 12 1 User Filter Group 107 8 6 1 12 2 User Filter n Group 107 8 6 1 12 3 Add...

Page 7: ...e RUNTIME Group 128 8 6 1 27 SSH Server Settings Page 129 8 6 1 27 1 SSH Server Group 129 8 6 1 28 TFTP Server Page 130 8 6 1 28 1 TFTP Server Group 130 8 6 1 29 DHCP Configuration Page 131 8 6 1 29 1...

Page 8: ...ndor Information Page 154 8 7 2 3 PLC Runtime Information Page 154 8 7 2 3 1 PLC Runtime Group 155 8 7 2 3 2 WebVisu Group 155 8 7 2 4 Legal Information Page 155 8 7 2 4 1 WAGO Licenses Page 155 8 7 2...

Page 9: ...erver Settings Page 171 8 7 3 13 SSH Server Group 171 8 7 3 13 1 TFTP Server Page 171 8 7 3 14 TFTP Server Group 171 8 7 3 14 1 DHCP Configuration Page 171 8 7 3 15 DHCP Configuration Xn Group 172 8 7...

Page 10: ...Security Settings Page 186 8 7 4 7 1 TLS Configuration Group 186 8 7 5 Diagnostic Tab 187 8 7 5 1 Diagnostic Information Page 187 8 7 5 2 Reboot Function 188 9 Visualization 189 9 1 Touch Operation 1...

Page 11: ...762 4xxx TP 600 Manual Version 1 3 0 11 4 2 Use WAGOupload to Update the Firmware 199 11 5 Factory Reset 200 12 Disposal 201 12 1 Electrical and electronic equipment 201 12 2 Packaging 201 13 Accessor...

Page 12: ...72 PIO1 WP 762 4102 TP 600 5 7 640x480 PIO1 WP 762 4103 TP 600 7 0 800x480 PIO1 WP 762 4104 TP 600 10 1 1280x800 PIO1 WP 762 4201 8000 0001 TP 600 4 3 480x272 PIO2 VP 762 4202 8000 0001 TP 600 5 7 640...

Page 13: ...ted Any further use of this Manual by third parties that violate pertinent copyright provisions is prohibited Reproduction translation electronic and phototechnical filing archiving e g photocopying a...

Page 14: ...Group e V DALI is a registered trademark of Digital Illumination Interface Alliance DiiA EtherCAT is a registered trademark and patented technology of Beckhoff Automation GmbH EtherNet IP is a registe...

Page 15: ...isk potentially hazardous situation which if not avoided could result in death or serious injury Personal Injury Indicates a low risk potentially hazardous situation which if not avoided may result in...

Page 16: ...6 Regulations Touch Panel Standard Line 762 4xxx TP 600 Manual Version 1 3 0 Additional Information Refers to additional information which is not an integral part of this documentation e g the Interne...

Page 17: ...d in italic type e g C Program Files WAGO Software Menu Menu items are marked in bold letters e g Save A greater than sign between two names means the selection of a menu item from a menu e g File New...

Page 18: ...se WAGO Touch Panels are suitable for use in the area of control and automation Their use extends beyond residential and commercial areas as well as industrial areas Technical data must be observed fo...

Page 19: ...ilding technology applications in the USA locally issued third party patents render it imperative to ensure that functions with reading and or writing access to operating system parameters e g date ti...

Page 20: ...which you wish to mount or remove the device Use SELV power source only The device must only be powered from a SELV Safety Extra Low Voltage power source complying with the limited power source LPS r...

Page 21: ...ean tools and materials are imperative for handling devices modules Clean only with permitted materials Clean housing and soiled contacts with propanol Do not use any contact spray Do not use any cont...

Page 22: ...personnel only Change the default passwords before first use This will reduce the risk of unauthorized access to your system Regularly change the passwords used This will reduce the risk of unauthori...

Page 23: ...urations as Web Panels 762 x1xx Visu Panels 762 x2xx Control Panels 762 x3xx The WAGO Touch Panels described in this manual are available as Web Visu and Control Panels in four screen sizes diagonal l...

Page 24: ...nel Standard Line 762 4xxx TP 600 Manual Version 1 3 0 The 762 Series item numbers are composed as follows Figure 1 762 Series Item Number Key The basic differences between Web Visu and Control Panels...

Page 25: ...nels but rather on the controller which also includes a Webserver that the panels can access with their Web browser The Web Panels can display visualizations from e COCKPIT CODESYS 3 The interfaces of...

Page 26: ...us replace a PLC controller Visu software and runtime software both run on the panels The interfaces of the PIO3 hardware are ETHERNET USB microSD and a line out headphone output Furthermore the inter...

Page 27: ...Figure 2 Front View Table 4 Legend for Figure Front View Pos Description Details See Section 1 Touch screen Device Description Touch Screen 2 Status LED Device Description Display Elements 3 Feedback...

Page 28: ...ode switch with the settings RESET STOP RUN the CFG RST button the SYS RUN CAN H11 H22 LEDs and the SD memory card slot are located on the left side For details see section Properties Connectors Displ...

Page 29: ...elements are not accessible from the front Figure 4 Other PIO2 Views Example of 762 4204 8000 0001 4 1 4 Other Views of the PIO3 Hardware On the back there are four M4 threaded holes for VESA mountin...

Page 30: ...uch Panel Standard Line 762 4xxx TP 600 Manual Version 1 3 0 When the hardware is installed the above named function elements are not accessible from the front Figure 5 Other PIO3 Views Example of 762...

Page 31: ...he foil during input A motion sensor is built in to recognize linear gestures The system automatically calibrates the sensor every 30 minutes In this way any change of location is detected and objects...

Page 32: ...O 0762 4101 Item description 1 Touch Panel 600 Item description 2 TP 600 4 3 480x272 PIO1 Control number 24753 5003 Date of manufacture year month 2019 03 Release indexes 2 digits ea 1 Firmware 2 Hard...

Page 33: ...able 6 Legend for Figure Connectors PIO1 on the Bottom Connector Function X1 and X2 ETHERNET interfaces with LED indicators X5 Supply voltage infeed X6 and X7 USB 2 0 host interfaces Figure 9 Connecto...

Page 34: ...e Connectors PIO2 on the Bottom Connector Function X1 and X2 ETHERNET interfaces with LED indicators X5 Supply voltage infeed X6 and X7 USB 2 0 host interfaces X8 Lineout audio output headset Figure 1...

Page 35: ...tor Function X1 und X2 ETHERNET Interface with LED X3 Serial Interface RS 232 or RS 485 X4 CAN Interface X5 POWER Power supply X6 und X7 USB 2 0 Host Interface X8 Lineout audio output headset X11 4 di...

Page 36: ...d an interface as per RS 485 However the two interfaces must NOT be used simultaneously These communication partners must be set to the same interface type since the voltage levels of the two types ar...

Page 37: ...ch Panel corresponds to device type DCE 4 4 5 1 Operating as an RS 232 Interface Kommuni kati onsanschluss Depending on the device type DTE Data Terminal Equipment e g PC or DCE Data Communication Equ...

Page 38: ...re in Tri state Attention bus termination The RS 485 bus must be terminated at both ends No more than two terminations per bus segment may be used Terminations may not be used in stub and branch lines...

Page 39: ...at the same time 4 4 7 X5 Supply Voltage Connect the supply voltage to the X5 connector For this use the included 734 103 female connector featuring three CAGE CLAMP connections For more information a...

Page 40: ...ectors configurable as inputs or outputs for connecting actuators and sensors A 10 pole picoMAX plug is used with 10 push in CAGE CLAMP S connections female connector 2091 1110 Table 14 X11 Pin Assign...

Page 41: ...croSDHC max 32 GB cards tested by WAGO can be used Use only WAGO memory cards Proper function and performance cannot be ensured when using SD SDHC memory cards not approved by WAGO Pay attention to th...

Page 42: ...ture of 25 C Power reserve The clock continues to run min 35 days corresponds to 840 hours at 25 C after shutting off the power supply After more than 35 days without a power supply a clock setting di...

Page 43: ...ated on the left side The meaning of the three color SYS LED is analogous to that of the status LED on the front The RUN LED indicates the program status Table 16 RUN LED LED Display Explanation Green...

Page 44: ...tart or Reset cold start depending on length of actuation see Section Starting Initiating Reset Functions STOP Latching Stop All e RUNTIME applications have stopped RUN Latching Normal operation e RUN...

Page 45: ...ot grounded directly but rather via interference suppression capacitors Only keyboards mice and USB memory sticks should be connected to the USB ports Do not connect devices that are grounded e g prin...

Page 46: ...46 Properties Touch Panel Standard Line 762 4xxx TP 600 Manual Version 1 3 0 4 8 2 Schematic Diagram PIO2 Figure 19 Schematic Diagram PIO2 4 8 3 Schematic Diagram PIO3 Figure 20 Schematic Diagram PIO3...

Page 47: ...m 10 1 278 208 mm Mounting panel thickness 2 6 mm All round clearance for ventilation and cable routing 100 mm Mounting 4 3 with 4 clamping elements 5 7 and 7 0 with 8 and 10 1 with 10 clamping elemen...

Page 48: ...8 208 mm Mounting panel thickness 2 6 mm All round clearance for ventilation and cable routing 100 mm Mounting 4 3 with 4 clamping elements 5 7 and 7 0 with 8 and 10 1 with 10 clamping elements or VES...

Page 49: ...8 208 mm Mounting panel thickness 2 6 mm All round clearance for ventilation and cable routing 100 mm Mounting 4 3 with 4 clamping elements 5 7 and 7 0 with 8 and 10 1 with 10 clamping elements or VES...

Page 50: ...55 C 10 1 0 50 C 0 50 C 0 55 C Permissible storage temperature 20 80 C Please refer to the chart below Relative humidity without condensation 10 90 Please refer to the chart below Operating altitude...

Page 51: ...ce as per EN 60950 1 24 VDC 25 30 with reverse voltage protection Max current and power consumption at 24 V without external USB devices 4 3 240 mA 5 6 W 5 7 265 mA 6 4 W 7 0 346 mA 8 3 W 10 1 480 mA...

Page 52: ...on across the entire voltage range without with external USB devices 4 3 6 0 W 11 2 W 5 7 7 0 W 12 0 W 7 0 8 8 W 13 9 W 10 1 11 8 W 17 0 W Table 25 Technical Data Power Supply PIO3 Operating Voltage S...

Page 53: ...lf Brightness Time defines the decrease in LED brightness by 50 compared to the original brightness This information applies to T 25 2 C and RH 60 10 Table 27 Technical Data Touch Screen 5 7 145 mm Di...

Page 54: ...Time defines the decrease in LED brightness by 50 compared to the original brightness This information applies to T 25 2 C and RH 60 10 Table 29 Technical Data Touch Screen 10 1 257 mm Display type R...

Page 55: ...able 32 Technical Data Software Visu Panels Operating system Linux 4 9 115 Runtime Software with Target Visualization e RUNTIME based on CODESYS 3 Web browser Qt WebEngine of Qt 5 9 4 Web server Light...

Page 56: ...X2 2 RJ 45 with Switch 10 100 Mbit s connecting cables twisted pair SF UTP 100 Ohms category 5e patch or crossover max 100 m USB Interfaces X6 and X7 2 USB 2 0 Host type A 480 Mbit s connecting cables...

Page 57: ...ent draw max 2 500 mA SD Slot For memory cards microSD and microSDHC 4 9 11 Connectors 4 9 11 1 Connectors Hardware PIO1 Table 40 Technical Data Connections Hardware PIO1 X5 voltage supply 3 CAGE CLAM...

Page 58: ...er supply conductor cross section 0 14 1 5 mm2 AWG 25 14 strip length 7 mm 0 28 inch X8 audio output for headphones 3 pole stereo socket 3 5 mm headphone output 62 5 mW at 16 ohm frequency range 20 20...

Page 59: ...UL61010 2 201 Korea Certification MSIP REM W43 WBP762 Detailed information regarding approvals Detailed information regarding approvals can be found at https www wago com item no 4 11 Standards and Gu...

Page 60: ...visualization is then displayed with e RUNTIME The visualization and data exchange are programmed with e COCKPIT on the engineering PC The visualization can also be provided to other display devices...

Page 61: ...he Web visualization of a specific controller directly See Favorites Page in the new WBM for the configuration of the start page 5 5 Connection Monitoring If a CODESYS visualization connection is inte...

Page 62: ...alized with the setting values last valid for it The connections on the X1 interface persist When operating with separate interfaces and fixed IP address the device can still be accessed via the inter...

Page 63: ...s its own user management The users in this system are isolated from the other user groups in the system for security reasons At initial start up you are prompted in the WBM to change the password whe...

Page 64: ...via ETHERNET to change the default password for the Linux user root After launching putty exe login as appears Enter root and press Enter You are prompted to enter the password Enter wago as the defau...

Page 65: ...ithms If Standard is set TLS 1 0 TLS 1 1 and TLS 1 2 are allowed as well as cryptographic methods that are no longer considered secure BSI Technical Guidelines TR 02102 The rules for the Strong settin...

Page 66: ...d to the default gateways that specifies with what time delay sometimes called cost factor a data packet can be forwarded via the gateway If multiple default gateways are configured the operating syst...

Page 67: ...nction is used to load the data and device settings from the memory card to the internal memory during operation The following options are available from the Restore function in the Legacy version of...

Page 68: ...y version of the WBM If the panel was started from the memory card a copy is saved to the internal flash via the function Create Image in the Legacy version of the WBM The existing image is deleted 5...

Page 69: ...Touch Panel Standard Line Functions 69 762 4xxx TP 600 Manual Version 1 3 0 5 10 Booting Start Behavior...

Page 70: ...70 Functions Touch Panel Standard Line 762 4xxx TP 600 Manual Version 1 3 0 Browser...

Page 71: ...e Touch Panels 600 The e COCKPIT software can be used for licensing You can find corresponding instructions in the documentation of e COCKPIT A license key is required for productive use without time...

Page 72: ...or Housing The panels are intended for installation that adheres to UL type 1 type 12 or type 4X e g in a control cabinet s front door or in an appropriate housing To ensure adequate cooling and a su...

Page 73: ...tightening torque is 0 1 Nm for 762 4x01 and 0 14 Nm for 762 4x02 4x04 This way the seal makes a uniform contact Figure 23 Mounting Clips and Positions of the Clamping Elements Table 46 Positions of...

Page 74: ...ooling is affected i e maximum permissible ambient temperature is reduced For exact values see section Device Description Technical Data In addition to installation in a cutout the panel can also be m...

Page 75: ...tor into the X5 connector and then verify that the clamping connection is secured 7 3 Connecting Devices Peripherals are connected electrically by the interfaces on the bottom and left side The ETHERN...

Page 76: ...Insert microSD memory cards as far into the slot until they click into place The slot can be sealed to protect the card To remove press the card further down until the lock releases The card can then...

Page 77: ...e menu accessed by swiping downward from the top edge of the screen You can interrupt the automatic sequence and arrive at a selection menu if you interrupt the countdown shown by touching the screen...

Page 78: ..._ To perform a cold start reset set the mode selector switch to Reset and hold it there for more than seven seconds Execution of the reset is signaled after seven seconds by the RUN LED going out for...

Page 79: ...onfigured via an external PC since the legacy version is not optimized for touch input The new WBM does not yet have all the functionalities On the touchscreen the touch optimized version is automatic...

Page 80: ...o be made only by a select number of users limit access to WBM functions through User Administration Change passwords The standard passwords are documented in these instructions and thus do not offer...

Page 81: ...g 81 762 4xxx TP 600 Manual Version 1 3 0 Observe access rights Users in WBM are authorized exclusively for access to websites User administration for controller applications is configured separately...

Page 82: ...onfiguration of Time and Date user Administration Users Configuration of the users for the Web based Management admin Create Image Create bootable Image admin Serial Interface Configuration of Serial...

Page 83: ...Navigation WBM page title User Information Device Status Device Status guest Vendor Information Vendor Information guest PLC Runtime PLC Runtime Information guest Legal Information WAGO Licenses WAGO...

Page 84: ...ser Browser Security Browser Security user Display Touchscreen Calibration Touchscreen Calibration user Display Orientation Display Orientation user Screensaver Screensaver user Users WBM User Configu...

Page 85: ...New WBM to open the new WBM at any time When the user has logged out a Login button is displayed on the right in the header line when logged in a Logout button is displayed The navigation tree is show...

Page 86: ...Time Local time on the device Local Date Local date on the device PLC Switch Setting of the mode selector switch LEDs This indicates the status of the device LEDs All LEDs are graphically represented...

Page 87: ...seconds The contents of the individual pages and sub pages are explained in the following sections Do not power cycle the controller after changing any parameters Some parameter changes require a cont...

Page 88: ...ailable Firmware Revision Firmware status 8 6 1 2 2 Network Details Xn Group s This group displays the network and interface properties of the controller If the switch is enabled one group Network Det...

Page 89: ...runtime system and PLC program created in the programming software is provided on the PLC Runtime Information page 8 6 1 3 1 PLC Runtime Group Table 52 WBM PLC Runtime Information Page PLC Runtime Gr...

Page 90: ...he home directory is stored in the internal memory Enabled The home directory is moved to the memory card All data is deleted when switching the runtime system The runtime system s home directory is c...

Page 91: ...ation of the runtime system is displayed Click Submit to apply change The change is effective immediately In its default setting the WBM is called up when only entering the IP address To update the di...

Page 92: ...sed if the network interface is changed to a static IP address or if no hostname is transmitted with a DHCP response Click Submit to apply the change The change is effective immediately CODESYS OPC UA...

Page 93: ...amic assignment of an IP address via DHCP or BootP Configured Enter the domain name The default entry is localdomain lan Click Submit to apply the change The change is effective immediately If a domai...

Page 94: ...uration X1 IP Configuration X2 is shown for each connection Table 57 WBM TCP IP Configuration Page IP Configuration Xn Group s Parameters Explanation Configuration Type Select a static or dynamic IP a...

Page 95: ...ay is to be used Disabled The default gateway is not used Enabled The default gateway is used Destination Address Enter here if any network devices or only a specific network device or device pool is...

Page 96: ...yed If no server has been defined Configured None is displayed New Server IP Add additional DNS addresses You can enter 10 addresses Additionally used assigned by DHCP The DNS servers assigned if nece...

Page 97: ...and the PFC system is mirrored at port X1 Fast Aging enabled Set here the aging time of unused entries in the list of MAC addresses with a port assignment to external network stations This field is on...

Page 98: ...can enable or disable the interface Autonegotiation on When Autonegotiation is enabled the connection modalities are negotiated automatically with the peer devices Speed Duplex Select the transmissio...

Page 99: ...ation Routing enabled entirely Specify here whether forwarding of IP data packets is allowed between different network interfaces If the box is not checked the settings under Static Routes are used wi...

Page 100: ...be reached Network address Only a specific network device or device from the specified address pool can be reached Destination Mask Enter the subnet mask of the device here If default is entered for...

Page 101: ...ation Enabled Specify here whether IP masquerading should be used for the selected network interface Disabled IP masquerading is not used Enabled IP masquerading is used Interface You can select the s...

Page 102: ...to be used for the port forwarding The options are TCP UDP or both protocols Destination Address Specify the network address of the destination device here This address replaces the original destinati...

Page 103: ...highest priority If the firewall is disabled all other settings have no direct effect The configuration of the other parameters is possible nevertheless so that you can set the firewall parameters cor...

Page 104: ...e or disable the ICMP echo protection for the respective interface ICMP echo limit per second You can specify the maximum number of ICMP echo bursts per second 0 Disabled ICMP burst limit You can spec...

Page 105: ...lso applies to other services that are used by your device e g the IP configuration via DHCP If the MAC Address Filter Whitelist does not contain the MAC address of your DHCP server your device will l...

Page 106: ...Group Parameters Explanation MAC address Displays the MAC address of the relevant list entry MAC mask This displays the MAC mask of the relevant list entry Filter enabled Enable or disable the filter...

Page 107: ...etwork for the corresponding filter entry Source port The source port number for the respective filter entry is displayed Destination IP address The destination IP address for the respective filter en...

Page 108: ...ss for the new filter entry Source netmask Enter here the source network mask for the new filter entry Source port Enter here the source port address for the new filter entry Destination IP address En...

Page 109: ...Parameters Explanation Local Set date Click Change date to apply change The change is effective immediately 8 6 1 13 2 Time on Device Group Table 75 WBM Configuration of Time and Date Page Time on De...

Page 110: ...e 76 WBM Configuration of Time and Date Page Time Zone Group Parameters Explanation Time zone Specify the appropriate time zone for your location AST ADT Atlantic Standard Time Halifax EST EDT Eastern...

Page 111: ...e zone is then also added to the Time Zone list You can find information on time zones and the corresponding TZ strings on the Internet For example to indicate the pure UTC time enter the TZ string UT...

Page 112: ...lect the user user or admin for new password assignment New Password Enter the new password for the user selected under Select User The following ASCII characters for passwords are valid a z A Z 0 9 a...

Page 113: ...le when Memory Card is set as the target Reduced to content The storage space of the copied image is kept as small as possible Full card size The image is created so that the entire memory card is fil...

Page 114: ...Configuration of Serial Interface RS232 Page Assign Owner of Serial Interface Group Parameters Explanation Linux Console Specify that the serial interface is assigned to the Linux console Unassigned...

Page 115: ...oot Table 81 WBM Configuration of Serial Interface RS 232 page Assign Owner of Service Interface Group Parameters Explanation WAGO Service Communication Specify that the service interface is used for...

Page 116: ...18 Reboot Controller Page The settings for the system reboot are shown on the Reboot Controller page 8 6 1 18 1 Reboot Controller Group Click the Reboot button to reboot the system Account for boot up...

Page 117: ...p here Memory card The data is written to the memory card This selection only appears if a memory card without system data is inserted Network The data are stored on the file system and can then be do...

Page 118: ...card Backup from the memory card to the internal flash memory is not possible Account for backup time Generation of backup files can take several minutes Stop the CODESYS program before you start the...

Page 119: ...entries All All data is restored This selection only appears if the memory card is selected as the data source PLC runtime project The PLC runtime project is restored Settings The controller settings...

Page 120: ...ly possible from internal memory If the device was booted from the memory card the firmware cannot be restored Reset by restore A reset is performed when the system or settings are restored by CODESYS...

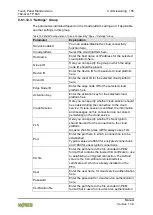
Page 121: ...tarted from are shown on the System Partition page 8 6 1 21 1 Current Active Partition Group The partition currently in use is displayed here 8 6 1 21 2 Set Inactive Partition Active Group Click Activ...

Page 122: ...ion Device The name of the storage volume in the operating system file system is displayed here Volume name The name of the storage volume is displayed here 8 6 1 22 2 Device Name create new filesyste...

Page 123: ...ds Page Activate New Software Group Parameter Explanation Software File This shows the file name of the transferred software package If no new uploaded software package is present on the controller th...

Page 124: ...ing disabling the individual services you can also limit the services for each particular interface via the firewall on the General Firewall Configuration page 8 6 1 24 1 Telnet Group Table 88 WBM Con...

Page 125: ...again 8 6 1 24 5 HTTPS Group Table 92 WBM Configuration of Network Services Page HTTPS Group Parameter Explanation Service active Enable disable the HTTPS service here Click the Submit button to apply...

Page 126: ...Configuration of Network Services Page OPC UA Group Parameter Explanation Service active Enable disable the OPC UA service here Click the Submit button to apply the changes The change only takes effec...

Page 127: ...r not available until now The time data was not yet updated Time server available The time data was updated Time Server n Enter here the IP addresses of up to 4 time servers Time server No 1 is reques...

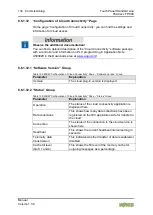
Page 128: ...cation Confirm Password Enter the new password again for confirmation Click Submit to apply change The change is effective immediately 8 6 1 26 2 e RUNTIME Group Table 97 WBM Configuration of CODESYS...

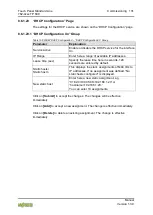
Page 129: ...H Server Group Table 98 WBM SSH Server Settings Page SSH Server Group Parameter Explanation Service active You can enable disable the SSH server here Port Number Specify the port number here Allow roo...

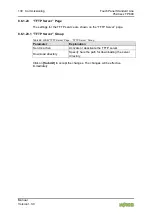
Page 130: ...are shown on the TFTP Server page 8 6 1 28 1 TFTP Server Group Table 99 WBM TFTP Server Page TFTP Server Group Parameter Explanation Service active Activate or deactivate the TFTP server Download dire...

Page 131: ...es Lease time sec Specify the lease time here in seconds 120 seconds are entered by default Static hosts Static host n This displays the static assignments of MAC IDs to IP addresses If no assignment...

Page 132: ...perating mode of the DNS server Proxy Requests are buffered to optimize throughput Relay All requests are routed directly Static hosts This displays the static assignments of IP addresses to names If...

Page 133: ...layed 8 6 1 31 1 Modbus TCP Group Table 102 WBM Modbus Services Configuration Page Modbus TCP Group Parameter Explanation Service active Disable or enable the Modbus TCP service here Click the Submit...

Page 134: ...Software Version Group Parameter Explanation Version The cloud plug in version is displayed 8 6 1 32 2 Status Group Table 105 WBM Configuration of Cloud Connectivity Page Status Group Parameter Explan...

Page 135: ...d platform here Clean Session Here you can specify whether clean session should be enabled during the connection to the cloud service If clean session is enabled the information and messages on this c...

Page 136: ...pecify whether a last will message should be enabled disabled Last Will Topic Here you can specify the topic under which the last will messages should be sent Last Will Message Here you can enter the...

Page 137: ...e Submit button to apply a change The changes only take effect after the controller restarts For this purpose use the WBM reboot function Do not shut down the controller too early The following table...

Page 138: ...ud platform X X X X X X Hostname X X X X X X Group ID X Device ID X X Client ID X X X Edge Node ID X Activation Key X X Clean Session X X X X TLS X X X X Port X X X X CA file X X X X User X X Password...

Page 139: ...Touch Panel Standard Line Commissioning 139 762 4xxx TP 600 Manual Version 1 3 0 Visible and active dependent on other settings Visible but not active dependent on other settings...

Page 140: ...eneral SNMP Configuration Group Parameter Explanation Service active Activate deactivate the SNMP service Name of device Enter here the device name sysName Description Enter here the device descriptio...

Page 141: ...manager configuration The community name can establish relationships between SNMP managers and agents who are respectively referred to as Community and who control identification and access between S...

Page 142: ...ke effect after restarting the controller For this purpose use the WBM reboot function Do not shut down the controller too early 8 6 1 34 4 Add New Trap Receiver Group You can enter 10 trap receivers...

Page 143: ...on Type The authentication type for the SNMP v3 packets is displayed here Possible values Use no authentication None Message Digest 5 MD5 Secure Hash Algorithm SHA Authentication Key The authenticatio...

Page 144: ...The key can have a min 8 and max 32 characters and may contain lower case letters a z upper case letters A Z numbers 0 9 special characters _ but no spaces Privacy Specify the encryption algorithm fo...

Page 145: ...Enter the cycle time in seconds in which a cyclic refresh is performed The label of the button Refresh Start Stop changes depending on status To refresh the display click the Refresh button This butto...

Page 146: ...cted file from the PC to the controller click Start Upload button To transfer the selected file from the controller to the PC click Start Download button The changes only take effect after restarting...

Page 147: ...nsfer the selected file to the controller click Start Upload button The changes will be effective immediately The certificates are saved in the directory etc certificates and the keys in the directory...

Page 148: ...for HTTPS Standard The Webserver allows TLS 1 0 TLS 1 1 and TLS 1 2 as well as cryptographic methods that are no longer considered secure Strong The Webserver only allows TLS Version 1 2 and strong a...

Page 149: ...the current values check The current values are compared against the values stored in the database update The current values are compared with the values stored in the database and the database then...

Page 150: ...Standard Line 762 4xxx TP 600 Manual Version 1 3 0 8 6 1 40 Open Source Licenses Page The license conditions for the open source software used for the controller are listed in alphabetical order on t...

Page 151: ...anel Standard Line Commissioning 151 762 4xxx TP 600 Manual Version 1 3 0 8 6 1 41 WAGO Licenses Page The license conditions for the WAGO software used in the controller are listed on the WAGO License...

Page 152: ...ubsections of the WBM which are divided into pages and groups When the software is opened on a desktop if the browser window is too narrow for all the tabs fit next to each other a tab with three dots...

Page 153: ...ne Commissioning 153 762 4xxx TP 600 Manual Version 1 3 0 included in these pages Within the WBM sections selected via the tabs the navigation menu on the right side allows you to access the various s...

Page 154: ...layed in this group Table 126 WBM Information Page Network Details X1 X2 Group s Parameter Explanation State Status of the X1 or X2 ETHERNET interface enabled disabled Mac Address MAC address used for...

Page 155: ...license conditions for the WAGO software used in the product are listed on the WAGO Licenses page 8 7 2 4 2 Open Source Licenses Page The license conditions for the open source software used for the...

Page 156: ...the runtime system should be moved to the memory card Disabled The home directory is stored in the internal memory Enabled The home directory is moved to the memory card All data is deleted when switc...

Page 157: ...ffective immediately In its default setting the WBM is called up when only entering the IP address To update the display after switching enter the IP address again in the address line of the web brows...

Page 158: ...ton to apply a change The change takes effect immediately 8 7 3 2 2 DNS Service Group Table 131 WBM TCP IP Configuration Page DNS Server Group Parameters Explanation New Server IP Add additional DNS a...

Page 159: ...ng enabled Set here the aging time of unused entries in the list of MAC addresses with a port assignment to external network stations This field is only enabled in switched mode Fast aging is only eff...

Page 160: ...Host Domain Name Page The settings for general TCP IP parameters are located on this page 8 7 3 4 1 Hostname Group Table 134 WBM Host Domain Name Page Hostname Group Parameter Explanation Currently u...

Page 161: ...ed here is to be valid the configuration of the DHCP server must be adapted so that no domain names are transferred in the DHCP response 8 7 3 5 Routing Page On this page you can find settings and inf...

Page 162: ...n be reached Network address Only a specific network device or device from the specified address pool can be reached Destination Mask Enter the subnet mask of the device here If default is entered for...

Page 163: ...ation Enabled Specify here whether IP masquerading should be used for the selected network interface Disabled IP masquerading is not used Enabled IP masquerading is used Interface You can select the s...

Page 164: ...The options are TCP UDP or both protocols Destination Address Specify the network address of the destination device here This address replaces the original destination address of the network data pack...

Page 165: ...European Time B DK D F I CRO NL EET EEST Eastern European Time BUL FI GR TR CST China Standard Time JST Japan Korea Standard Time TZ string For time zones that cannot be selected with the Time Zone p...

Page 166: ...as been booted the following destination is available for selection after boot up for the image to be generated System was booted from Target partition for bootable image Memory Card Internal Flash In...

Page 167: ...CODESYS 2 and Port 11740 for e COCKPIT not required by your application Only open ports and services during commissioning and or configuration 8 7 3 8 1 Telnet Group Table 144 WBM Network Services Pa...

Page 168: ...fect immediately Note Disconnection abort on disabling If the HTTPS service is disabled the connection to the panel may be interrupted In that case reopen the page 8 7 3 8 6 I O CHECK Group Table 149...

Page 169: ...CP or BootP are displayed If no NTP server has been assigned by DHCP or BootP none is displayed Click the Submit button to apply the changes The changes are effective immediately 8 7 3 10 NTP Single R...

Page 170: ...s page 8 7 3 12 DNS Service Group Table 154 WBM Configuration of DNS Service Page DNS Service Group Parameter Explanation Service active You can enable disable the DNS server service here Mode Select...

Page 171: ...login Activate or deactivate the password query function here Click on Submit to accept the changes The changes will be effective immediately dg_ 8 7 3 13 1 TFTP Server Page The settings for the TFTP...

Page 172: ...ter 10 assignments Ip Address Enter here an IP address You can enter 10 assignments Click on Submit to accept the changes The changes will be effective immediately Click on Add to accept a new assignm...

Page 173: ...set a start page If a target visualization is running on the device selecting the start page has no effect because the target visualization is started directly 8 7 3 16 2 WBM Group Here you enable dis...

Page 174: ...own virtual keyboard WebVisu Specify whether the indicated URL is a WebVisu or not Click the Submit button to apply a change To reset all input fields of the entry click the Clear button Click Submit...

Page 175: ...uchscreen Calibration Page The display calibration settings options are found on the Display Touchscreen Calibration page 8 7 3 20 Touchscreen Calibration Group Specify whether or not the display shou...

Page 176: ...ixels are inverted for a few milliseconds not visible Off No screensaver is displayed Text Enter any text display as the text screensaver Can be adjusted in the Text option Duration s When the display...

Page 177: ...he pages directly on the display is no longer possible because only permitted characters are available from the virtual keyboard Note Observe access rights The users in WBM only have access to the Web...

Page 178: ...762 4xxx TP 600 Manual Version 1 3 0 8 7 4 Additional Settings Page The Additional Settings contains a link the user can use to switch to the legacy version of the WBM in order to make settings that h...

Page 179: ...selected file from the PC to the product click Start Upload button To transfer the selected file from the product to the PC click Start Download button The changes only take effect after restarting th...

Page 180: ...has the highest priority If the firewall is disabled all other settings have no direct effect The configuration of the other parameters is possible nevertheless so that you can set the firewall param...

Page 181: ...s per second 0 Disabled Service enabled Telnet Enable or disable the firewall for the respective service The services themselves must be enabled or disabled separately on the Ports and Services page F...

Page 182: ...device will lose its IP settings after the next refresh cycle and is then no longer accessible If the MAC Address Filter Whitelist does not contain an entry the activation of the filter is prevented...

Page 183: ...the filter for the relevant list entry here MAC address Enter here the MAC address for a new list entry You can enter 10 filters MAC mask Enter the MAC mask for the new list entry here Filter enabled...

Page 184: ...on subnet mask The destination network mask for the respective filter entry is displayed Destination port The designation port number for the respective filter entry is displayed Protocol The permitte...

Page 185: ...er for the new filter entry Protocol Enter here the permitted protocols for the new filter TCP The TCP service is permitted UDP The UDP service is permitted Input interface Enter here the permitted in...

Page 186: ...The network security settings are found on this page 8 7 4 7 1 TLS Configuration Group Table 179 WBM Security Security Settings Page TLS Configuration Group Parameter Explanation TLS Configuration He...

Page 187: ...c refresh is performed The label of the button Refresh Start Stop changes depending on status To refresh the display or to enable cyclic refresh click the Refresh button This button is only visible if...

Page 188: ...188 Commissioning Touch Panel Standard Line 762 4xxx TP 600 Manual Version 1 3 0 8 7 5 2 Reboot Function Click the Reboot button To restart click the Reboot button To cancel the restart click Cancel...

Page 189: ...by touching with a finger or stylus Alternatively you can also use a USB mouse and click the buttons Take care when operating the touch screen Always touch the screen at one point i e do not touch mu...

Page 190: ...figuration You must be logged in as the Administrator Call up visualization Disable display to allow cleaning Note buttons If you want to use the swipe gestures make sure you do not hit buttons on the...

Page 191: ...time depends on the number type and characteristics of the objects displayed The smaller the number of objects displayed per page the faster the panel responds Since a visualization page is first ful...

Page 192: ...l The visualization style can be changed in the program structure in the Visualization Manager in the Settings tab If you use these visualization styles in the Isotropic or Anisotropic scaling options...

Page 193: ...jects Function bind Polyfill 9 5 4 Graphic Elements 9 5 4 1 Antialiasing The Antialiasing functionality smooth edges of graphical elements in the e COCKPIT causes an increase in the computing effort i...

Page 194: ...a controller and stored temporarily in the RAM but can rather be generated and displayed directly in the panel As a result there are almost no delays when switching between different pages The entire...

Page 195: ...g There is an error The specific error message is displayed Blue flashing There is a connection error to the controller No communication In the case of a connection error check if The controller is in...

Page 196: ...display 11 2 Calibrating the Touch Screen When connecting the panel to a WAGO controller the touch screen is calibrated via the WBM Select Display Touchscreen Calibration Figure 33 Touchscreen Calibra...

Page 197: ...own a bit The menu from which screen cleaning is started appears for 5 sec A 15 sec countdown starts The screen can be cleaned during that time A damp microfiber cloth must be used to clean the screen...

Page 198: ...e Firmware 1 Launch e COCKPIT 2 Create a new project or open an existing project 3 Add at least one controller to your e COCKPIT project either by scanning the network or going to the device catalog a...

Page 199: ...the IP address of your controller in the Transfer via TCP IP option 4 Click Find Controller Your controller is now displayed in the list 5 Select the displayed controller and click Next 6 In the Selec...

Page 200: ...ting web visualization data Subsequently installed firmware functions are not overwritten If you have any questions contact WAGO Support The controller is restarted after the factory reset Proceed as...

Page 201: ...nment from harmful substances in electrical and electronic equipment Observe national and local regulations for the disposal of electrical and electronic equipment Clear any data stored on the electri...

Page 202: ...sion 1 3 0 Observe national and local regulations for the disposal of packaging Dispose of packaging of all types that allows a high level of recovery reuse and recycling Improper disposal of packagin...

Page 203: ...182 Accessories Memory Cards microSD memory card 1 GB 758 879 000 002 microSD memory card 2 GB 758 879 000 3102 Table 183 Accessories Connecting Cable and connector USB A B connecting cable 3 m 758 87...

Page 204: ...Termination with DTE DCE Connection 1 1 37 Figure 15 Termination with DCE DCE Connection Cross Over 37 Figure 16 RS 485 Bus Termination 38 Figure 17 Connections DIO X11 Example 41 Figure 18 Schematic...

Page 205: ...vironmental Conditions 50 Table 23 Technical Data Power Supply PIO1 51 Table 24 Technical Data Power Supply PIO2 52 Table 25 Technical Data Power Supply PIO3 52 Table 26 Technical Data Touch Screen 4...

Page 206: ...Page Port Forwarding Group 102 Table 66 WBM General Firewall Configuration Page Global Firewall Parameters Group 103 Table 67 WBM General Firewall Configuration Page Firewall Parameter Interface xxx...

Page 207: ...es Page e RUNTIME Webserver Group 128 Table 98 WBM SSH Server Settings Page SSH Server Group 129 Table 99 WBM TFTP Server Page TFTP Server Group 130 Table 100 WBM DHCP Configuration DHCP Configuration...

Page 208: ...C Runtime Configuration Page General PLC Runtime Configuration Group 156 Table 129 WBM PLC WebVisu Page Webserver Configuration Group 157 Table 130 WBM TCP IP Configuration Page IP Configuration Group...

Page 209: ...M WBM User Configuration Page Change Passwords Group 177 Table 166 WBM Software Uploads Page Upload New Software Group 177 Table 167 WBM Configuration of OpenVPN and IPsec Page OpenVPN Group 179 Table...

Page 210: ...210 List of Tables Touch Panel Standard Line 762 4xxx TP 600 Manual Version 1 3 0 Table 183 Accessories Connecting Cable and connector 203 Table 184 Accessories Mounting Kit 203...

Page 211: ...Touch Panel Standard Line 211 762 4xxx TP 600 Manual Version 1 3 0...

Page 212: ...WAGO Kontakttechnik GmbH Co KG Postfach 2880 D 32385 Minden Hansastra e 27 D 32423 Minden Phone 49 571 887 0 Fax 49 571 887 844169 E Mail info wago com Internet www wago com...

Reviews: